TestExecutor Utility
- 3 minutes to read
EasyTest functional tests can be run from Visual Studio. However, functional testing takes time. So usually, it does not make sense to run all the functional tests on a developer’s personal computer. As the number of tests increases, it becomes much more convenient to run the tests on a separate server. In this scenario, the test executor utility should be used. This topic provides general information on the utility, and lists the command-line parameters supported by it. For information on how to run EasyTest tests from Visual Studio, refer to the EasyTest Basics topic.
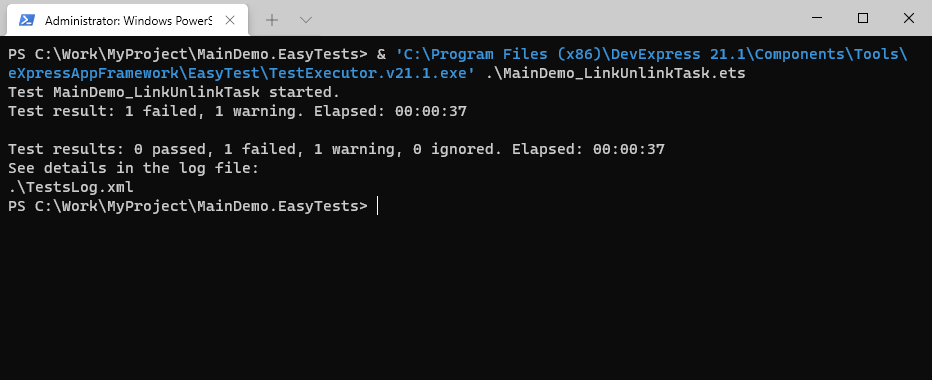
The test executor utility is a command-line tool available in the %PROGRAMFILES(x86)%\DevExpress 21.1\Components\Tools\eXpressAppFramework\EasyTest folder by default. This tool can perform EasyTest functional tests and produce XML output logs. If a test did not pass, then in addition to the log file, a screenshot is created, capturing the state of the application’s UI at the time of failure. Currently, this screenshot is represented by a JPEG picture for a Windows Forms application, and an HTML page for an ASP.NET Web Forms application. The following image demonstrates how the test executor works.
The test executor utility has the following command-line syntax:
TestExecutor.v21.1.exe <script_file> | <scripts_dir> [-p:<profile_name>] [-d:<script_line_number_to_stop>] [-l:<LogFileName>] [-o:<alias_name>=<alias_value>]
| Parameter | Type | Description | Example |
|---|---|---|---|
| script_file | Required | Specifies the name of the script file containing the test that must be performed. | TestExecutor.v21.1.exe D:\MySolution.Tests\ContactTest.ets |
| scripts_dir | Required | Specifies the name of the directory containing the script files to be executed sequentially. | TestExecutor.v21.1.exe D:\MySolution.Tests\ |
| -p | Optional | Specifies the EasyTest configuration profile that must be used when performing a test. | TestExecutor.v21.1.exe D:\MySolution.Tests\ContactTest.ets -p:Global |
| -d | Optional | Specifies that a test script should be run in debug mode. To start execution of the script, you will need to press the ENTER key after the “Press <Enter> to start test” message has been displayed. The script will be executed up to the line specified by this parameter’s argument. After that, the “Press <Enter> to process command” message is displayed and you will need to press the ENTER key after each script file line to continue script execution. | TestExecutor.v21.1.exe D:\MySolution.Tests\ContactTest.ets -d:9 |
| -l | Optional | Specifies the XML log file name. If this parameter is not specified, the log file name specified in the TestExecutor.v21.1.exe.config is used. | TestExecutor.v21.1.exe D:\MySolution.Tests\ContactTest.ets -l:MyLog.xml |
| -o | Optional | Overrides the value of an alias declared in the test configuration file. | TestExecutor.v21.1.exe D:\MySolution.Tests\ContactTest.ets -o:Port=4126 |
| -c | Optional | Specifies the path to the test configuration file. | TestExecutor.v21.1.exe D:\MySolution.Tests\ContactTest.ets -c:D:\MySolution.Tests\MyConfig.xml |
To run a single test script, pass its file name. To sequentially run all test scripts located within a certain directory, pass this directory name.
Note
EasyTest requires interactive UI on the test server (a user must be logged in).