Access Grid Control Properties
- 5 minutes to read
In this lesson, you will learn how to access the properties of a list form’s Grid Control in WinForms and ASP.NET Web applications. For this purpose, new View Controllers will be implemented. They will set alternating row colors in all List Views represented by the built-in GridListEditor and ASPxGridListEditor.
Access Editor Settings in a WinForms Application
- Since the functionality to be implemented is specific to the WinForms platform, changes will be made to the MySolution.Module.Win project. Add a View Controller to the Controllers folder in the MySolution.Module.Win project, as described in the Add a Simple Action lesson. Name it “WinAlternatingRowsController“.
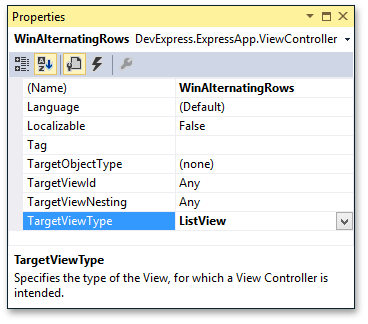
Invoke the Controller’s Designer. In the Properties window, set the TargetViewType property to the “ListView” value. This is necessary because the Controller should appear in List Views only.
Since you are going to access the settings of the List View’s Grid Control, you need to ensure that it has already been created. This is why you need to subscribe to the Controller’s ViewControlsCreated event. In the Properties window, switch to the Events view and double-click the ViewControlsCreated event. Handle the event as shown below.
using System.Drawing; using DevExpress.ExpressApp.Win.Editors; using DevExpress.XtraGrid.Views.Grid; //... private void WinAlternatingRowsController_ViewControlsCreated(object sender, EventArgs e) { GridListEditor listEditor = ((ListView)View).Editor as GridListEditor; if (listEditor != null) { GridView gridView = listEditor.GridView; gridView.OptionsView.EnableAppearanceOddRow = true; gridView.Appearance.OddRow.BackColor = Color.FromArgb(244, 244, 244); } }As you can see in the code above, to access a list form’s Grid, you should first get the ListEditor, which is the object that binds data to a Grid. To get the ListEditor, use the ListView.Editor property of the required List View. There are several types of built-in WinForms ListEditors. The code above is implemented when the current List View is represented by a GridListEditor. This ListEditor represents data via the XtraGrid control. Use the GridListEditor.GridView property to access this control.
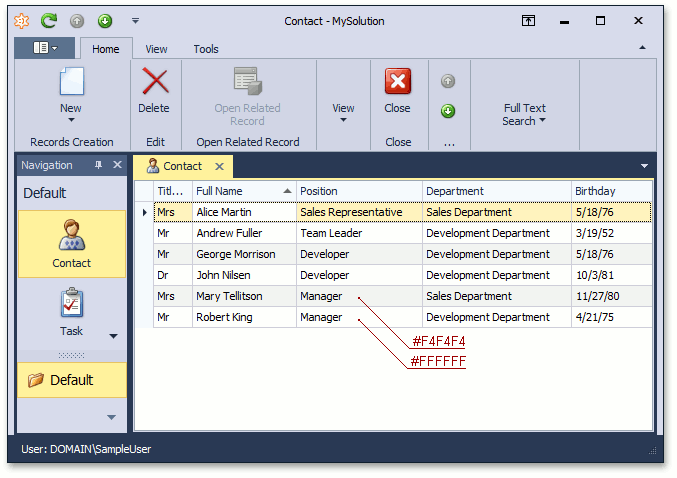
Run the WinForms application and select an item in the navigation control. The data rows now have alternating colors.
Access Editor Settings in an ASP.NET Application
- As the functionality to be implemented is specific to the ASP.NET platform, changes will be made to MySolution.Module.Web in this lesson. Add a View Controller to the Controllers folder in the MySolution.Module.Web project, as described in the Add a Simple Action lesson. Name it “WebAlternatingRowsController“.
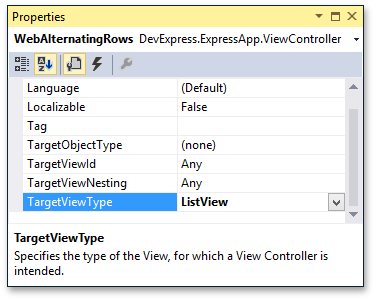
Invoke the Controller’s Designer. In the Properties window, set the TargetViewType property to the “ListView” value. This is necessary because the Controller should appear in List Views only.
Since you are going to access the settings of the List View’s Grid Control, you need to ensure that it has already been created. This is why you need to subscribe to the Controller’s ViewControlsCreated event. In the Properties window, switch to the Events view and double-click the ViewControlsCreated event. Handle the event as shown below.
using System.Drawing; using DevExpress.ExpressApp.Web.Editors.ASPx; //... private void WebAlternatingRowsController_ViewControlsCreated(object sender, EventArgs e) { ASPxGridListEditor listEditor = ((ListView)View).Editor as ASPxGridListEditor; if (listEditor != null) listEditor.Grid.Styles.AlternatingRow.BackColor = Color.FromArgb(244, 244, 244); }As you can see in the code above, to access a list form’s Grid, you should first get the ListEditor, which is the object that binds data to a Grid. To get the ListEditor, use the ListView.Editor property of the required List View. There are several types of built-in ASP.NET ListEditors. The code above is implemented when the current List View is represented by an ASPxGridListEditor. This ListEditor represents data via the ASPxGridView control. To access this control, the ASPxGridListEditor.Grid property is used.
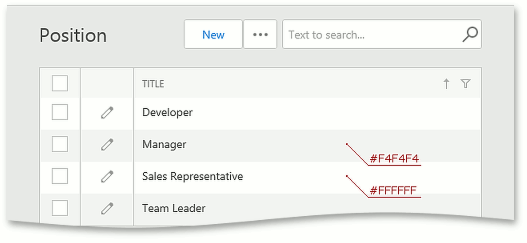
Run the ASP.NET application. Select an item in the navigation control and ensure that the rows background is changed.
Note
Due to WinForms and ASP.NET platform specifics, View Item and List Editor controls may not be immediately ready for customization after the control is created. Consider handling additional platform-dependent events or using alternative approaches if the customizations above do not have any effect.
WinForms:
Handle the System.Windows.Forms.Control object’s HandleCreated, VisibleChanged or ParentChanged events. You can also handle the Load (or similar) event if the current control type exposes it.
ASP.NET:
Handle the System.Web.UI.Control object’s Load or Init server-side event. In certain cases, you may need to handle the WebWindow.PagePreRender event. Use the WebWindow.CurrentRequestWindow static property to get the current WebWindow object. You can also perform certain customizations on the client side using JavaScript (see Client-Side Functionality Overview).
These additional platform-dependent events indicate the controls’ “ready” state: a control has been added to the form controls hierarchy or has been bound to data. Contact us using the Support Center if you need additional help to perform customizations.
Next Lesson: Place an Action in a Different Location