How to: Change an Application Logo and Info
- 4 minutes to read
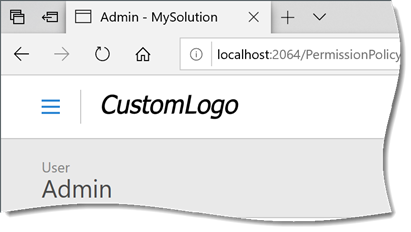
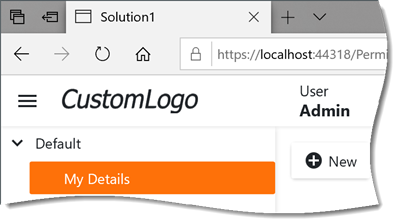
This topic describes how to change the default logo and text displayed in a WinForms application’s About window and in the top-left and bottom-left corners of an ASP.NET and Blazor application’s main page. In WinForms and ASP.NET applications, you can use an embedded resource image as a logo. You can also use an image file from a web application’s folder.
WinForms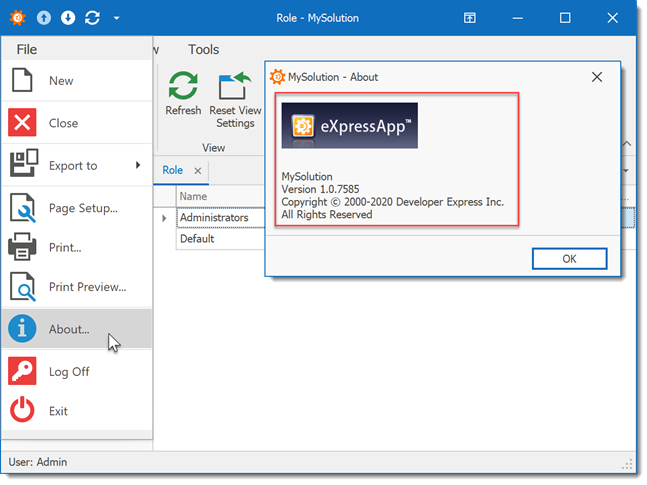
ASP.NET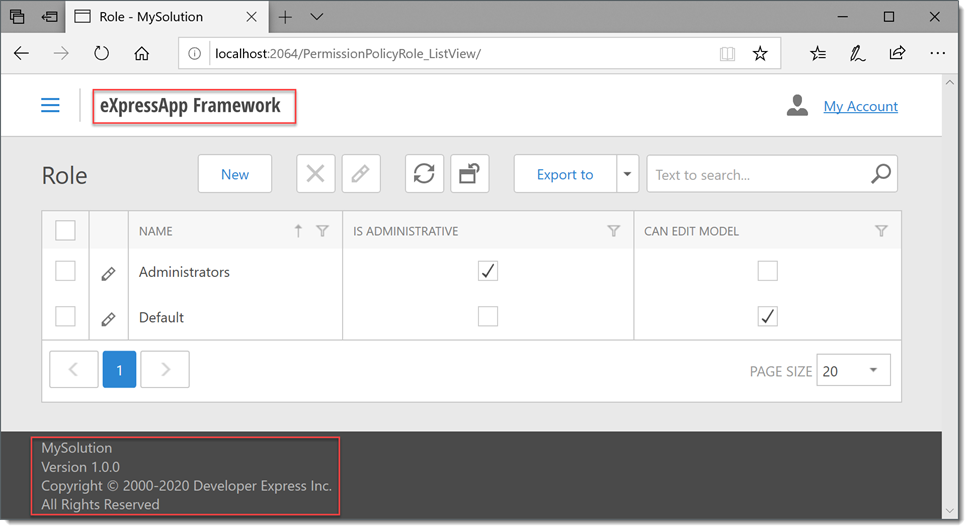
Blazor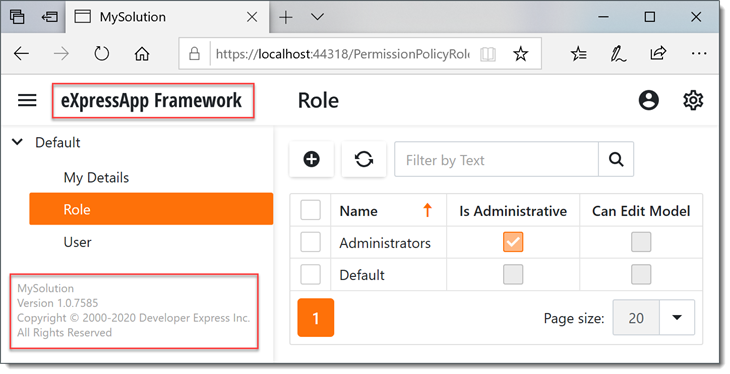
Note
In WinForms applications, the About window is invoked using the AboutInfoController.AboutInfoAction Action and contains the AboutInfo object’s Detail View (AboutInfo_DetailView). In ASP.NET applications, the AboutInfoControl is used to display the info. Blazor applications display the AboutInfoString property value on the Template.
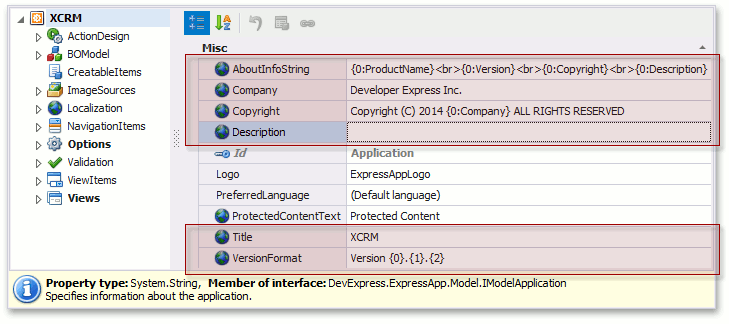
Specify the Application Info
In the Model Editor, you can specify information about the application name, description, vendor, copyright and version formatting using the following properties or the root Application node:
Use a Custom Logo Image
In WinForms and ASP.NET Applications
Tip
A complete sample project is available in the DevExpress Code Examples database at https://supportcenter.devexpress.com/ticket/details/e4721/how-to-change-the-application-logo.
To use a custom logo, add it as an embedded resource. The steps below illustrate how to do this.
Save your custom logo to the Images folder in the module project (for example, MySolution.Module\Images\CustomLogo.png).
Important
If your solution language is VB.NET, prefix the file name with the module assembly name and folder name. For example, to add a CustomLogo.png image to the Images folder of the MySolution.Module project, rename the image file MySolution.Module.Images.CustomLogo.png.
- In Solution Explorer, click the Show All Files toolbar button. Select the image added to the Images sub-folder, right-click it and choose Include In Project.
- Switch to the Properties window. Set the Build Action option to Embedded Resource.
Now you can assign the added image name to the IModelApplication.Logo property. Rebuild the solution and invoke the Model Editor. Focus the root Application node and click the Logo property’s ellipsis button. In the invoked Image Picker dialog, choose your logo.
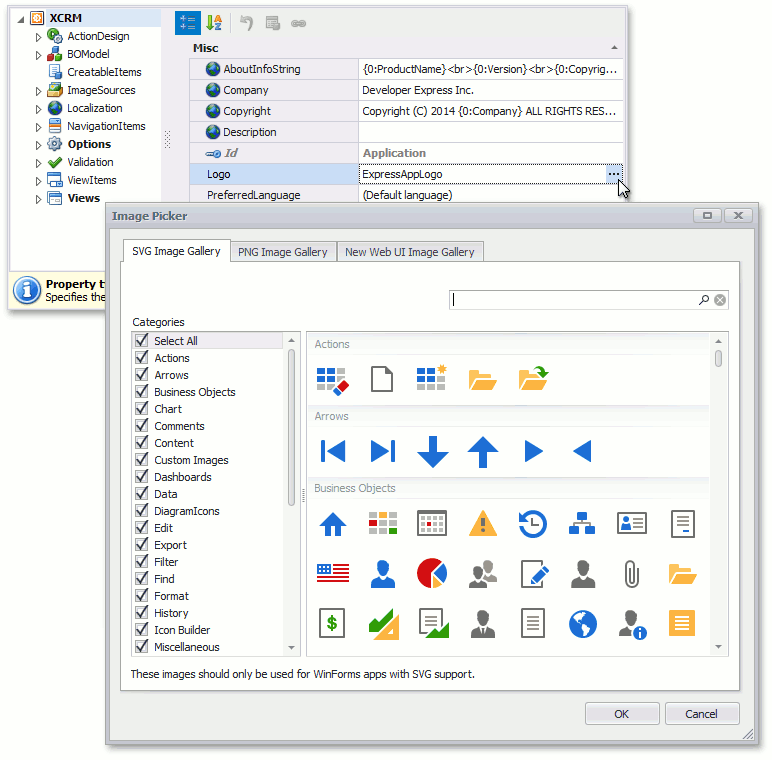
You can also type the image name manually instead of choosing it in the Image Picker. When specifying the image name, omit the file extension (and prefix, if you use VB.NET).
Note
In WinForms applications, the default logo is specified in the application Model Differences, so changes made in this step have no effect. To use the logo specified in the module Model Differences, open the Model.xafml file from the application project, navigate to the Application node and delete the Logo property value.
To check that the logo has been changed in the WinForms application, run it and invoke the About window.
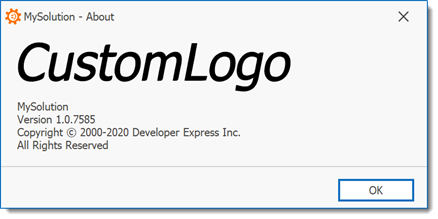
Refer to the Application Personalization topic for more information on the About window.
Run the ASP.NET application to ensure that the custom logo is applied.
In Blazor Applications
To use a custom logo, add it to the MySolution.Blazor.Server\wwwroot\images folder.
Specify its name in the header-logo CSS class in the MySolution.Blazor.Server\wwwroot\css\site.css file:
.header-logo {
    -webkit-mask: url('../images/CustomLogo.svg');
    mask: url('../images/CustomLogo.svg');
    /* ... */
    width: 180px;
    height: 24px;
}
Run the Blazor application to ensure that the custom logo is applied.
Use a Logo Image File from the Web Application Folder
You can use a content file instead of a module’s embedded resource in ASP.NET applications. To use a custom PNG image as a logo in a New Web UI, rename your file to Logo.png and copy it to the Images folder in the application project.
Follow the steps below to customize the logo image (use a custom file name, non-PNG format, adjust the image size):
- Open the Default.aspx.cs (Default.aspx.vb) file and add the Page_Init method to the Default class to handle the Page.Init event, and then subscribe to the BaseXafPage.CustomizeTemplateContent event.
- Cast the CustomizeTemplateContentEventArgs.TemplateContent parameter or BaseXafPage.TemplateContent property to the IHeaderImageControlContainer interface to access the template content.
The template content exposes the ThemedImageControl using the HeaderImageControl property. Specify an image using the DefaultThemeImageLocation and ImageName properties of this control.
This code demonstrates how to use an SVG logo in the New Web UI:
public partial class Default : BaseXafPage { // ... protected void Page_Init() { CustomizeTemplateContent += (s, e) => { IHeaderImageControlContainer content = TemplateContent as IHeaderImageControlContainer; if(content == null) return; content.HeaderImageControl.DefaultThemeImageLocation = "Images"; content.HeaderImageControl.ImageName = "CustomLogo.svg"; content.HeaderImageControl.Width = Unit.Pixel(30); content.HeaderImageControl.Height = Unit.Pixel(30); }; } }As a result, the application logo is loaded from the CustomLogo.svg file in the ASP.NET application project’s Images folder (for instance, MySolution.Web\Images\CustomLogo.svg).
Important
If your application has a logon form, make sure the following lines are present in the Web.config file:
<location path="Images">
    <system.web>
      <authorization>
        <allow users="?"/>
      </authorization>
    </system.web>
  </location>