How to: Filter Large List Views using the Auto Filter Row
- 4 minutes to read
This topic demonstrates how to avoid displaying the entire collection of a List View with a large object count in Windows Forms applications. One of the ways to do this is to use the Auto Filter Row of the XtraGrid used in Windows Forms applications.
To activate the Auto Filter Row in an XAF application, use the IModelListViewShowAutoFilterRow.ShowAutoFilterRow property of the Application Model‘s Views | <ListView> node. When this property is set to true, the Auto Filter Row is available.
By default, all existing objects are retrieved while the current filter is empty. To prohibit the retrieval of objects, implement a new View Controller as shown below.
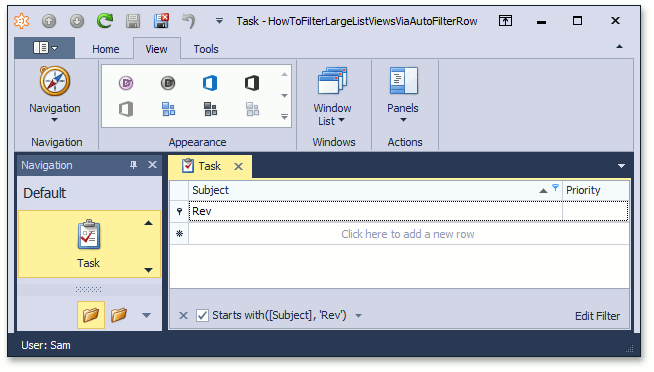
Assume your application uses the Task business class from the Business Class Library. Imagine that the Task objects collection is very large, so you will need an empty List View to be displayed when you click the Task item in the navigation control. However, to get the required objects, the Auto Filter Row is made available via the Model Editor.
- Create a new View Controller. (In this example, it is called AutoFilterRowController.) To learn how to implement Controllers, refer to the Tutorial’s Extend Functionality section.
- Set the Controller’s scope so that it is only activated for a root Task List View. Set the ViewController.TargetViewType property to ListView, the ViewController.TargetViewNesting to Root, and the ViewController.TargetObjectType to DevExpress.Persistent.BaseImpl.Task to do this.
To prohibit the retrieval of Task objects when the Task List View is displayed and the grid’s filter has not yet been applied, set a false criteria for the View’s Collection Source. To do this, access the View’s Grid control by handling the Controller’s Controller.Activated event to subscribe to the View’s View.ControlsCreated event.
In the ControlsCreated event handler, access the View’s Grid control and set a false criteria if the active filter of its GridView is empty:
using DevExpress.XtraGrid.Views.Base; using DevExpress.Data.Filtering; using DevExpress.XtraGrid; //... public partial class AutoFilterRowController : ViewController { //... private ColumnView gridView; private CriteriaOperator falseCriteria = CriteriaOperator.Parse("1=0"); void AutoFilterRowController_ControlsCreated(object sender, EventArgs e) { GridControl grid = view.Control as GridControl; gridView = grid.FocusedView as ColumnView; if(gridView.ActiveFilter.IsEmpty) { view.CollectionSource.Criteria["FalseCriteria"] = falseCriteria; } gridView.ActiveFilter.Changed += new EventHandler(ActiveFilter_Changed); } }As you can see in the code above, we subscribe to the active filter’s Changed event. This is necessary in order to retrieve all Task objects when you need to get those that satisfy the filters generated by an end-user via the Auto Filter Row. In addition, apply the false criteria when an end-user cancels the active filter. In this case, the event handler is:
public partial class AutoFilterRowController : ViewController { //... void ActiveFilter_Changed(object sender, EventArgs e) { if(((ViewFilter)sender).IsEmpty) { view.CollectionSource.Criteria["FalseCriteria"] = falseCriteria; } else { if(view.CollectionSource.Criteria.ContainsKey("FalseCriteria")) { view.CollectionSource.Criteria.Remove("FalseCriteria"); } } } }- Run the application and make sure that everything works as required.