Using the Security System
- 8 minutes to read
In this lesson, you will learn how to use a Security System in the application. When you use this system, the SecurityStrategyComplex security strategy is applied to your application. According to this strategy, Users have Roles, which in turn are characterized by a permission set. This topic will guide you through creating an administrator and a common user in code. The administrator will have a full-access permission set, and the user will have a limited permission set. You will see how the administrator can create Users and Roles, specify Permissions for them, and then assign Roles to Users at runtime. You will also use the AuthenticationStandard authentication type to log on to the application.
Note
Before proceeding, take a moment to review the following topics.
- Create a Solution using the Wizard
- Supply Initial Data (XPO/EF) lesson.
Active Directory Authentication
If you have followed the Create a Solution using the Wizard lesson, you have already enabled the Security System with the AuthenticationActiveDirectory authentication.
Invoke the Application Designer for the WinForms application and take a look at the Security section.
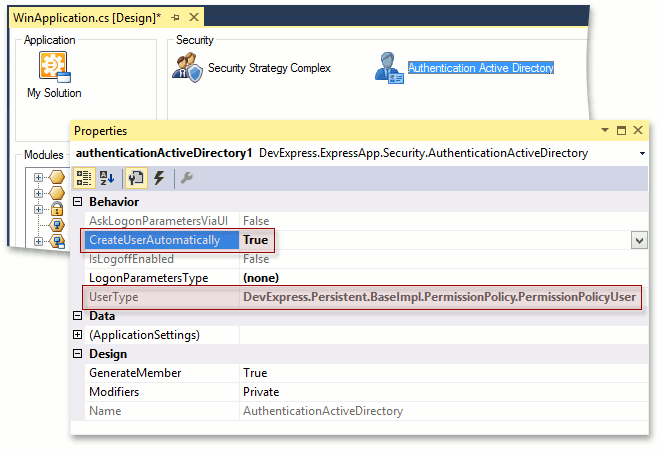
As you can see in the image above, a Complex Security Strategy and Active Directory authentication are used, and the CreateUserAutomatically property is set to true. This means that a user object (PermissionPolicyUser) is created automatically when you first run the application. This object’s UserName property is set to your Active Directory account. You’ve got all permissions as the automatically created user type is an administrator. To see this user’s details at runtime, navigate to the User and MyDetails items in the navigation control.
Now, follow the Tutorial to learn how to change authentication type in your application.
Standard Authentication
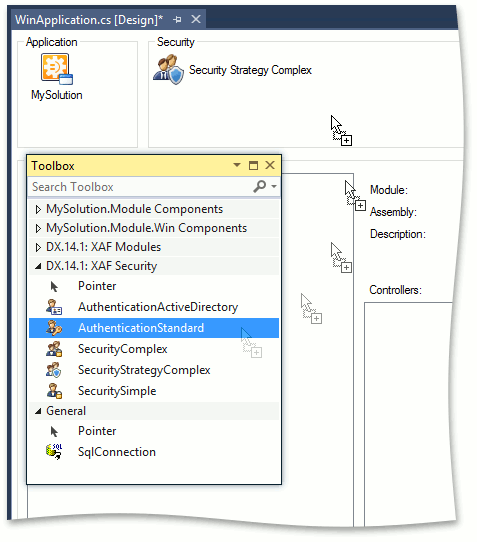
Invoke the Application Designer for the WinForms application. To use a standard authentication strategy, drag the AuthenticationStandard component from the DX.18.2: XAF Security Toolbox tab to the Designer’s Security section.
- Invoke the Application Designer for the ASP.NET application. Drag the AuthenticationStandard component from the DX.18.2: XAF Security Toolbox tab to the Designer’s Security section.
Create Predefined Users and Roles in Code
Before running an application with Standard Authentication enabled, create several predefined Users and Roles business objects, and assign the Roles to Users. This will allow you to logon and create more Users at runtime.
The objects that should exist in the database while running the application are created in the ModuleUpdater.UpdateDatabaseAfterUpdateSchema method in the MySolution.Module | DatabaseUpdate | Updater.cs/Updater.vb file (see the Supply Initial Data (EF/XPO) topic).
First, create Roles. The following code demonstrates how to create an “Administrators” Role.
using DevExpress.ExpressApp.Security; // ... public override void UpdateDatabaseAfterUpdateSchema() { base.UpdateDatabaseAfterUpdateSchema(); // ... PermissionPolicyRole adminRole = ObjectSpace.FindObject<PermissionPolicyRole>( new BinaryOperator("Name", SecurityStrategy.AdministratorRoleName)); if (adminRole == null) { adminRole = ObjectSpace.CreateObject<PermissionPolicyRole>(); adminRole.Name = SecurityStrategy.AdministratorRoleName; adminRole.IsAdministrative = true; } // ... }Note
In the code above, the PermissionPolicyRole class from the DevExpress.Persistent.BaseImpl.PermissionPolicy namespace is used for XPO, and the PermissionPolicyRole class from the DevExpress.Persistent.BaseImpl.EF.PermissionPolicy namespace is used for Entity Framework. Ensure that the correct using (Imports in VB) directive is added.
Here, the “Administrators” Role has full access to objects of all types, because its IPermissionPolicyRole.IsAdministrative property is set to true.
Now create a “Users” Role - a very basic Role that will have access to the current user object only. You can later extend this Role‘s permission set in the UI using extension methods of the PermissionSettingHelper class. See the following code.
public override void UpdateDatabaseAfterUpdateSchema() { // ... PermissionPolicyRole userRole = ObjectSpace.FindObject<PermissionPolicyRole>(new BinaryOperator("Name", "Users")); if(userRole == null) { userRole = ObjectSpace.CreateObject<PermissionPolicyRole>(); userRole.Name = "Users"; userRole.PermissionPolicy = SecurityPermissionPolicy.AllowAllByDefault; userRole.AddTypePermission<PermissionPolicyRole>(SecurityOperations.FullAccess, SecurityPermissionState.Deny); userRole.AddTypePermission<PermissionPolicyUser>(SecurityOperations.FullAccess, SecurityPermissionState.Deny); userRole.AddObjectPermission<PermissionPolicyUser>(SecurityOperations.ReadOnlyAccess, "[Oid] = CurrentUserId()", SecurityPermissionState.Allow); userRole.AddMemberPermission<PermissionPolicyUser>(SecurityOperations.Write, "ChangePasswordOnFirstLogon", null, SecurityPermissionState.Allow); userRole.AddMemberPermission<PermissionPolicyUser>(SecurityOperations.Write, "StoredPassword", null, SecurityPermissionState.Allow); userRole.AddTypePermission<PermissionPolicyRole>(SecurityOperations.Read, SecurityPermissionState.Allow); userRole.AddTypePermission<PermissionPolicyTypePermissionObject>("Write;Delete;Navigate;Create", SecurityPermissionState.Deny); userRole.AddTypePermission<PermissionPolicyMemberPermissionsObject>("Write;Delete;Navigate;Create", SecurityPermissionState.Deny); userRole.AddTypePermission<PermissionPolicyObjectPermissionsObject>("Write;Delete;Navigate;Create", SecurityPermissionState.Deny); } //... }The following code demonstrates how to create Users.
using DevExpress.ExpressApp.Security; // ... public class Updater : ModuleUpdater { public Updater(IObjectSpace objectSpace, Version currentDBVersion) : base(objectSpace, currentDBVersion) { } public override void UpdateDatabaseAfterUpdateSchema() { // ... // If a user named 'Sam' does not exist in the database, create this user. PermissionPolicyUser user1 = ObjectSpace.FindObject<PermissionPolicyUser>( new BinaryOperator("UserName", "Sam")); if(user1 == null) { user1 = ObjectSpace.CreateObject<PermissionPolicyUser>(); user1.UserName = "Sam"; // Set a password if the standard authentication type is used. user1.SetPassword(""); } // If a user named 'John' does not exist in the database, create this user. PermissionPolicyUser user2 = ObjectSpace.FindObject<PermissionPolicyUser>( new BinaryOperator("UserName", "John")); if(user2 == null) { user2 = ObjectSpace.CreateObject<PermissionPolicyUser>(); user2.UserName = "John"; // Set a password if the standard authentication type is used. user2.SetPassword(""); } } }Finally, you will assign Roles to Users.
public class Updater : ModuleUpdater { // ... public override void UpdateDatabaseAfterUpdateSchema() { // ... user1.Roles.Add(adminRole); user2.Roles.Add(userRole); } }Note
More examples are provided in the Client-Side Security (2-Tier Architecture) topic.
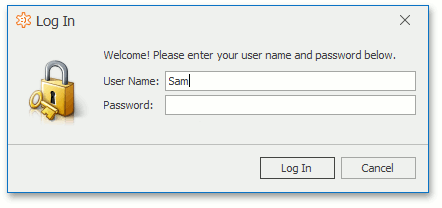
Run the WinForms or ASP.NET application. The following logon window will be displayed in a WinForms application.
The following window will be displayed in the ASP.NET application.
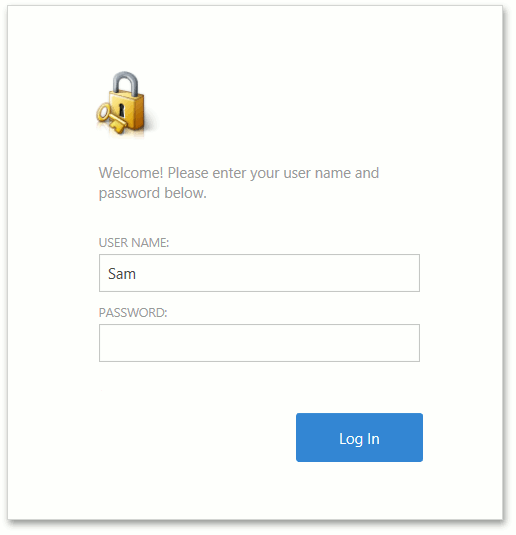
After the Log In button is clicked, the user’s credentials are authenticated and the application will run.
Create a Role in a UI
Administrators, and other users with Role creation permission can create Roles as follows.
Select the Role item in the navigation control and click the New Action. In the invoked Detail View, set the name and permissions for the new Role.
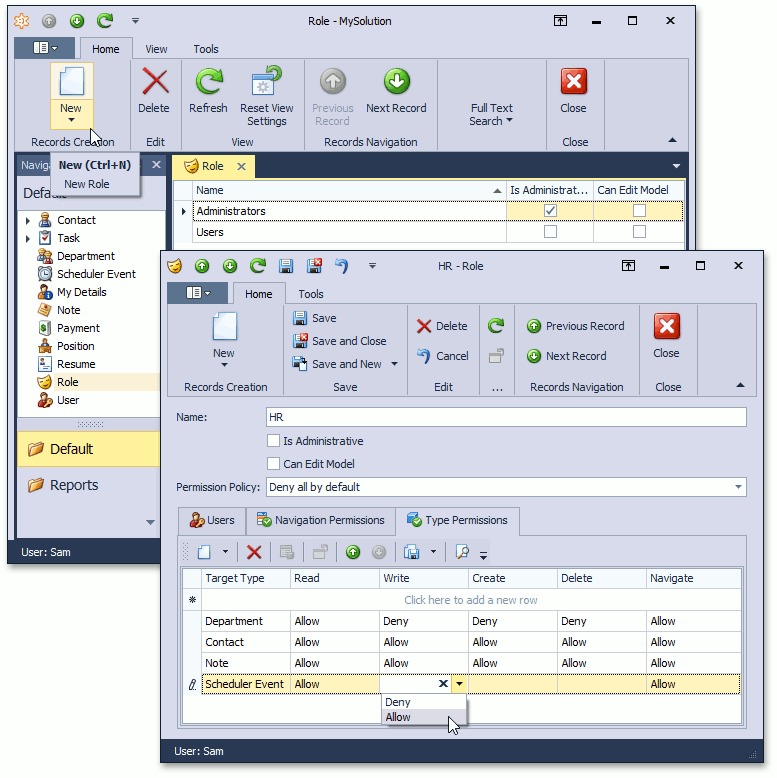
With the Permission Policy property, you can assign “deny all”, “read only all” or “allow all” default permission policies for each role. For each operation, you can explicitly specify the Allow or Deny modifier or leave it blank. If the modifier is not specified, the permission is determined by the role’s permission policy.
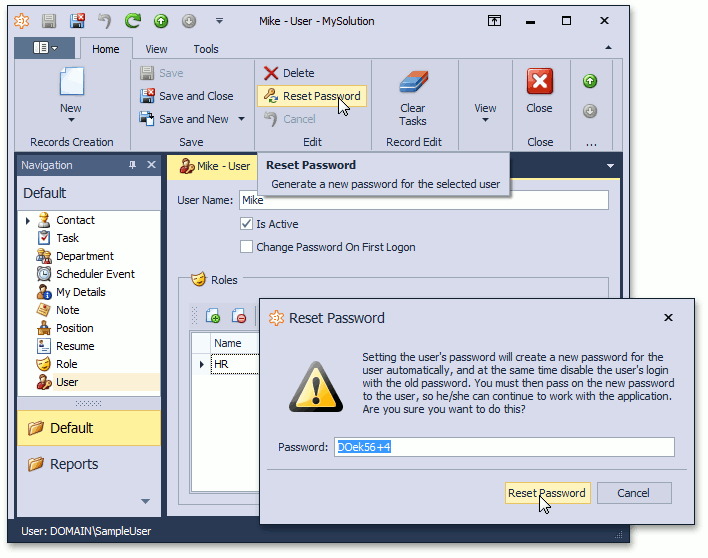
Create a User in a UI
Users who have permission to create Users can do the following.
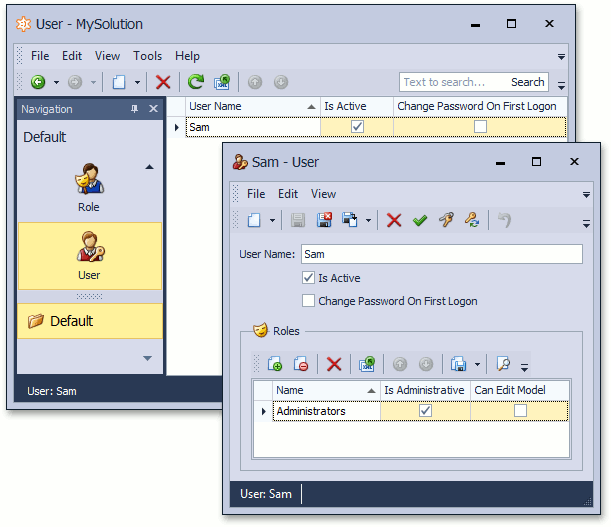
Select the User item in the navigation control and click the New button. In the invoked Detail View, specify the User Name and assign one or more Roles.

Note
Set the Is Active property to false if you need to temporarily prohibit the user from using the application.
To assign a password to a newly created user, click the Reset Password button. The assigned password should be passed to the user. A User will be able to change it when logging on for the first time.
Note
This button is the ResetPassword Action, which is available to users who are allowed to modify User objects. This button is not available when the Active Directory authentication is used.
My Details
The My Details navigation item is available for users who have read access to the current User object. This navigation item opens the current user details.
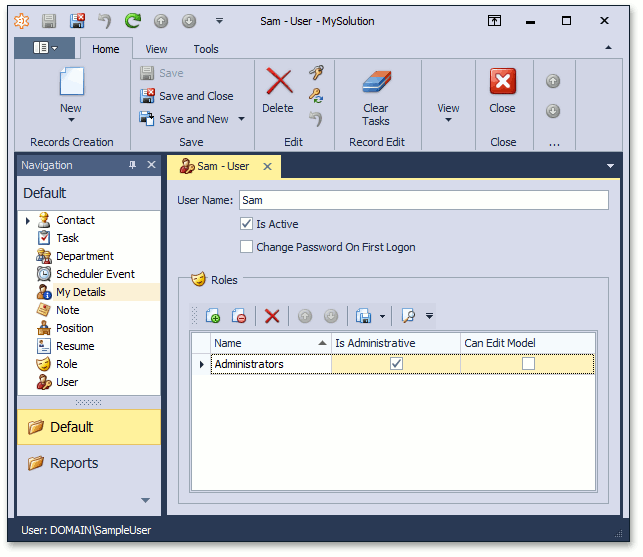
In an ASP.NET application, it can also be opened by clicking the My Details link at the top-right corner of the page.
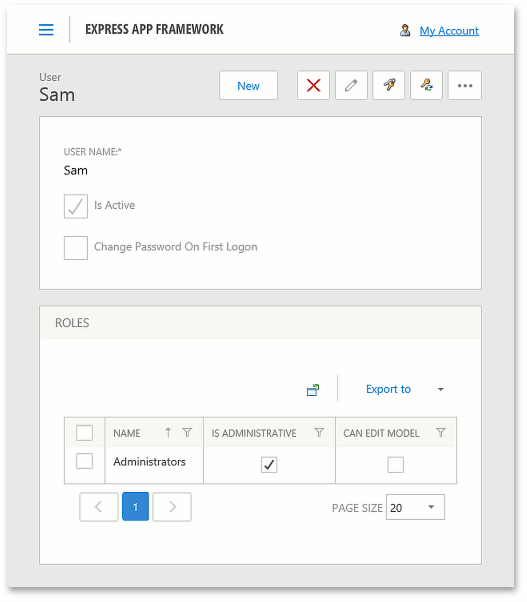
Change Password
When the standard authentication type is used, the Change My Password button is available once the My Details Detail View is displayed. This button opens a dialog where a user can change the password.
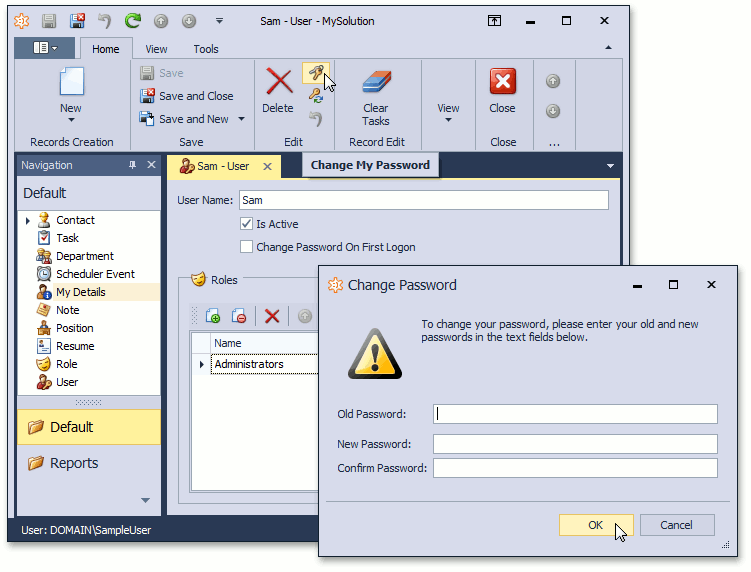
Note
This button is the ChangePasswordByUser Action that is not available if the Active Directory authentication is used. To change a password in this instance, end users can use the operating system’s standard tools (e.g., press CTRL+ALT+DEL and select Change a password).
Next Lesson: Access the Security System in Code