Provide Several View Variants for End-Users
- 4 minutes to read
In this lesson, you will learn how to provide several customized variants of the same View, and allow an end-user to choose a desired View variant at runtime. Variants can be applied to both List Views and Detail Views. In this lesson, the Contact List View will be used. Two variants of this List View will be constructed via the Module Editor. To switch between these View variants, the special ChangeVariant Action will be used. To add this Action, the ViewVariants module will be referenced in the application.
Note
Before proceeding, take a moment to review the following lessons.
- Inherit from the Business Class Library Class (XPO/EF)
- Change Field Layout and Visibility in a List View
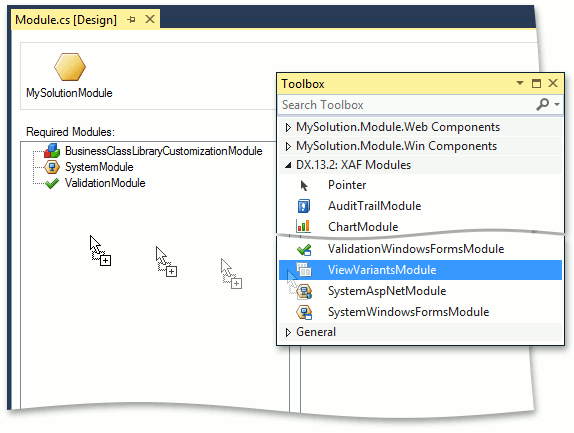
Add the View Variants module to your MySolution.Module project. Find the Module.cs (Module.vb) file in the MySolution.Module project displayed in the Solution Explorer, and double-click this file. The Module Designer will be invoked. In the Toolbox, navigate to the DX.18.2: XAF Modules tab. Drag the ViewVariantsModule item from this tab to the Designer’s Required Modules section.
- Rebuild your solution so that the changes made in the Module Designer are loaded to the Application Model.
Invoke the Model Editor for the MySolution.Module project. Right-click the Views node and select Add… | ListView.
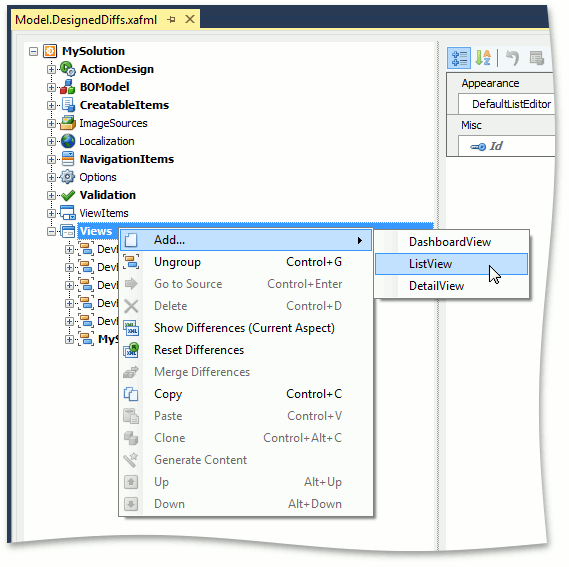
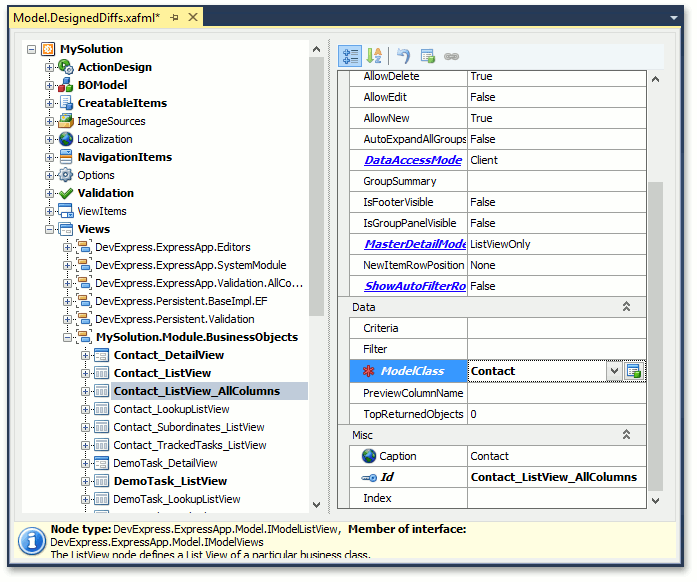
For the new node, set the Id property to “Contact_ListView_AllColumns” and the ModelClass property to “Contact”.
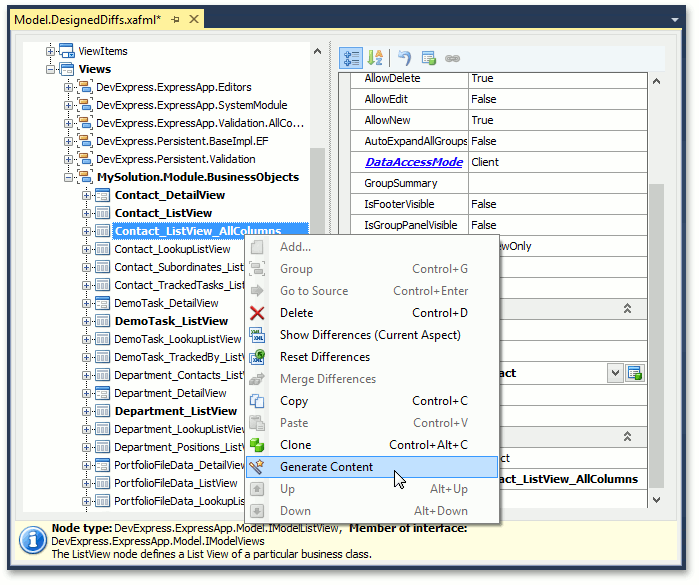
Right-click the newly created node and select Generate content. Columns will be generated using information on the specified class (BOModel | Contact node) and its ancestors. Leave these columns as is. This List View will represent the complete variant for the Contact List View.
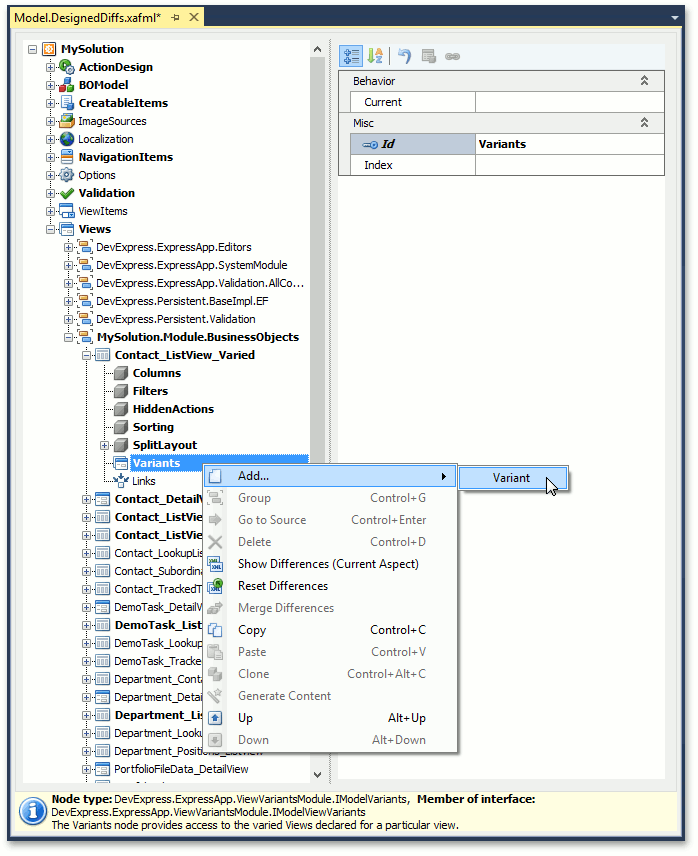
Right-click the Views node and select Add… | ListView. For the new node, set the Id property to “Contact_ListView_Varied” and the ModelClass property to “Contact”. Do not generate content for the new node.
Expand the newly added Contact_ListView_Varied node, right-click the Variants child node and select Add… | Variant.
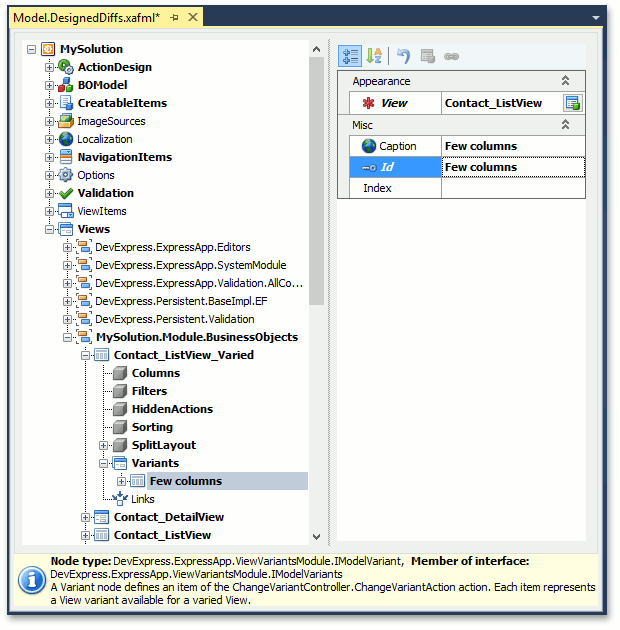
For the new node, set the View property to “Contact_ListView”, and set the Id and Caption properties to “Few columns”.
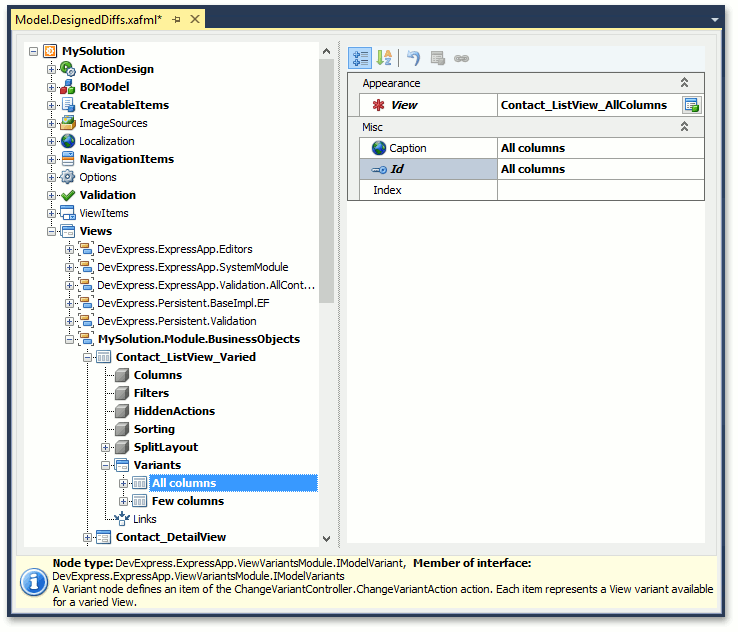
Right-click the Variants node and select Add… | Variant. For the new node, set the View property to “Contact_ListView_AllColumns”, and set the Id and Caption properties to “All columns”.
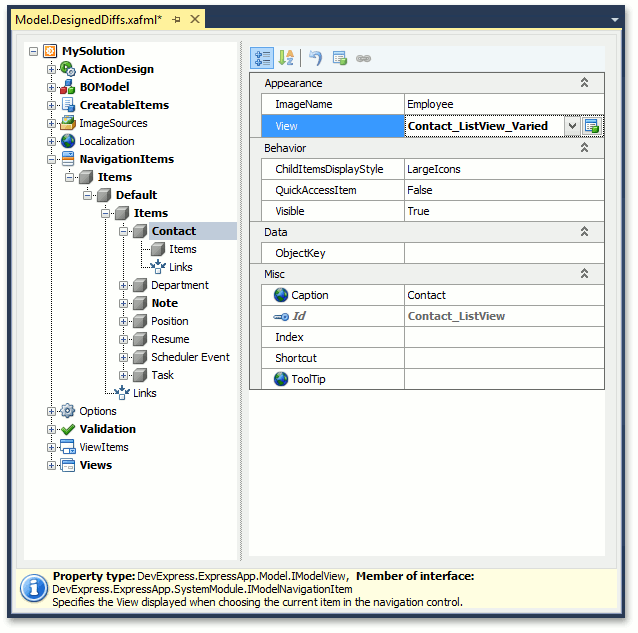
Navigate to the NavigationItems | Items | Default | Items | Contact node. Its View property, specifying the View displayed when choosing the Contact navigation item, is “Contact_ListView” by default. Change it to “Contact_ListView_Varied”.
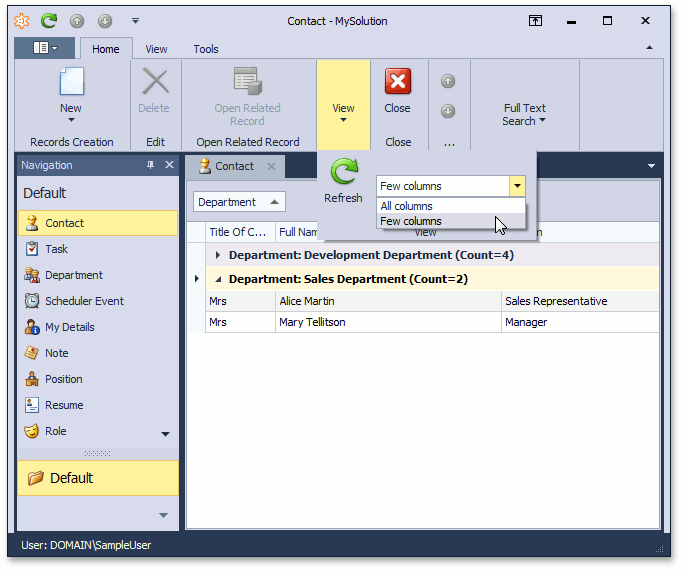
Run the WinForms or ASP.NET application. Select the Contact item in the navigation control. For the displayed Contact List View, the ChangeVariant Action will be activated. This Action’s items represent the view variants specified in the Model Editor.
Note
You can use the Index property to specify the sort order of variants in the ChangeVariant Action drop-down list. Additionally, you can set the Current property of the Variants node to specify the default variant.
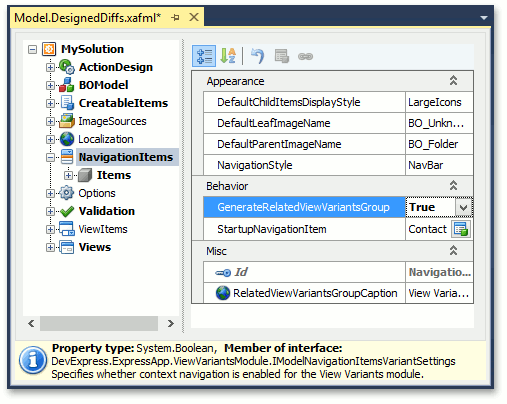
Optionally, you can add view variants to the navigation control. For this purpose, invoke the Model Editor and set the GenerateRelatedViewVariantsGroup property of the NavigationItems node to true.
Note
Ensure that the IModelChoiceActionItemChildItemsDisplayStyle.ChildItemsDisplayStyle property of the current navigation group node is set to List (see Change Style of Navigation Items). Otherwise, the view variants will not be added to the navigation control in the WinForms application.
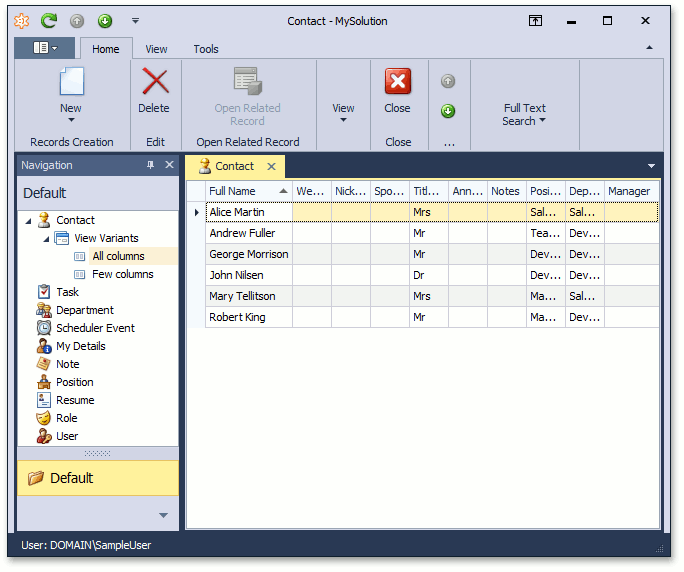
As a result, the Contact navigation item will expose child items for each view variant.
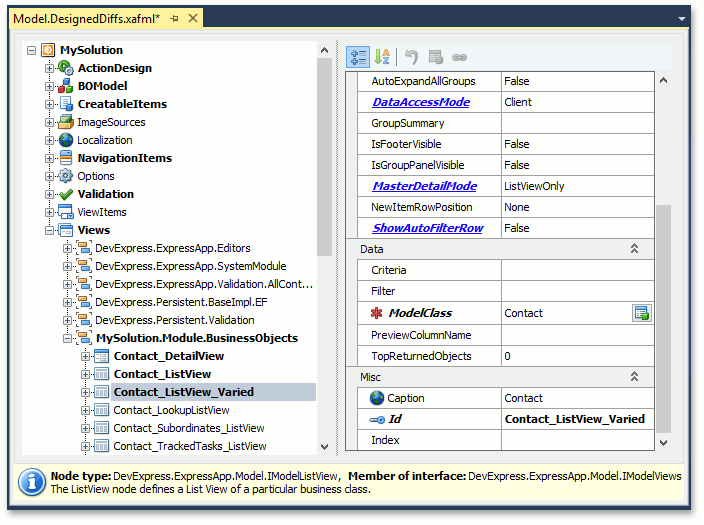
You can see the changes made in this lesson in the Model Editor invoked for the Model.DesignedDiffs.xafml file, located in the Main Demo | MainDemo.Module project. The MainDemo application is installed in %PUBLIC%\Documents\DevExpress Demos 18.2\Components\eXpressApp Framework\MainDemo by default. The ASP.NET version of this demo is available online at https://demos.devexpress.com/XAF/MainDemo.
Next Lesson: Audit Object Changes