Assign a Standard Image
- 2 minutes to read
eXpressApp Framework (XAF) includes standard images embedded into the DevExpress.Images assembly. In this lesson, you will learn how to associate a business class with a standard image. This image will represent the class in the navigation control, including detail and list form headers. For this purpose, the Department and Position classes will be used, since their ancestor (BaseObject class) is not associated with an image.
To see the available images, browse the following folder: %PROGRAMFILES(x86)%\DevExpress 20.2\Components\%PROGRAMFILES(x86)%\DevExpress 20.2\.NET Core Desktop Libraries\Sources\DevExpress.Images\Images.
Note
Before proceeding, take a moment to review the Place an Action in a Different Location lesson.
Follow the steps below to assign images to the Department and Position classes.
Invoke the Model Editor for your WinForms or ASP.NET application project.
Navigate to the NavigationItems node, and set ShowImages to true.
For WinForms applications, also set the ShowTabImage property to true in the Options node.
Images are now displayed for business classes. The “BO_Unknown” image is shown for classes that have no preassigned image.

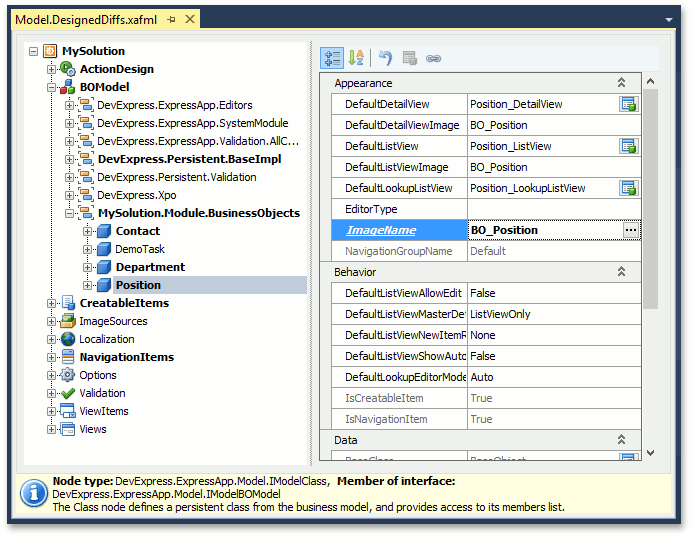
Invoke the Model Editor. Navigate to the BOModel | MySolution.Module.Business_Classes | Department node and change the ImageName property value to “BO_Department”. This is the name of the image in the %PROGRAMFILES(x86)%\DevExpress 20.2\Components\%PROGRAMFILES(x86)%\DevExpress 20.2\.NET Core Desktop Libraries\Sources\DevExpress.Images\Images folder. This folder represents a Standard Image Library.

Note
- When the ImageName property is focused, the ellipsis button (
 ) is displayed to the right of the property value. You can click this button to invoke the Image Picker dialog and browse the available images.
- When the ImageName property is focused, the ellipsis button (
Navigate to the BOModel | MySolution.Module.Business_Classes | Position node and change the ImageName property value to “BO_Position”.
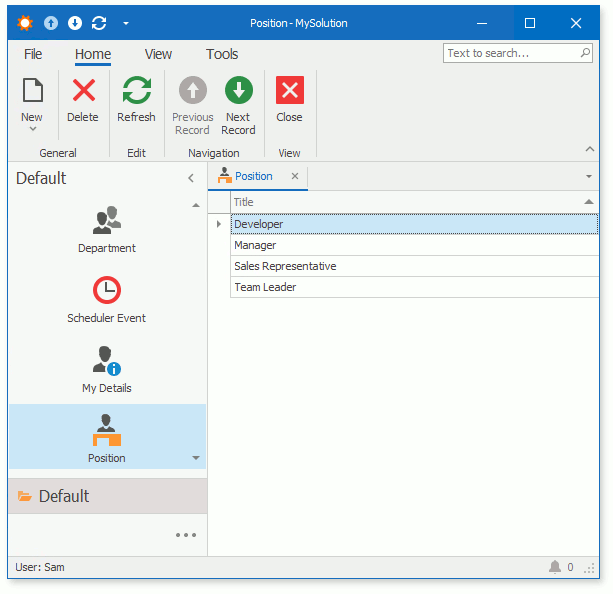
Run the application. You will see that Department and Position now have corresponding images displayed within the navigation bar and tab panel. If you run the ASP.NET application, you will see similar images within the page header when the Department (or Position) List View or Detail View is active.
WinForms Application
ASP.NET Application

You can see the results in the Main Demo | MainDemo.Module project’s Model Editor. The MainDemo application is installed in %PUBLIC%\Documents\DevExpress Demos 20.2\Components.NET Core Desktop Libraries\eXpressApp Framework\MainDemo by default. The ASP.NET Web Forms version is available online at https://demos.devexpress.com/XAF/MainDemo.
Next Lesson: Assign a Custom Image