Place an Action in a Different Location
- 3 minutes to read
In this lesson, you will learn how to place an Action in the required place. For this purpose, the ClearTasksAction that was defined in the Add a Simple Action lesson will be used. It is located together with the SaveTo, ExecuteReport and Refresh Actions. This Actions group is called View Action Containers (the ActionBase.Category property is set to “View” when implementing the ClearTasksAction). The remaining Actions are distributed among other Action Containers. In this lesson, you will move the ClearTasksAction to the RecordEdit Action Container.
Note
Before proceeding, take a moment to review the following lessons.
Tip
You can also change an Action location in code by handling the ActionControlsSiteController.CustomizeContainerActions event.
Since the ClearTasksAction is implemented in the common application module, you can specify its location directly in this module. To do this, invoke the Model Editor by double-clicking the Model.DesignedDiffs.xafml file from the MySolution.Module project.

The XAF application interface is based on the Application Model. The Model Editor is a tool for browsing and editing the Application Model. This tool is integrated in Visual Studio and displayed as a window pane. Commands specific to the Model Editor are available in the XAF Model Editor toolbar.

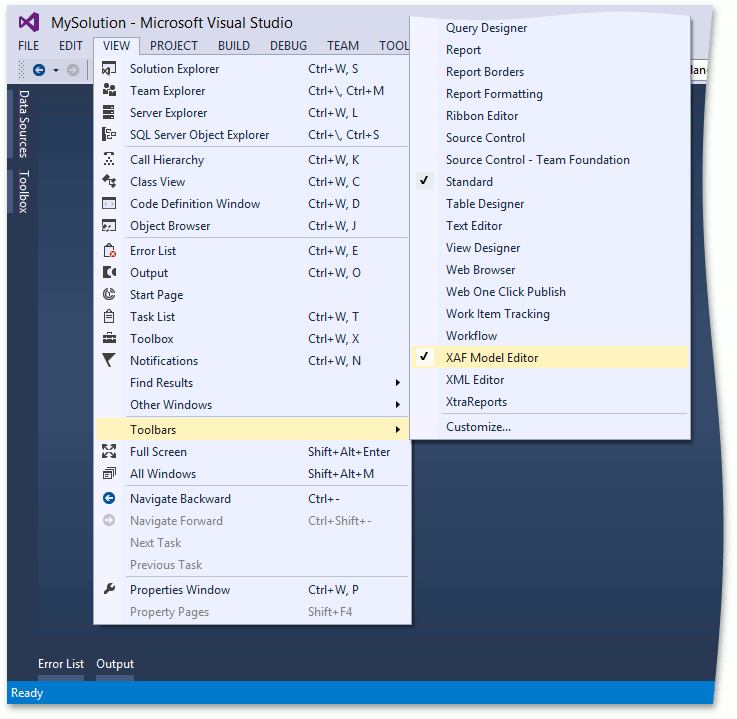
If the XAF Model Editor toolbar is hidden, you can make it visible by checking the XAF Model Editor item in the VIEW | Toolbars menu.
Note
To learn more about Model Editor capabilities, refer to the Model Editor topic.
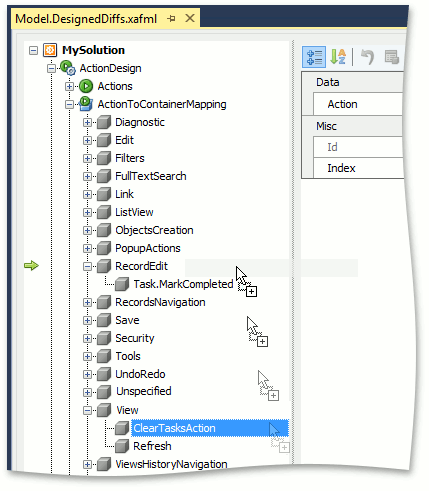
In the Model Editor, navigate to the ActionDesign | ActionToContainerMapping node. Its child nodes represent the Action Containers to which the Actions are mapped according to their Category property values. Expand the View node representing the View Action Container. Drag the ClearTasksAction child node to the RecordEdit node.
Note
Alternatively, you can use the context menu’s Copy, Paste, Delete and Clone commands to modify the Application Model structure. The modified parts of the Application Model are displayed with a bold font. You can revert any node with all of its child nodes to their original state via the context menu’s Reset Differences command.
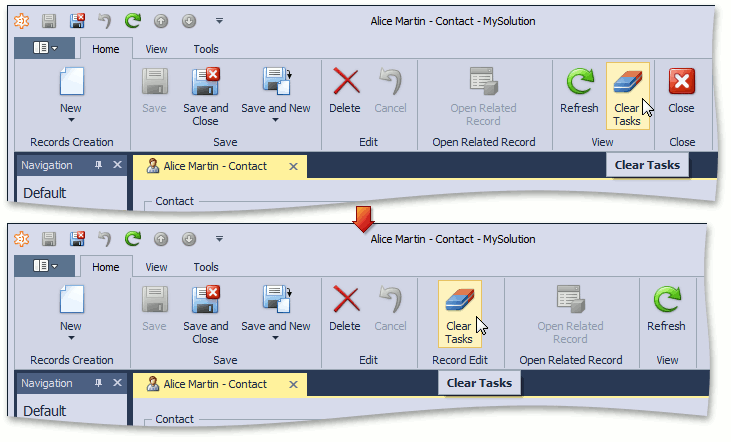
Run the WinForms or ASP.NET application. Invoke a detail form, since the ClearTasksAction is activated for Detail Views only. The following image demonstrates that this Action is located with Actions that belong to the RecordEdit Action Container.
You can see the changes made in the lesson in the Model Editor invoked for the Model.DesignedDiffs.xafml file located in the Main Demo | MainDemo.Module project. The MainDemo application is installed in %PUBLIC%\Documents\DevExpress Demos 20.2\Components.NET Core Desktop Libraries\eXpressApp Framework\MainDemo by default. The ASP.NET Web Forms version is available online at https://demos.devexpress.com/XAF/MainDemo.
Next Lesson: Specify Action Settings