Create a Report in Visual Studio
- 5 minutes to read
In this lesson, you will learn how to create reports in the integrated reporting system. This system is based on the DevExpress Reporting library for WinForms and ASP.NET. This lesson will guide you through creating a report that shows a list of Contact objects with their names and email addresses. Report will be available to end-users in both WinForms and ASP.NET applications.
Adding XAF Modules
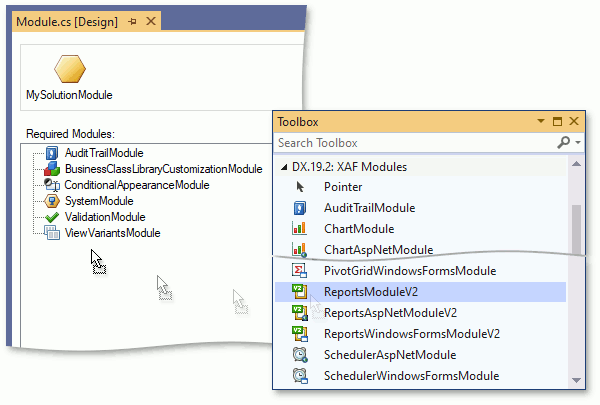
Add the platform-independent Reports V2 module to your project. To do this, double-click the Module.cs (Module.vb) file in the MySolution.Module project. This will invoke the Module Designer. In the Toolbox, navigate to the DX.20.2: XAF Modules group. Drag the ReportsModuleV2 item from this group to the Designer’s Required Modules section.
Add a WinForms-specific Reports V2 module to your WinForms module project. Double-click the WinModule.cs (WinModule.vb) file in the MySolution.Module.Win project. This will invoke the Module Designer. In the Toolbox, navigate to the DX.20.2: XAF Modules group. Drag the ReportsWindowsFormsModuleV2 item from this group to the Designer’s Required Modules section.

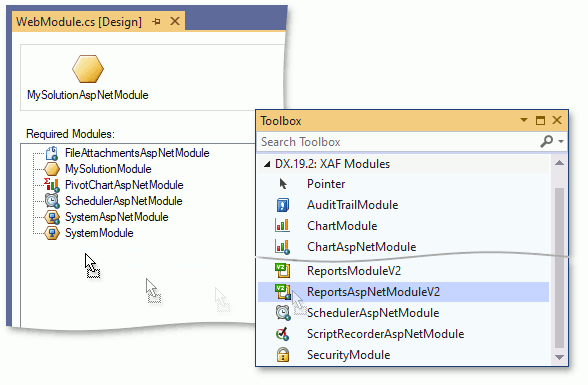
Add the ASP.NET-specific Reports V2 module to your ASP.NET application project. Invoke the Module Designer by double-clicking the WebModule.cs (WebModule.vb) file in the MySolution.Module.Web project. In the Toolbox, navigate to the DX.20.2: XAF Modules group. Drag the ReportsAspNetModuleV2 item from this group to the Designer’s Required Modules section.
- Rebuild your solution.
If you are using eXpress Persistent Objects as your ORM, proceed to the next section (Design-Time Reporting) section. Otherwise, if you use Entity Framework Code First, execute the following steps.
- Register the ReportDataV2 type in the DbContext as shown in the Set a Many-to-Many Relationship (EF) lesson.
- Double-click the MySolution.Win\WinApplication.cs file to invoke the Application Designer. In the Modules pane, focus the ReportsModuleV2 component. In the Properties window, set the ReportsModuleV2.ReportDataType property to DevExpress.Persistent.BaseImpl.EF.ReportDataV2.
- Repeat the previous step for the MySolution.Web\WebApplication.cs file.
Design-Time Reporting
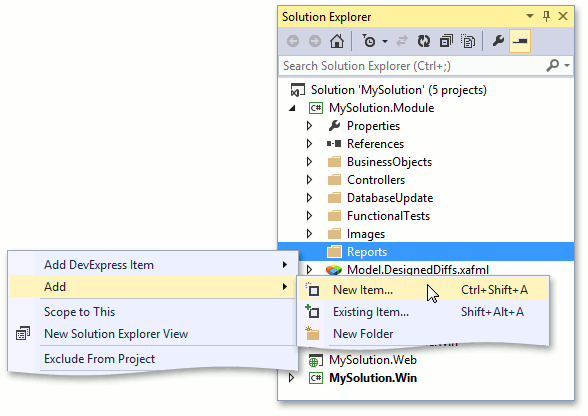
Right-click the MySolution.Module project and select Add | New Folder. Set the name of the new folder to “Reports”. Right-click the Reports folder and select Add | New Item.
Note
You can place reports in any folder (including the root project folder), although it is recommended that you organize your project files.
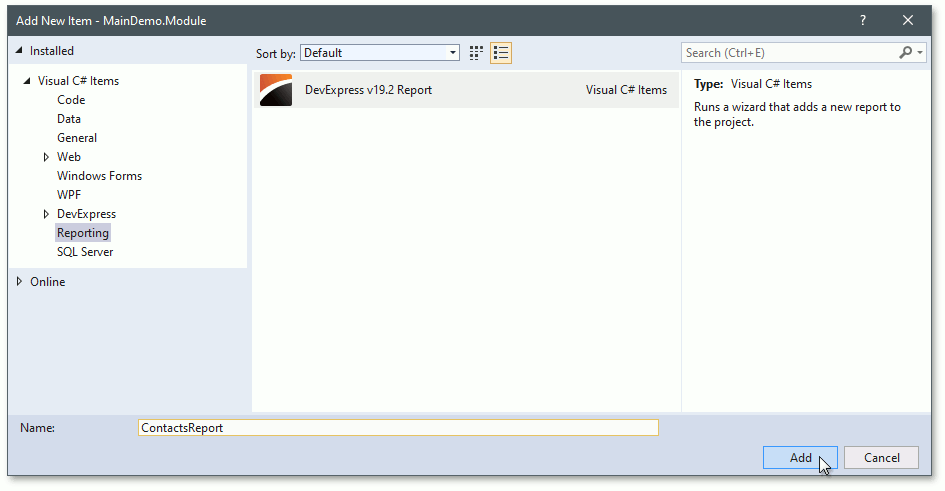
Select the DevExpress v20.2 Report, name it “ContactsReport” and click Add.
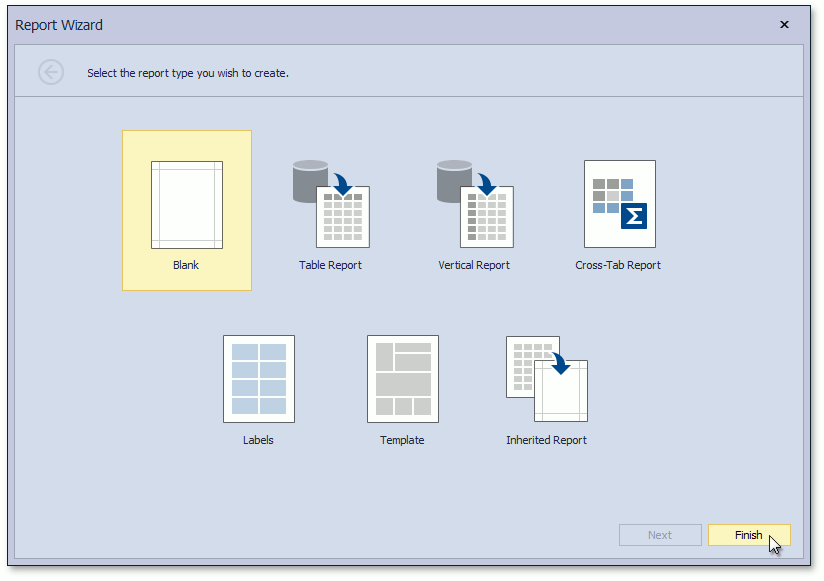
This invokes the Report Wizard. Select Blank and click Finish.
Note
Do not use report types other than Blank. Other report types will not allow you to select an XAF-specific data source. You will be able to proceed with the Report Wizard later, after the data source is selected in the Report Designer.
After clicking Finish, the Report Designer is invoked. In the Toolbox, navigate to the DX.20.2: XAF Data Sources for Reports group. Drag the CollectionDataSource item from this group to the Report Designer window.

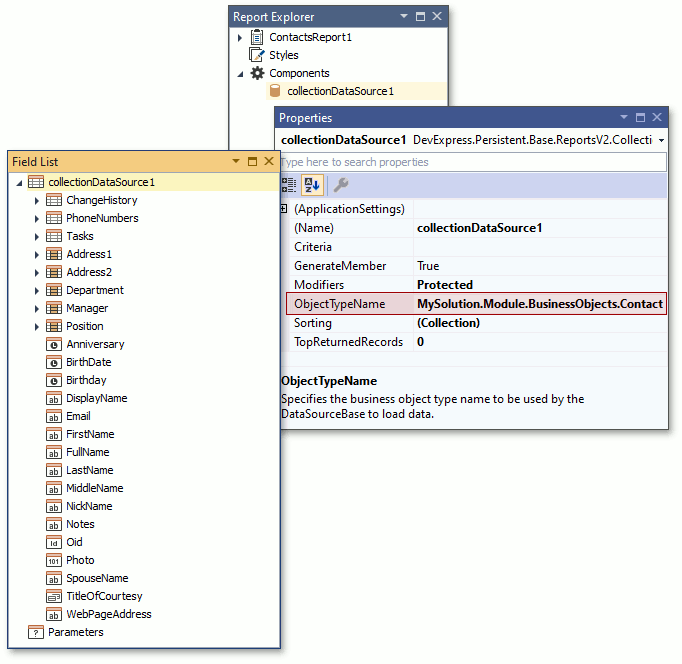
In the Report Explorer window, select the collectionDataSource1 item. In the Properties window, assign the “MySolution.Module.BusinessObjects.Contact” value to the ObjectTypeName property. Note the changes in the Field List window - the fields of the Contact class are now available if you expand the collectionDataSource1 node.
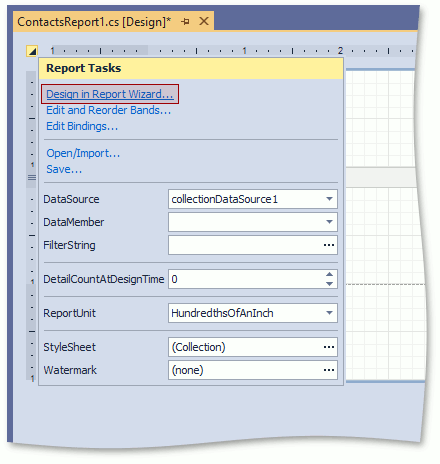
Click the Report Designer‘s Smart Tag and select Design in Report Wizard… in the invoked menu.
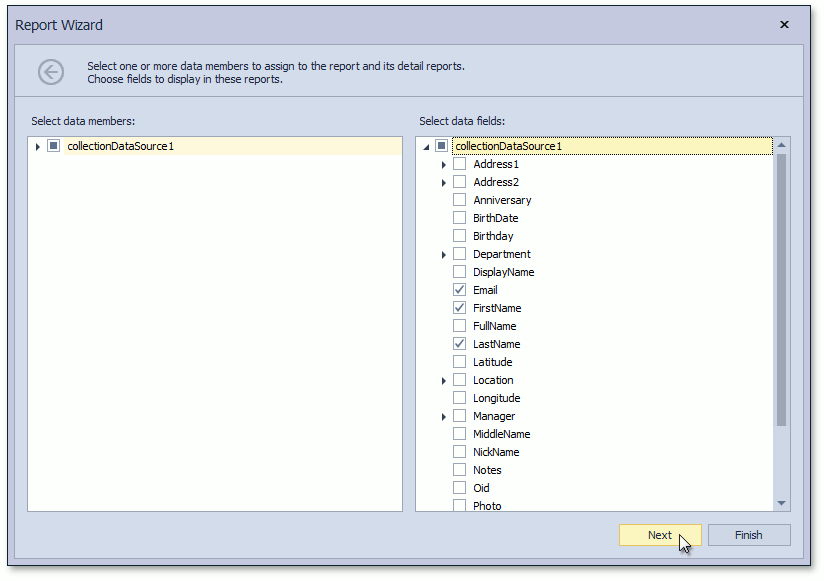
This invokes the Report Wizard. In the first step, you should select the Table Report and click Next. Since the data source is already specified, you will skip some wizard screens and the second step will allow you to choose the report data.

Select the fields that to be used within your report. Check the collectionDataSource1 data member on the left and the following data fields on the right:
- FirstName
- LastName
Click Next when finished.
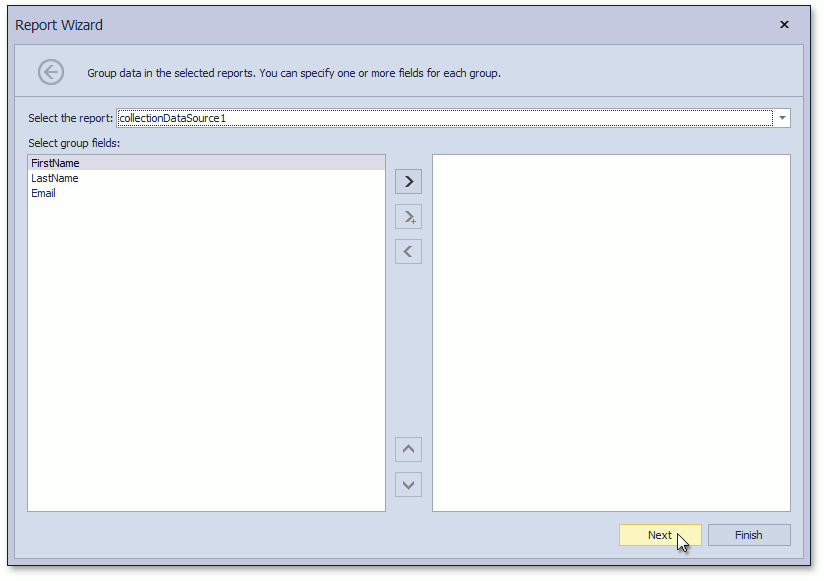
Select the fields by which to group the report rows. Since grouping is not required in this example, click Next to continue.
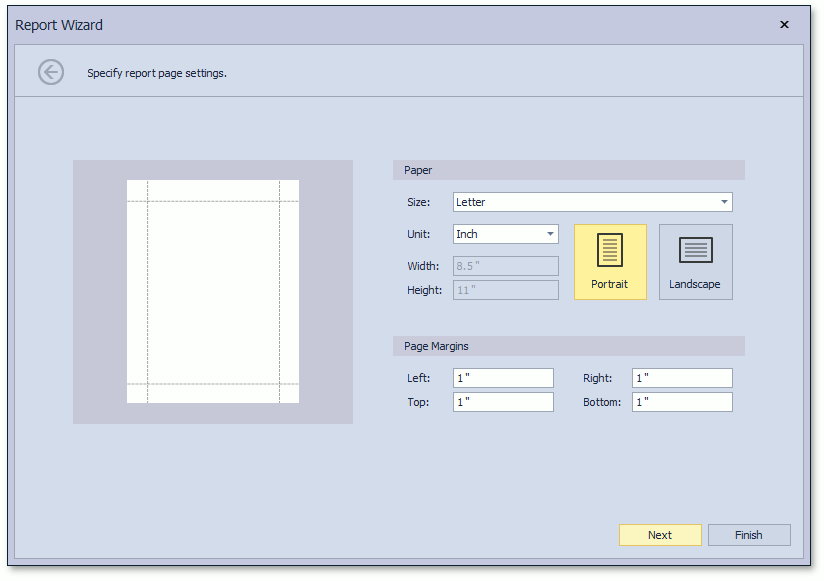
In the next step, you can customize the report page. Stay these settings unchanged and click Next.
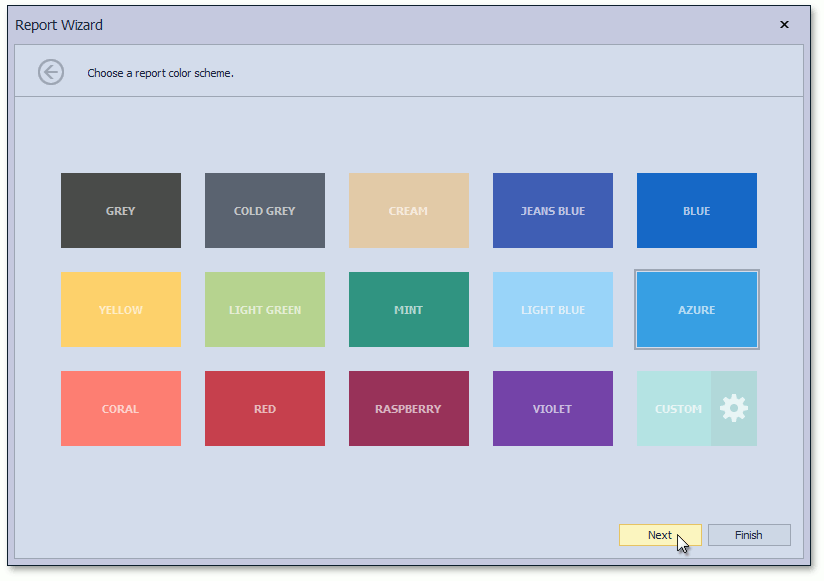
Choose a report color scheme, for example, Azure, and click Next.
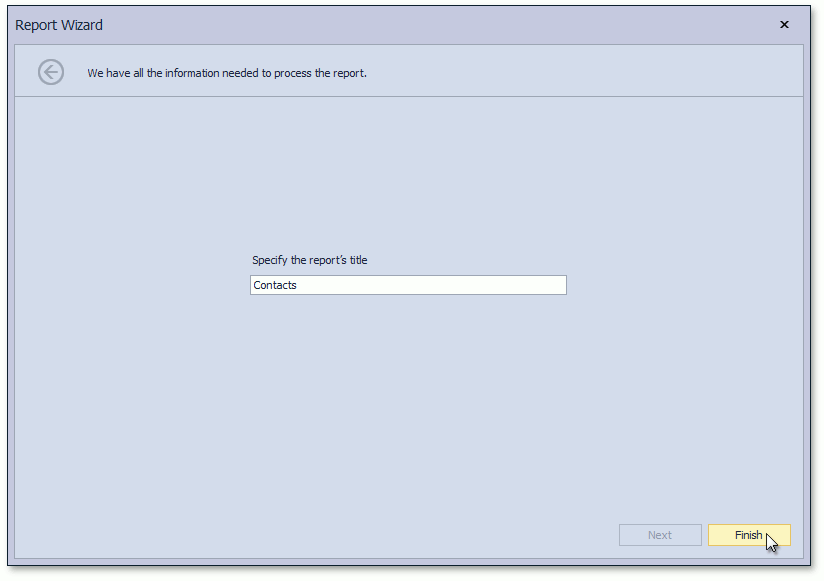
In the final step, you can set the report’s title. This text will be displayed at the top of your report. Set the title to “Contacts” and click Finish.
The report structure you created will be displayed in the Report Designer. Customize and save the report.

Note
At design time, the Preview tab of the Report Designer is empty. The CollectionDataSource and ViewDataSource components do not connect to a database directly and require an IObjectSpace instance (that can be created at runtime only) to load data. Thus, it cannot load data at design time.
Now register the report within your XAF application using the PredefinedReportsUpdater class. To do this, in the Solution Explorer, right-click the MySolution.Module | Module.cs (Module.vb) file and select View Code to edit its source code. The code snippet below demonstrates the required changes.
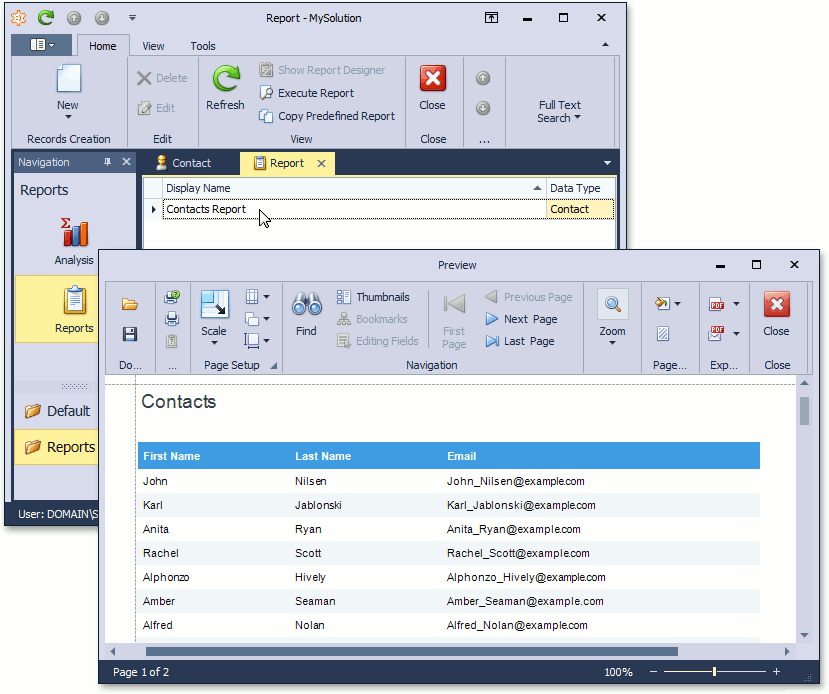
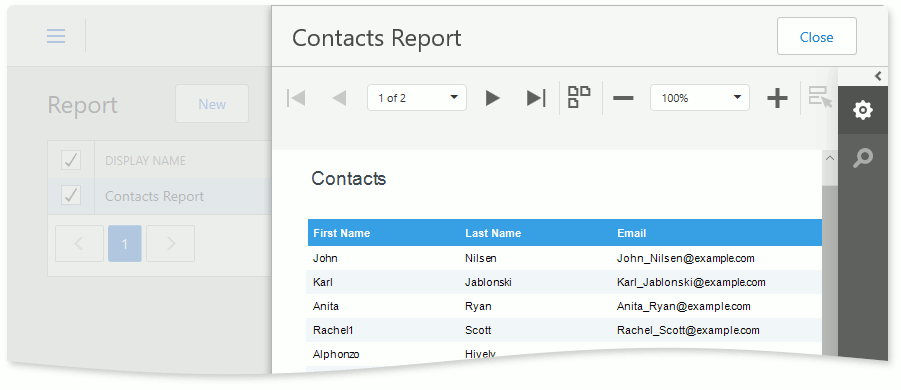
using DevExpress.ExpressApp.ReportsV2; using MySolution.Module.Reports; using MySolution.Module.BusinessObjects; //... namespace MySolution.Module { public sealed partial class MySolutionModule : ModuleBase { //... public override IEnumerable<ModuleUpdater> GetModuleUpdaters( IObjectSpace objectSpace, Version versionFromDB) { ModuleUpdater updater = new DatabaseUpdate.Updater(objectSpace, versionFromDB); PredefinedReportsUpdater predefinedReportsUpdater = new PredefinedReportsUpdater(Application, objectSpace, versionFromDB); predefinedReportsUpdater.AddPredefinedReport<ContactsReport>( "Contacts Report", typeof(Contact)); return new ModuleUpdater[] { updater, predefinedReportsUpdater }; } //... } }Run the WinForms or ASP.NET application, navigate to Reports and open the Contacts Report.
Note
- Predefined reports are not editable at runtime, but you can edit a copy of a report (see Modify an Existing Report).
- Report data can be sorted and filtered according to a parameter defined by the end-user.
Next Lesson: Create a Report at Runtime