Add a Simple Action using an Attribute
- 3 minutes to read
In the previous Add a Simple Action lesson, you learned how to add an Action by implementing the View Controller. There is another approach that may be more convenient when the Action is intended for a certain business class. In this lesson, you will learn how to add a Simple Action using an attribute. For this purpose, a new method will be added to the DemoTask class, and the ActionAttribute attribute will be applied to it.
Note
Before proceeding, take a moment to review the following lessons:
- Set a Many-to-Many Relationship (XPO/EF)
- Add a Simple Action
Add the Postpone method to the DemoTask class as shown below.
[DefaultClassOptions] [ModelDefault("Caption", "Task")] public class DemoTask : Task { //... [Action(ToolTip = "Postpone the task to the next day")] public void Postpone() { if(DueDate == DateTime.MinValue) { DueDate = DateTime.Now; } DueDate = DueDate + TimeSpan.FromDays(1); } }The Postpone method sets the Task.DueDate property to the next date, after the date previously specified. Since the ActionAttribute attribute is used, the Postpone button will be displayed in the UI, and the Postpone method will be called when clicking this button.
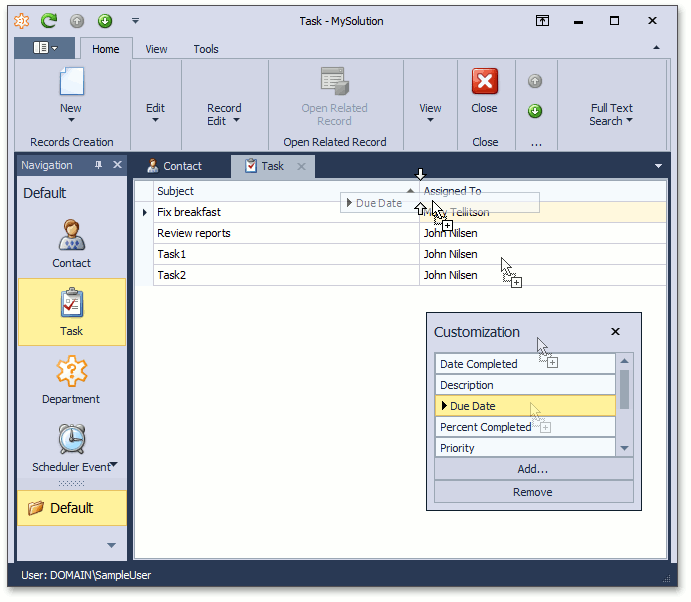
Run the WinForms or ASP.NET Web Forms application. Select the Task item in the navigation control. Show the Due Date column using the Column Chooser. To activate the Column Chooser, right-click the Task List View header. The Column Chooser allows end users to show or hide columns at runtime, by dragging a column header to or from the table header.
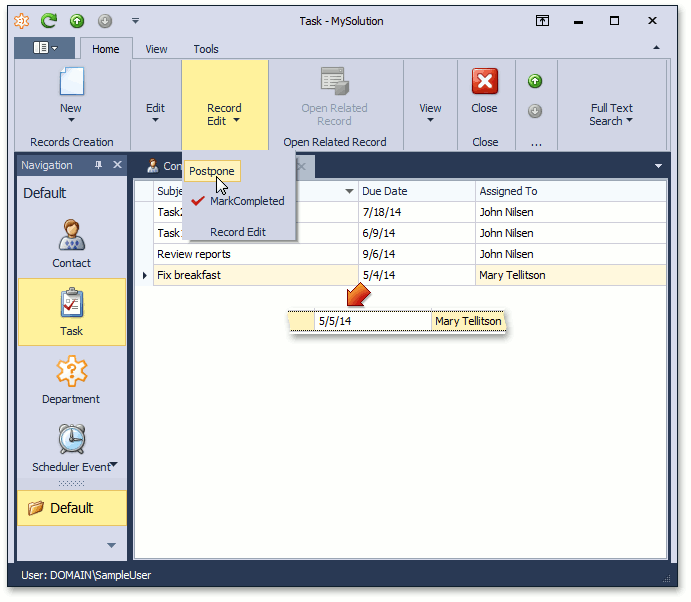
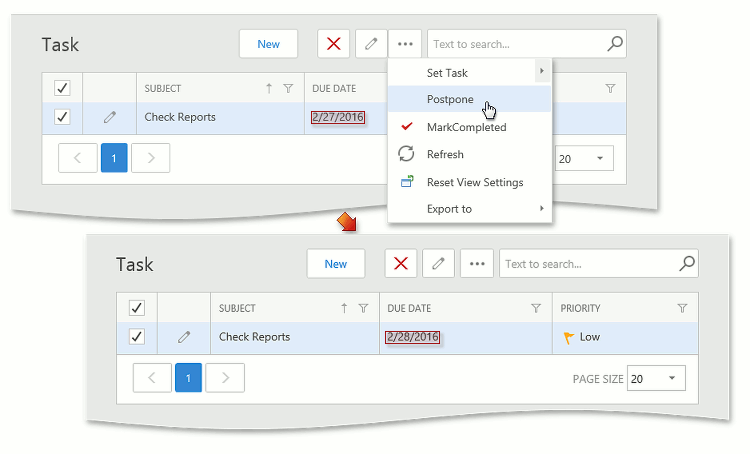
Select one or more Task objects in the Task List View. Find the Postpone toolbar button, which represents the Postpone Action that you have implemented above. Click this button. The DueDate property of the selected objects displayed in the Due Date column will be modified.
Tip
When the browser window shrinks, some Actions become hidden and can be accessed using the “…” button (see IModelActionWeb.AdaptivePriority).
Note
You can also use the Action attribute to implement an action that asks an end user to specify parameters in a popup dialog (e.g., the number of days to postpone a Task ). Refer to the How to: Create an Action Using the Action Attribute topic to see an example.
You can see the code demonstrated here in the MySolution.Module | Business Objects | DemoTask.cs (DemoTask.vb) file of the Main Demo installed with XAF. The MainDemo application is installed in %PUBLIC%\Documents\DevExpress Demos 21.2\Components\eXpressApp Framework\MainDemo by default. The ASP.NET Web Forms version is available online at https://demos.devexpress.com/XAF/MainDemo.
Next Lesson: Access Editor Settings