Filter List Views
- 4 minutes to read
In this lesson, you will learn how to filter a List View. Three techniques, based on different scenarios, will be illustrated. For this lesson, a filter will be applied to the Contact List View.
Note
Before proceeding, take a moment to review the following lessons.
- Inherit from the Business Class Library Class (XPO/EF)
- Implement Custom Business Classes and Reference Properties (XPO/EF)
- Set a One-to-Many Relationship (XPO/EF)
- Filter Lookup Editor Data Source
- Place an Action in a Different Location
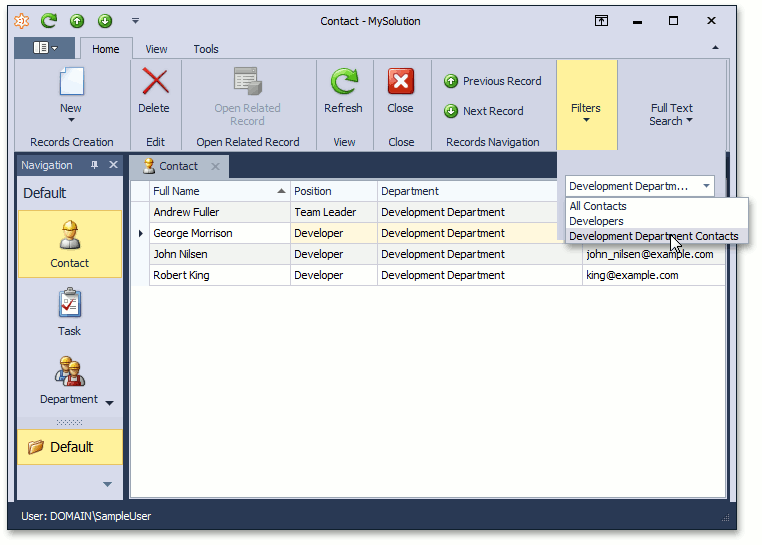
Activate a Filter Action
Use this approach to enable an end-user to apply predefined filters to a particular List View. With this approach, the SetFilter Action (whose items represent predefined filters) is visible in the user interface. This action is activated for List Views only. Predefined filters can be added in the Application Model, and are represented by child nodes of the Views | <ListView> | Filters node (see Filters Application Model Node).
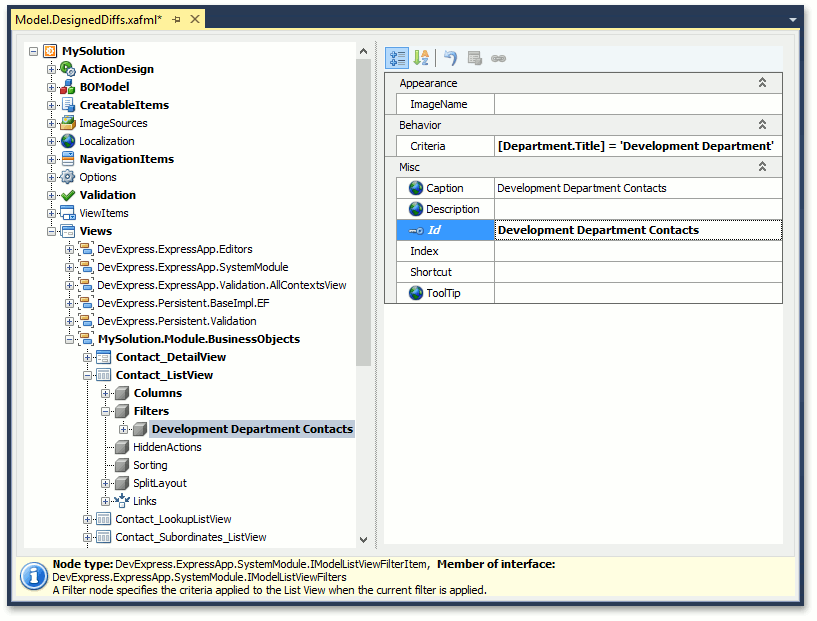
Invoke the Model Editor for the MySolution.Module project. Navigate to the Views | MySolution.Module.BusinessObjects | Contact_ListView node. Right-click the Filters child node and select New | ListViewFilterItem. For the new node, set the Id property to “Development Department Contacts”. To specify a criteria, set the Criteria property to the “[Department.Title] = ‘Development Department’” value.
Note
The Criteria property value must be specified using the Criteria Language Syntax. To simplify this task, you can invoke the Filter Builder dialog by clicking the ellipsis button (
 ) to the right of the Criteria value. Within this dialog, you can design a criteria expression using the visual Filter Builder.
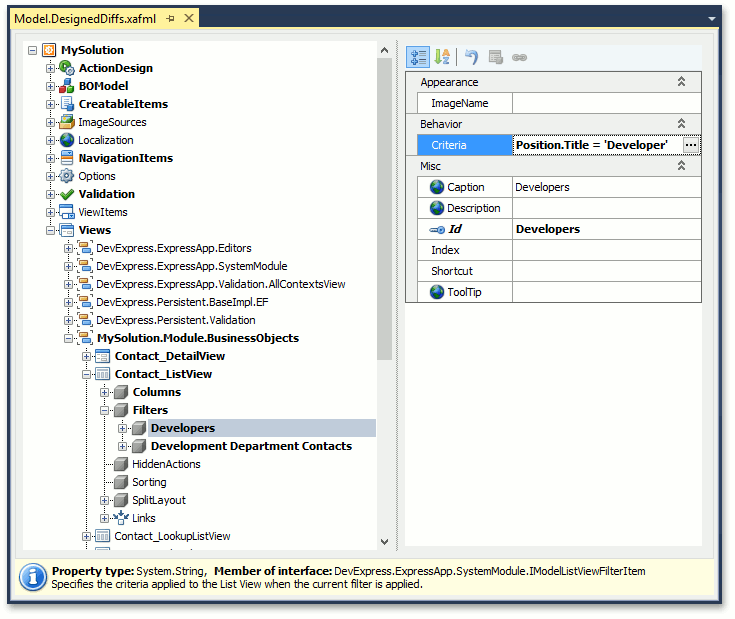
Add one more Filter node to the Filters node as defined above. Set the Id property to “Developers” and the Criteria property - to “Position.Title = ‘Developer’”.
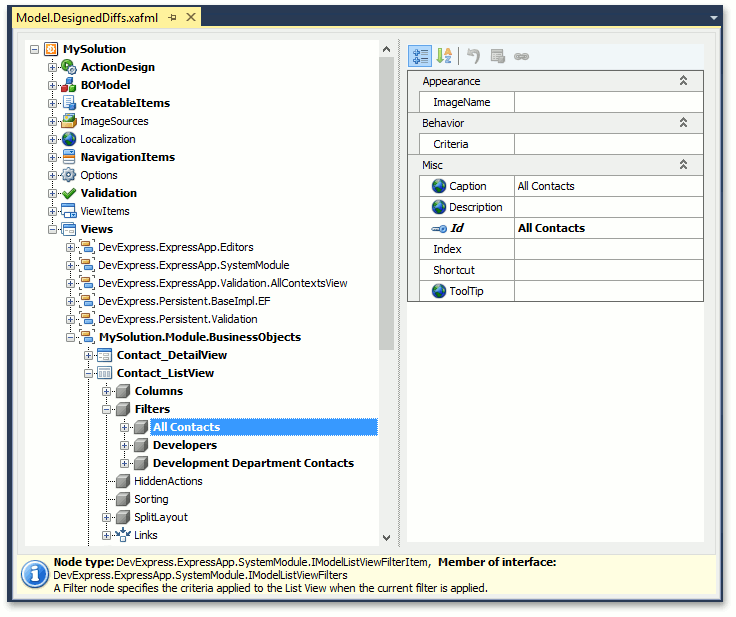
To be able to view all Contact objects in the List View, add one more Filter node to the Filters node, as defined above. Set the Id property to “All Contacts” and leave the Criteria property empty.
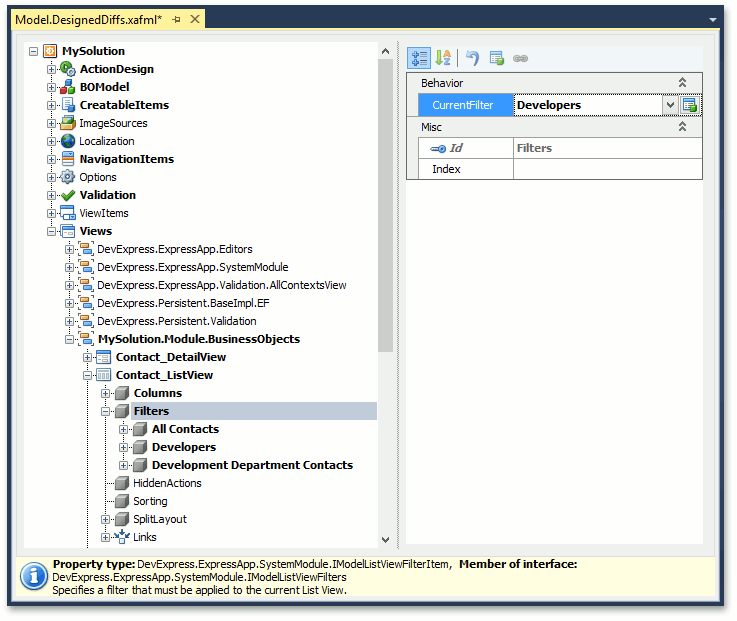
For the Filters node, set the CurrentFilterID property to “Developers”. Save the changes.
Run the WinForms or ASP.NET application and select the Contacts item in the navigation control. Notice that the SetFilter Action is now available.
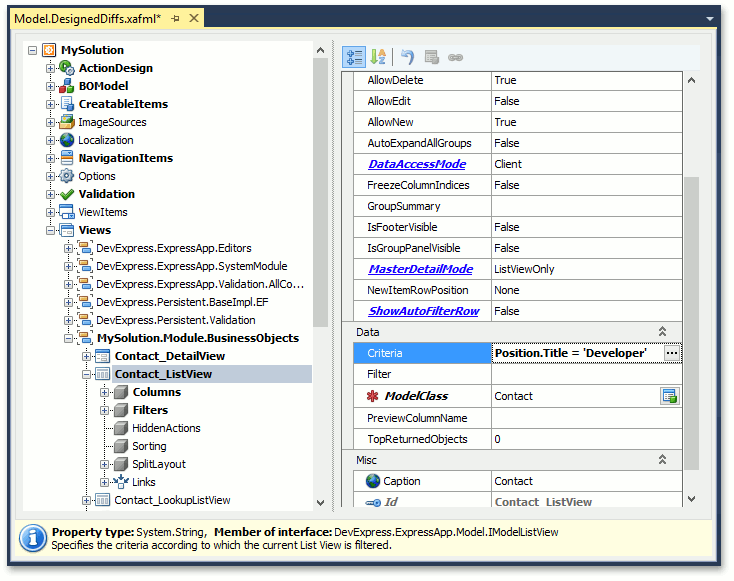
Use the Model Editor’s Application | Views | ListView Node
Use this approach to filter a List View via the Model Editor. Filters applied with the Model Editor cannot be changed by end-users.
Run the Model Editor for the MySolution.Module project. Navigate to the Views | MySolution.Module.BusinessObjects | Contact_ListView node. Set its Criteria property to “Position.Title = ‘Developer’”.
- Run the WinForms or ASP.NET application. Select the Contacts item in the navigation control and check to see if the Contact objects in the List View are filtered.
Filter on Data Source Level
Use this approach if you need to apply filters that will not be changed at runtime or via the Model Editor.
- Create a View Controller and generate the Activated event handler, as defined in the Add a Simple Action tutorial, as well as the other lessons from the Extend Functionality section.
Replace the generated code for the Activated event handler with the following code.
using DevExpress.Data.Filtering; using MySolution.Module.BusinessObjects; // ... public partial class FilterListViewController : ViewController { // ... private void FilterListViewController_Activated(object sender, EventArgs e) { if ((View is ListView) & (View.ObjectTypeInfo.Type == typeof(Contact))) { ((ListView)View).CollectionSource.Criteria["Filter1"] = new BinaryOperator( "Position.Title", "Developer", BinaryOperatorType.Equal); } } }- Run the WinForms or ASP.NET application and select the Contacts item in the navigation control. Check to see if the Contact objects in the List View are filtered.
Next Lesson: Apply Grouping to List View Data