Set a Many-to-Many Relationship (XPO)
- 3 minutes to read
In this lesson, you will learn how to set relationships between business objects. For this purpose, the Task business class will be implemented and a Many-to-Many relationship will be set between the Contact and Task objects. You will also learn the basics of automatic user interface construction for the referenced objects.
Note
Before proceeding, take a moment to review the Inherit from the Business Class Library Class (XPO) lesson.
To add the Task business class to the application, you can use the Task class from the Business Class Library. Since you need to set a relationship between the Contact and Task objects, you need to customize the Task class implementation. Inherit from this class and add the Contacts collection property, as shown in the following code.
using DevExpress.ExpressApp.Model; // ... [DefaultClassOptions] [ModelDefault("Caption", "Task")] public class DemoTask : Task { public DemoTask(Session session): base(session) { } [Association("Contact-DemoTask")] public XPCollection<Contact> Contacts { get { return GetCollection<Contact>(nameof(Contacts)); } } }Important
Do not modify the XPCollection property declaration demonstrated above. Manipulating the collection or introducing any additional settings within the declaration may cause unpredictable behavior.
In this code, the AssociationAttribute is applied to the XPCollection type Contacts property, representing the collection of associated Contacts. The Association attribute is required when setting a relationship between objects. Note that the Contacts property getter implementation - the GetCollection method - is used to return a collection.
Note
The ModelDefaultAttribute attribute, which is applied to the DemoTask class, specifies the “Task” value for the Caption property of the Application Model’s BOModel | DemoTask node. Generally, you can specify any property of the Application Model’s BOModel | <Class> or BOModel | <Class> | OwnMembers | <Member> node, by applying the ModelDefault attribute to a business class or its member.
Modify the Contact class implementation: add the Tasks property as the second part of the Contact-DemoTask relationship. Note that the Association attribute must be applied to this property as well. The following code demonstrates a code snippet from the Contact class implementation.
[DefaultClassOptions] public class Contact : Person { //... [Association("Contact-DemoTask")] public XPCollection<DemoTask> Tasks { get { return GetCollection<DemoTask>(nameof(Tasks)); } } }The code above will automatically generate the required intermediate tables and relationships.
Note
CodeRush includes a number of Code Templates that help generate business classes or their parts with a few keystrokes. To learn about the Code Templates for eXpress Persistent Objects, refer to the following help topic: XPO and XAF Templates.
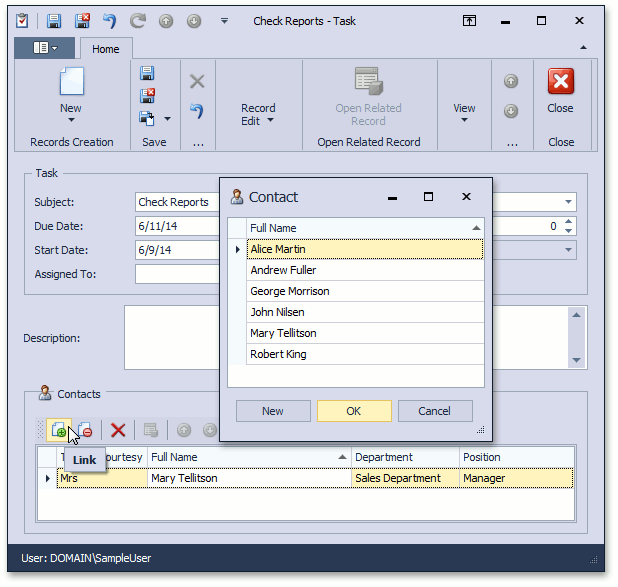
Run the WinForms or ASP.NET application. Invoke the Contact Detail View or Task Detail View. Add tasks to a Contact object’s Tasks collection, or contacts to a Task object’s Contacts collection. To apply the assignment, use the Link button that accompanies these collections.

You can see the code demonstrated in this lesson in the Contact.cs (Contact.vb) and DemoTask.cs (DemoTask.vb) files of the Main Demo installed with XAF. The MainDemo application is installed in %PUBLIC%\Documents\DevExpress Demos 20.2\Components.NET Core Desktop Libraries\eXpressApp Framework\MainDemo by default. The ASP.NET Web Forms version is available online at https://demos.devexpress.com/XAF/MainDemo.
Next Lesson: Set a One-to-Many Relationship (XPO)