How to: Create an Action Using the Action Attribute
- 6 minutes to read
This example demonstrates how to create an Action within a persistent class declaration (i.e., how to convert a persistent class method into a SimpleAction or PopupWindowShowAction).
Tip
A complete sample project is available in the DevExpress Code Examples database at How to: Create an Action Using the ActionAttribute.
Note
- Actions that are created by the Action attribute are not designed to operate when there are no selected objects. The attribute’s ActionAttribute.SelectionDependencyType parameter can be set either to RequireSingleObject or RequireMultipleObjects (see MethodActionSelectionDependencyType). To create an Action that does not require the selected object, add a Controller and implement an Action in it (see Add a Simple Action and Add an Action that Displays a Pop-up Window).
- The approach described in this topic is not supported by the Mobile platform. If it is necessary to implement this scenario in your Mobile application, contact us using the Support Center.
Create A Simple Action
Let us start with the following Task business class.
[DefaultClassOptions, ImageName("BO_Task"), DefaultProperty("Subject")]
public class Task : BaseObject {
    public Task(Session session) : base(session) { }
    private string subject;
    public string Subject {
        get { return subject; }
        set { SetPropertyValue("Subject", ref subject, value); }
    }
    private bool isCompleted;
    public bool IsCompleted {
        get { return isCompleted; }
        set { SetPropertyValue("IsCompleted", ref isCompleted, value); }
    }
}
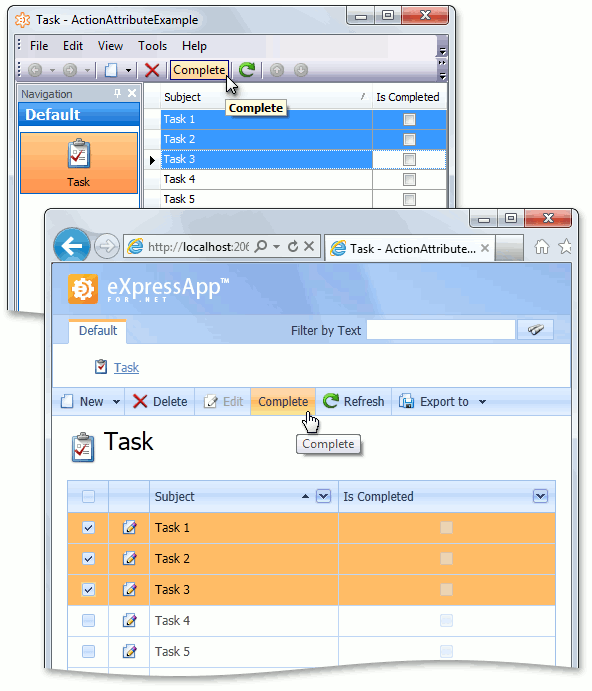
Assume that implementing an Action that changes the IsCompleted value to true is required. Add the following Complete method to the Task class and decorate it with the ActionAttribute attribute.
[Action(Caption="Complete", TargetObjectsCriteria = "Not [IsCompleted]")]
public void Complete() {
    IsCompleted = true;
}
Such methods are automatically collected from business classes by the ObjectMethodActionsViewController Controller. This controller will create the Task.Complete Action, which will invoke the Complete method for each selected Task. Note the use of the ActionAttribute.TargetObjectsCriteria parameter. The Action will be disabled for Tasks that are already completed (the IsCompleted property is true). You can pass other parameters to customize the Action’s look and behavior. The image below illustrates the Complete Action in the UI.
Create an Action that Displays the Pop-up Dialog
Next, extend the Task class demonstrated in the previous section of this topic with several additional properties to demonstrate a more complex scenario. Here are these properties (Deadline and Comments).
using DevExpress.ExpressApp.Model;
// ...
private DateTime? deadline;
public DateTime? Deadline {
    get { return deadline; }
    set { SetPropertyValue("Deadline", ref deadline, value); }
}
private string comments;
[Size(SizeAttribute.Unlimited), ModelDefault("AllowEdit", "False")]
public string Comments {
    get { return comments; }
    set { SetPropertyValue("Comments", ref comments, value); }
}
Assume that you are required to implement an Action that postpones the Deadline for a specified number of days and updates the Comments text. First, implement the following non-persistent class that declares parameters to be specified when an end-user postpones a Task.
using DevExpress.ExpressApp.DC;
// ...
[DomainComponent]
public class PostponeParametersObject {
    public PostponeParametersObject() { PostponeForDays = 1; }
    public uint PostponeForDays { get; set; }
    [Size(SizeAttribute.Unlimited)]
    public string Comment { get; set; }
}
Then, add the following Postpone method to the Task class. This method takes a parameter of the PostponeParametersObject type and is decorated with the Action attribute.
[Action(Caption = "Postpone",
    TargetObjectsCriteria = "[Deadline] Is Not Null And Not [IsCompleted]")]
public void Postpone(PostponeParametersObject parameters) {
    if (Deadline.HasValue && !IsCompleted && (parameters.PostponeForDays > 0)) {
        Deadline += TimeSpan.FromDays(parameters.PostponeForDays);
        Comments += String.Format("Postponed for {0} days, new deadline is {1:d}\r\n{2}\r\n",
        parameters.PostponeForDays, Deadline, parameters.Comment);
    }
}
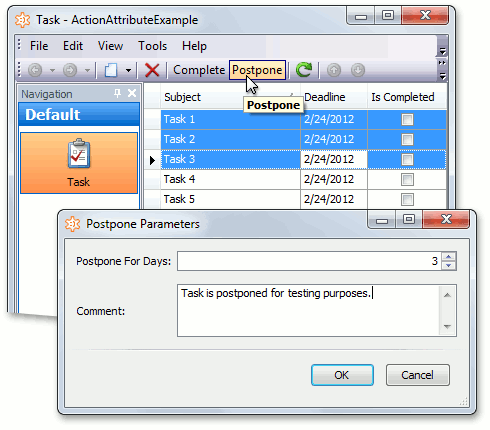
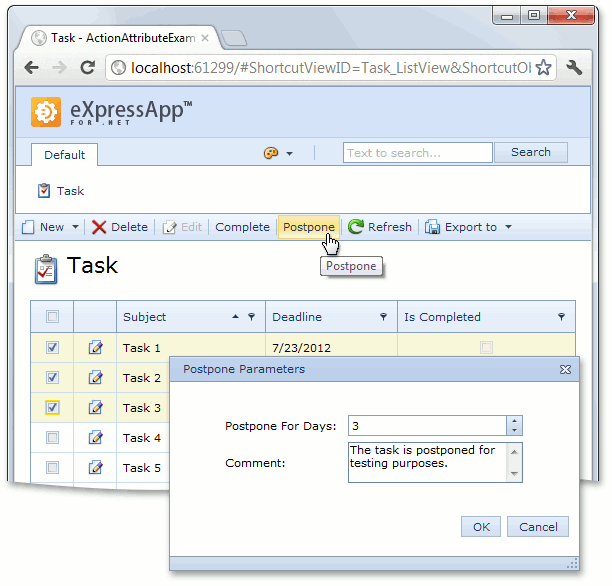
As a result, the Task.Postpone Action, which accompanies the Task Views, will be automatically created. This Action invokes a dialog with the PostponeParametersObject Detail View and executes the Postpone method after an end user specifies the parameters and clicks OK. The following images illustrate this.
Tip
If there is a requirement for reordering parameters displayed in a popup dialog, modify the layout of a parameter object’s Detail View in the Model Editor. In the example above, the appropriate Detail View node is PostponeParametersObject_DetailView. Refer to the View Items Layout Customization topic to learn more about layout customizations.
Access the current object instance
If you declare a PostponeParametersObject constructor that takes a parameter of a target business objects’ type (Task), the current Task instance will be passed to this constructor when the Action is executed.