How to: Create a Custom WinForms Ribbon Template
- 6 minutes to read
This example demonstrates how to modify the default ribbon template - create a ribbon page group and place an Action into it.
XAF provides two form styles of WinForms applications: Ribbon and Standard. Your application’s form style can be selected using the IModelOptionsWin.FormStyle property of the Options node. This example demonstrates how to modify the default ribbon template - create a ribbon page group and place an Action into it. If your FormStyle is Standard, please refer to the How to: Create a Custom WinForms Standard Template article instead.
Tip
A complete sample project is available in the DevExpress Code Examples database at https://supportcenter.devexpress.com/ticket/details/e216/how-to-create-a-custom-winforms-ribbon-template.
Consider the following Action located in the View category:
public class MyViewController : ViewController {
    public MyViewController() {
        SimpleAction myAction = new SimpleAction(this, "MyAction", "View");
        myAction.ImageName = "Action_SimpleAction";
    }
}
By default, you can place this Action into existing predefined categories only. The steps below demonstrate how you can place this Action into a custom location within the ribbon control.
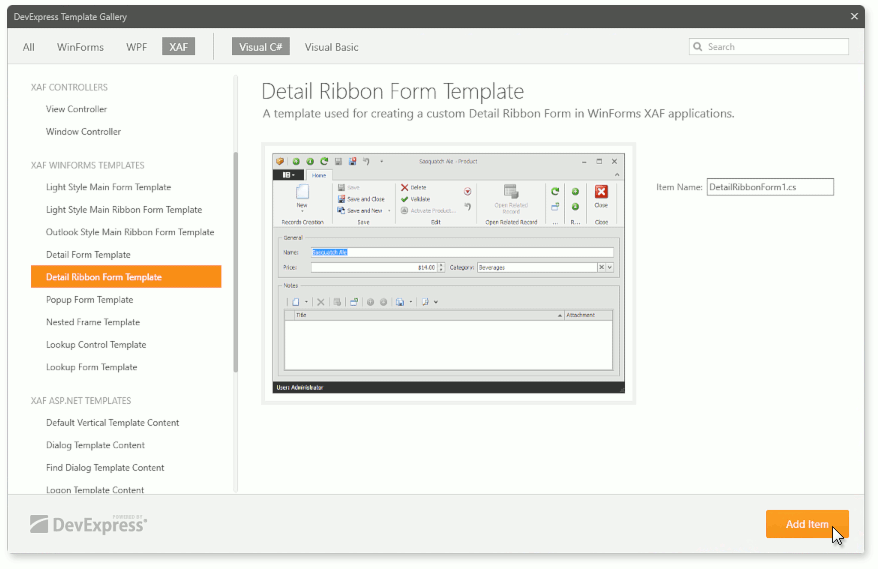
In the Solution Explorer, right-click the WinForms application project and choose Add DevExpress Item | New Item… to invoke Template Gallery. Then select the XAF WinForms Templates | Detail Ribbon Form Template project item and press Add Item.
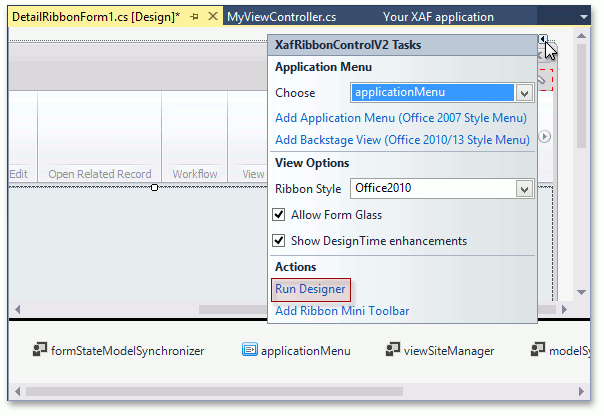
In the ribbon form designer, focus the ribbon control, click the smart tag in the top right corner and then click Run Designer.
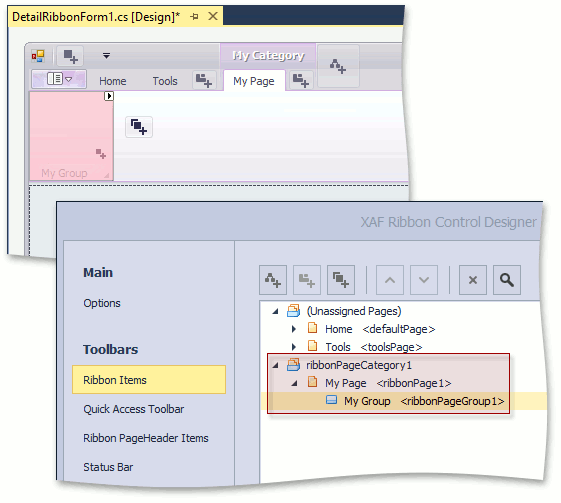
In the invoked XAF Ribbon Control Designer, create a Ribbon Page Group. You can add it into an existing Ribbon Page, or add a new page to the default or custom Page Category.
Note
XAF Ribbon Control Designer is an XAF-specific extension of the Ribbon Control Designer. Refer to the Ribbon Items Page topic to learn how to manage ribbon items, ribbon pages and page groups.
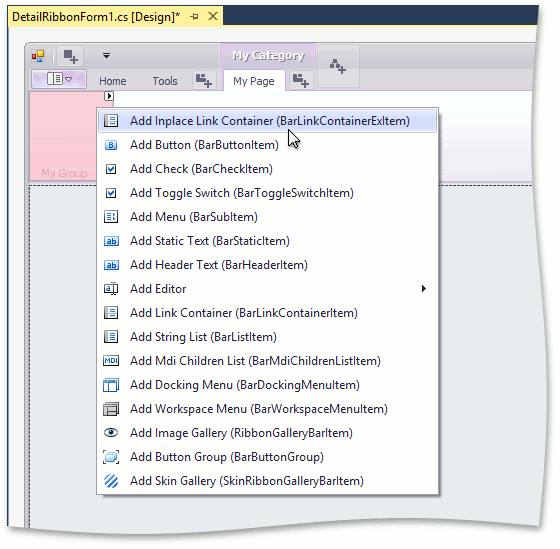
Close the XAF Ribbon Control Designer window. In the ribbon form designer, right-click the newly created Ribbon Page Group and select Inplace Link Container (BarLinkContainerExItem).
Tip
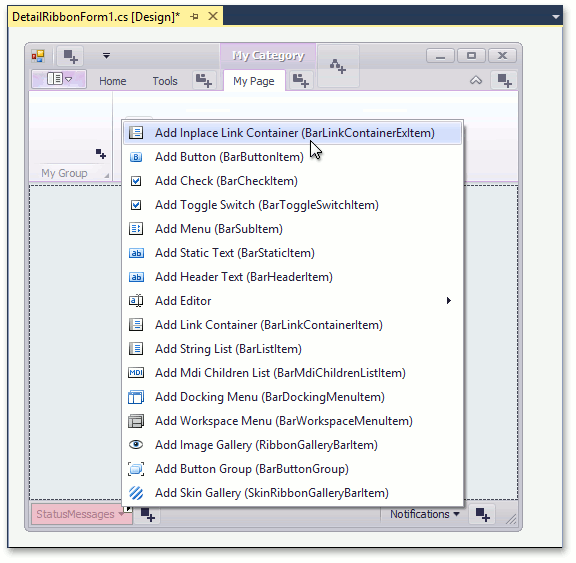
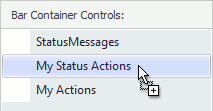
You can also add an Action Container to the status bar. In the Status Bar Menu of the detail form designer, right-click StatusMessages and select Inplace Link Container (BarLinkContainerExItem). Then, specify the caption for the new link container, for example, “My Status Actions”.
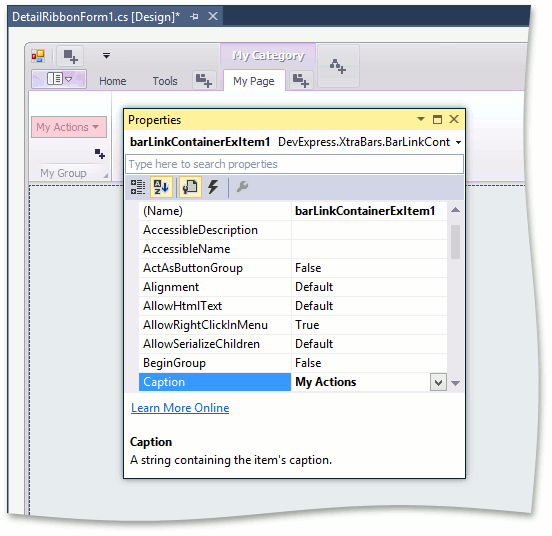
Set the link container’s Caption to My Actions.
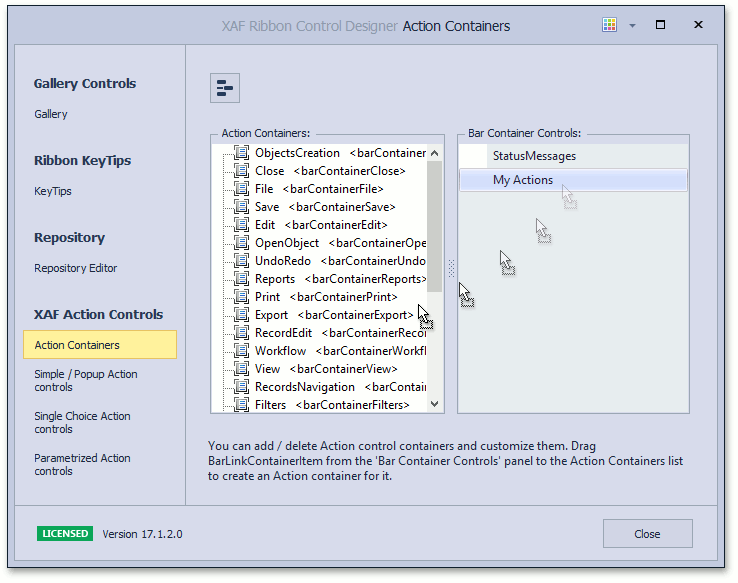
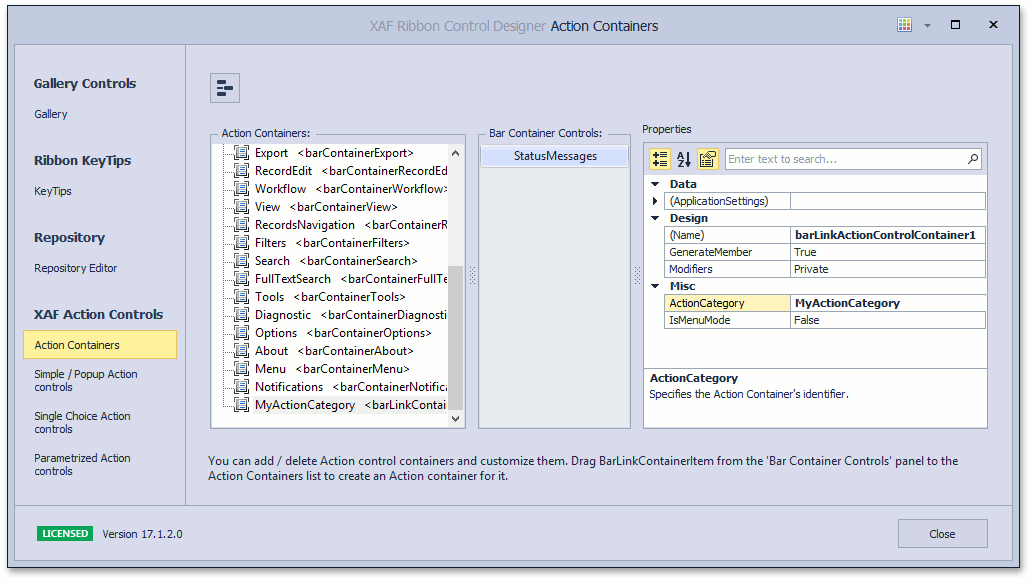
Open XAF Ribbon Control Designer again. Choose XAF Action Controls | Action Containers in the navigation panel. To make an action container from a link container, drag “My Actions” item from the Bar Container Controls list to Action Containers.
Tip
If you want to additionally place an action container to a status bar, drag the “My Status Actions” item from the Bar Container Controls list to Action Containers.
In the property grid to the right, specify the ActionCategory for the created Action Container. For example, set it to MyActionCategory.
Change the category of the Action that you want to place into the created ribbon page group. Use the same value that was specified in the previous step (e.g., MyActionCategory). If your Action is created in code, you can pass the category to the Action’s constructor
public class MyViewController : ViewController { public MyViewController() { SimpleAction myAction = new SimpleAction(this, "MyAction", "MyActionCategory"); myAction.ImageName = "Action_SimpleAction"; } }Alternatively, you can use the ActionBase.Category property in code or in the Controller designer, or customize the ActionDesign | ActionToContainerMapping node in the Model Editor (see Place an Action in a Different Location).
Finally, you should replace the default Template with the custom Template. Edit the application project’s Program.cs (Program.vb) file and handle the XafApplication.CreateCustomTemplate event.
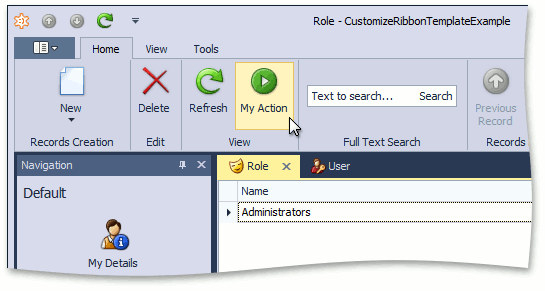
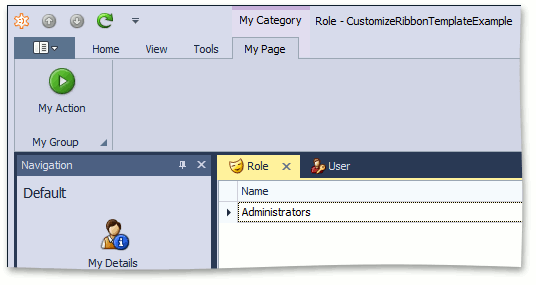
The following image illustrates the result:
Tip
You can localize this custom Template using the approach described in the How to: Localize a WinForms Template topic.
Note the following when implementing this approach:
In this example, it is assumed that you use the Tabbed MDI mode MdiShowViewStrategy which is the default for any XAF solution created from the Solution Wizard. In this mode, the visible ribbon elements are merged from the Detail Ribbon Form and Main Ribbon Form templates. In other modes, it may be required to customize the Main Ribbon Form instead of the Detail Ribbon Form, or both these templates, depending on your particular scenario. Here is the code of the CreateCustomTemplate event handler for a case when you customize both templates.
If users of your application can choose between the Ribbon and Standard form styles using the IModelOptionsWin.FormStyle property, then you may need to check this property value in the CreateCustomTemplate event handler before specifying a custom ribbon template.
Note that if you access the Application Model, you need to ensure that it is not set to null. For details, refer to the WinApplication.Setup method runs in a separate thread breaking change description.
If your XAF application was created in a version prior to 14.2, and then upgraded, please ensure that the WinApplication.UseOldTemplates property is set to false.