Lesson 3 - Create a Report with Parameters
- 3 minutes to read
This tutorial will guide you through the process of creating a user interface for modifying the parameter values of a report in a Silverlight application. This user interface allows you to filter a report based on the specified parameter value. For general information, see Use Report Parameters and Data Filter Overview.
In this tutorial, we will use the report created in the preceding lesson: Lesson 2 - Create a Data-Aware Report.
Perform the actions below to create a parameterized report in a Silverlight application.
Prepare the Report
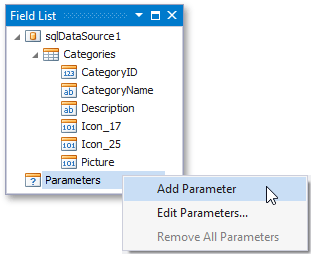
To create a parameter that will serve as a criteria for filtering a report’s data, open the report designer at design time within Visual Studio, and invoke the Field List. Then, right-click the Parameters section and select Add Parameter in the invoked menu.
In the invoked Add New Parameter dialog, specify the parameter’s Parameter.Name, Parameter.Description and Parameter.Type.
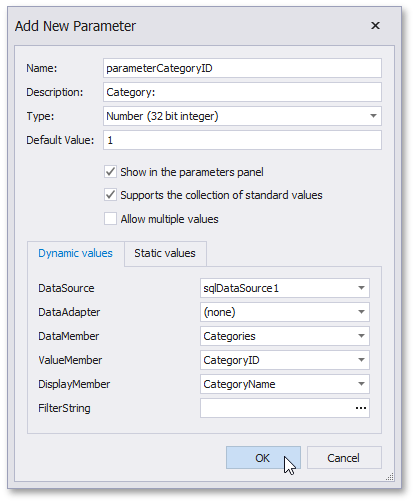
The parameter type should correspond to the type of data the parameter will pass (e.g., the type of the data field to which the parameter is to be bound). In this example, you will filter the report based on the CategoryID data field, so the Parameter.Type property is set to Number (long integer).
Note
For parameters whose type corresponds to any of the Type enumeration values, an appropriate editor will be created automatically, corresponding to the parameter type. To learn about using custom parameter types, see Create Custom Report Parameters.
In the same dialog, apart from specifying the default value for the parameter, you can define either a static or dynamic list of values for the parameter. To do this, enable the Supports the collection of standard values option.
Then specify the parameter’s data source options and set its Value member to CategoryID, and Display member to CategoryName.
Make sure to leave the Show in the parameters panel property enabled, because if a report has no visible parameters, their default values are passed silently (i.e., the user interface for parameters is not shown and their values cannot be modified on the client).
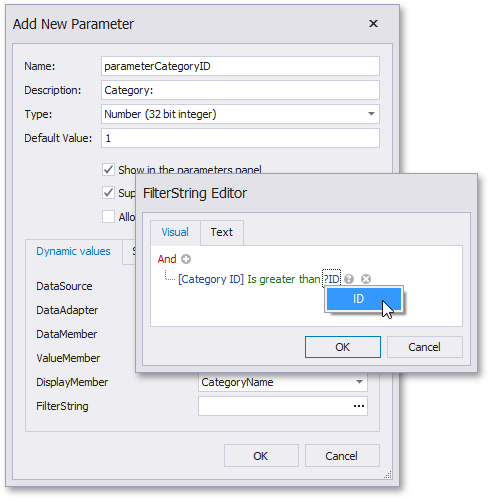
You can filter parameter values by specifying the filtering expression that can also include other parameter values.
To run the FilterString editor, click the ellipsis button for the LookUpSettings.FilterString property in the Add New Parameter dialog window.
Use the invoked editor to construct a filtering expression. To access the value of another parameter, click the icon to the right of the condition field until it turns into a question mark.
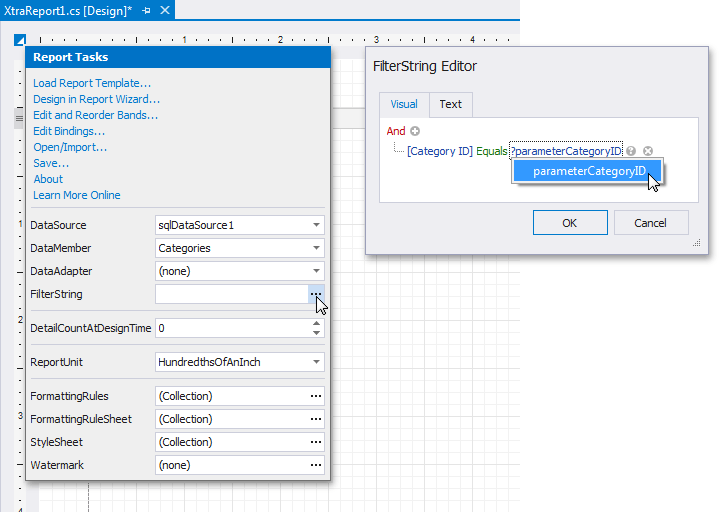
To define a filtering criteria for the report, click its smart tag, and in the invoked actions list, click the ellipsis button for the XtraReportBase.FilterString property.
In the invoked FilterString Editor, choose the data field and the parameter, as well as the comparison operator for the filtering criteria.
Note
If the parameter type does not correspond to the field type, the parameter is not listed in the editor.
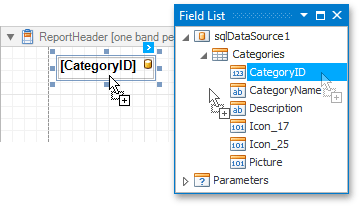
To show the current category ID in the report, bind the label residing in the Report Header band to the CategoryID data field.
You can choose whether or not a report document is generated using the default parameter values before they are submitted on the client via the XtraReport.RequestParameters property.
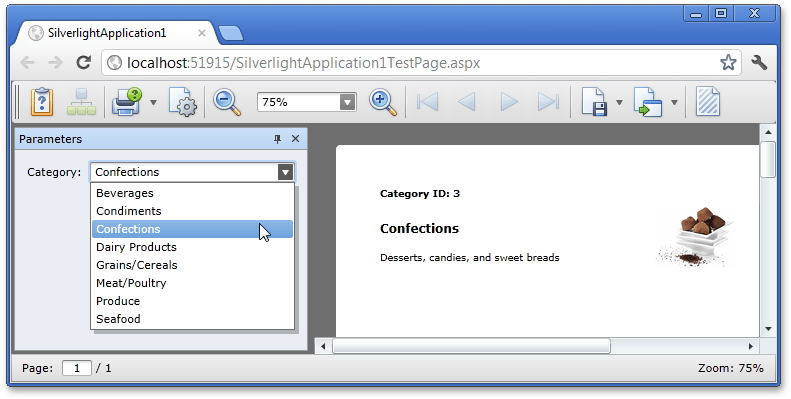
View the Result
The report with parameters is now ready. Run the application and view the result.