Display Remotely Created Documents
- 3 minutes to read
This tutorial illustrates how to use ASPxDocumentViewer to publish a document the DevExpress Report and Dashboard Server or WCF report service generates remotely.
Note
See the Display Documents from the Report and Dashboard Server topic to learn how to show remotely generated reports in the HTML5 Document Viewer.
Create a Web Application
To get started with this tutorial, open an existing ASP.NET Web Application with a print preview or create a new one from scratch. Refer to the Add a Document Viewer to an ASP.NET WebForms Application tutorial to learn how to add a print preview to a Web application.
Publish a Document Generated by a WCF Report Service
The following steps are required to publish a document a WCF report service provides:
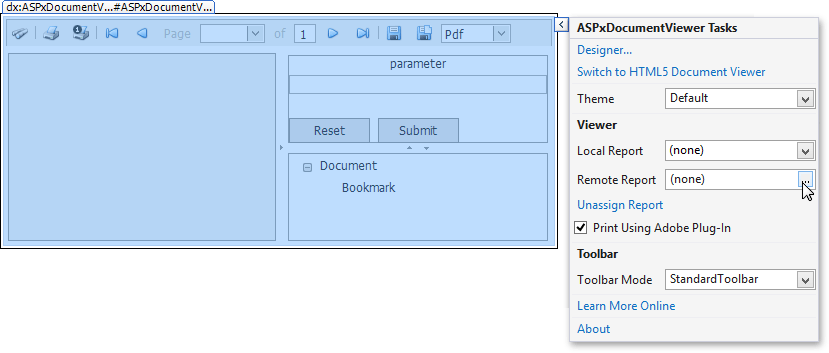
Click the ASPxDocumentViewer control’s smart tag. In the invoked actions list, click the Remote Report property’s ellipsis button.
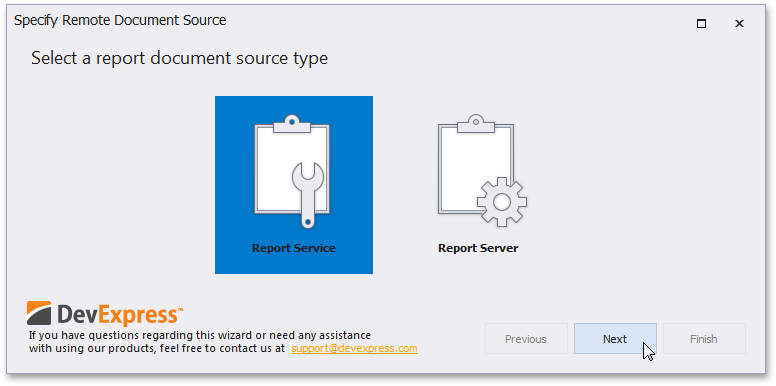
In the invoked wizard’s first step, select Report Service and click Next.
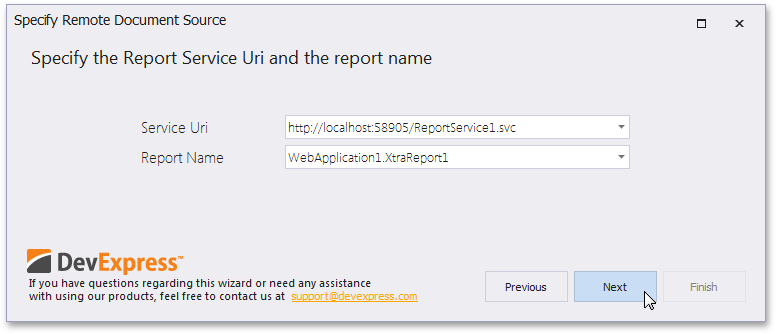
Next, specify the URI for the report service the server-side application hosts, as well as the name of the remote report you wish to display in the document viewer. Click Next to proceed to the next step.
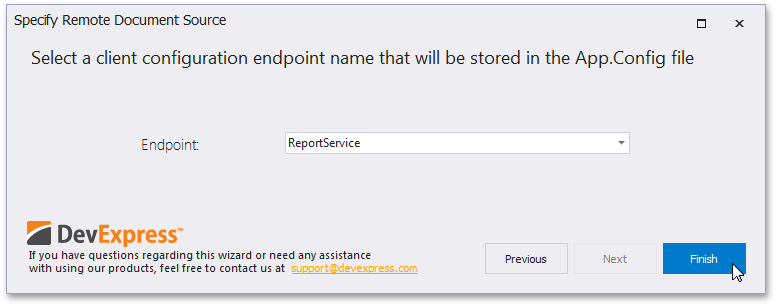
Specify a name for the endpoint and click Finish to exit the wizard.
Publish a Document Generated by a DevExpress Report and Dashboard Server
The following steps are required to publish a document a DevExpress Report and Dashboard Server provides:
Click the ASPxDocumentViewer control’s smart tag, and select Remote Report in the invoked actions list.
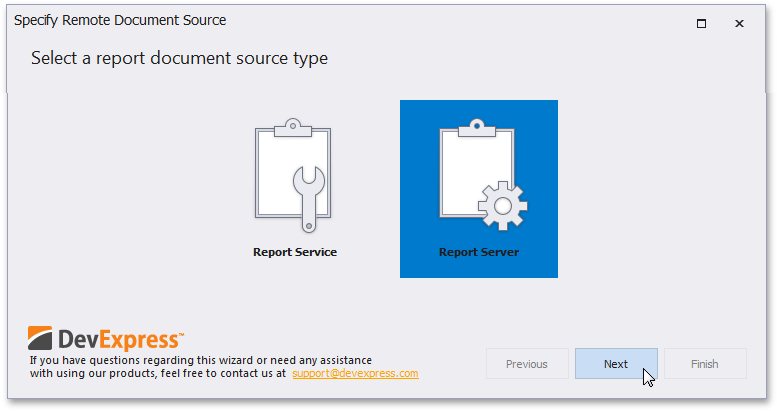
In the invoked wizard’s first step, select Report Server and click Next.
Next, specify the Report and Dashboard Server address and choose the authentication type.
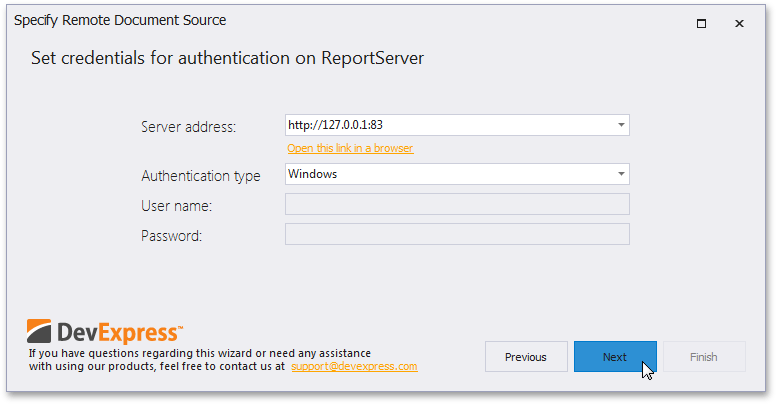
If you selected the Report Server Authentication option, you need to specify the user credentials as well. The wizard uses the specified credentials to obtain the information required in later steps. Refer to the code sample at the end of this section to learn how to pass credentials to the Report and Dashboard Server at runtime.
Click Next to proceed to the next step.
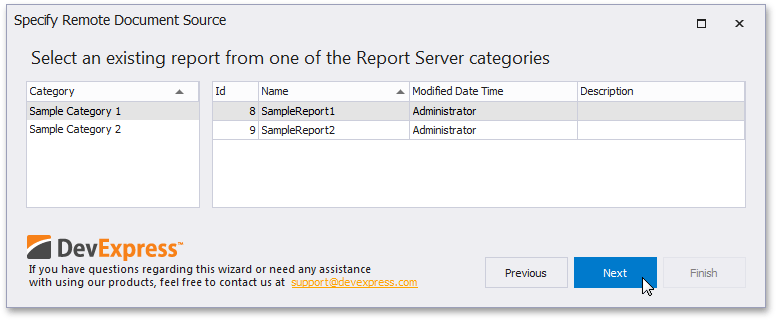
In the following step, select a report to display in the Document Viewer from the list of available reports and click Next.
Specify a name for the newly added endpoint and click Finish to exit the wizard.

Report Server Authentication
To pass user credentials when connecting to a Report and Dashboard Server at runtime, handle the DocumentViewerRemoteSourceSettings.RequestCredentials event of the object the ASPxDocumentViewer.SettingsRemoteSource property returns.
void SettingsRemoteSource_RequestCredentials(object sender,
DevExpress.XtraReports.Web.DocumentViewer.WebAuthenticatorLoginEventArgs e) {
    e.Credential = new DevExpress.XtraReports.Web.DocumentViewer.WebCredential("username", "password");
    e.Handled = true;
}
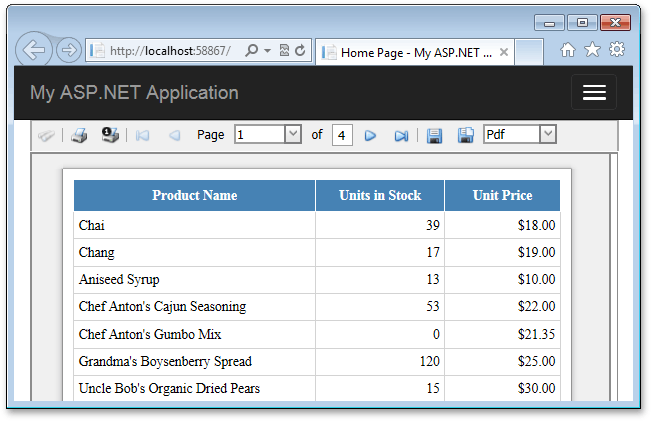
Launch the Application and View the Result
The client-side print preview is now capable of obtaining documents created on the application’s server side.
Run the application to preview the document and use the corresponding toolbar commands to print or export the previewed report.