Conditionally Suppress Controls
- 2 minutes to read
This tutorial demonstrates how to conditionally suppress report controls.
Note
This approach to conditionally suppressing controls applies when the UserDesignerOptions.DataBindingMode is set to DataBindingMode.Bindings.
See Conditionally Suppress Controls to learn about the alternative approach to solving this task.
See Data Binding Modes to learn more about the available binding modes.
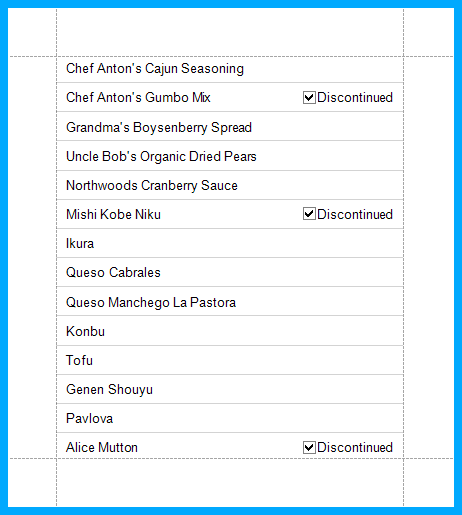
The report created in this tutorial displays check boxes only for data fields whose value is true:
Do the following to conditionally suppress controls in a report:
- To create a table report in this tutorial, start with a report that is bound to the “Products” table of the sample Northwind database (the nwind.mdb file is included with the XtraReports installation). To learn more about binding a report to a data source, see Provide Data to Reports.
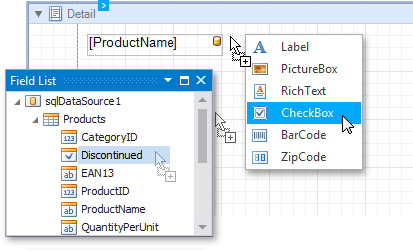
Drag the ProductName field from the Field List window, and drop it on the report’s Detail band.
To create a check box, drag the Discontinued field with the right mouse button, drop it on the Detail band, and in the invoked menu, select CheckBox.
Select the created xrCheckBox1 control and click its smart tag. In the invoked actions list, click the ellipsis button for the XRControl.FormattingRules property.
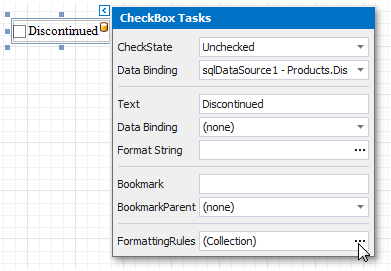
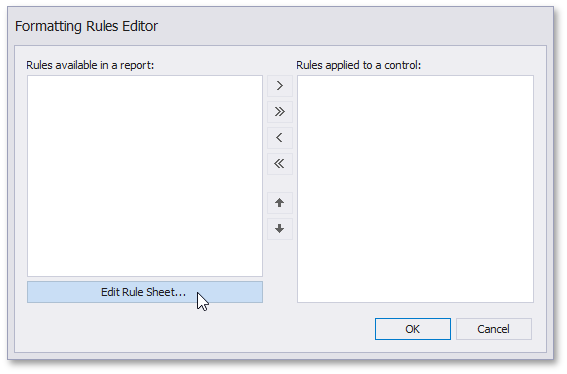
Then, in the invoked Formatting Rules Editor, click the Edit Rule Sheet… button.
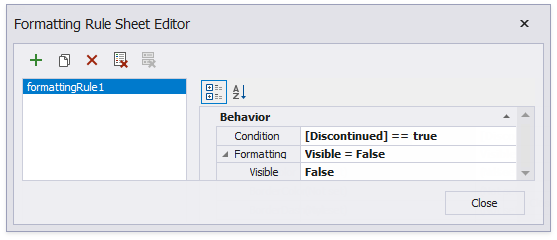
In the invoked Formatting Rule Sheet Editor, click
 to create a new formatting rule. For this rule, set the Visible property to false.
Then, locate the FormattingRule.Condition property and click its ellipsis button. The Condition Editor will appear.
In this editor, define a Boolean expression for the rule (e.g., [Discontinued] == False). This means that the Discontinued data field should be false for the appropriate control to be hidden.
Click OK to save the changes and close the dialog. Then, click Close to quit the Formatting Rule Sheet Editor.
Now, in the Formatting Rules Editor, you can see the created rule (named formattingRule1), which should be moved to the list of active rules at the right using the arrow buttons in the middle of the dialog.
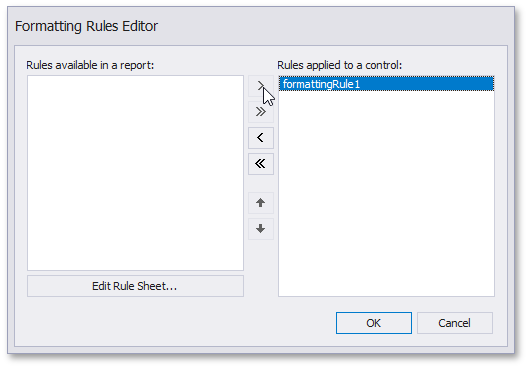
It is also possible to customize the precedence of formatting rules by using the up and down arrow buttons at the right of the dialog. So, the rules are applied in the same order they are on the list, and the last rule on the list has the highest priority.