Create Labels and Badges in the Visual Studio Report Designer
- 2 minutes to read
This tutorial describes how to create a label report that contains employee badges.

Do the following to create a label report:
Create a new application or open an existing application. For more information, review the following help topic: Get Started with DevExpress Reporting.
- Add a new blank report to it and bind the report to the “Employees” table of the sample Northwind database.
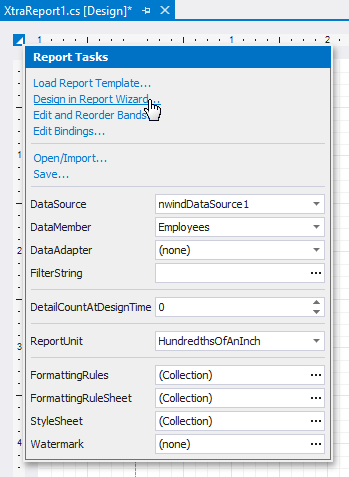
To invoke the Report Wizard, click the report’s smart tag, and in the invoked actions list, click Design in Report Wizard… link.
- The wizard guides you through the process of creating a label report. For detailed instructions on the wizard’s steps, refer to Labels.
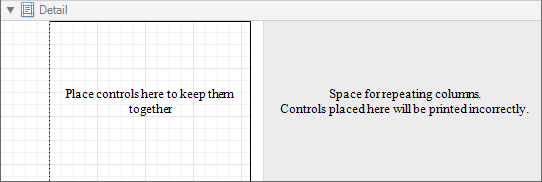
After performing the above steps you will see that the report’s Detail band is now divided into three differently colored areas. The first area at the left-hand side indicates the actual available band area for controls to be placed within it. The gray area at the right-hand side is intended for the columns in which labels will be displayed, so it cannot be occupied by controls. Finally, the white area specifies an indent between the available and reserved areas.
Drop the required fields from the Field List onto the available Detail band’s area, and adjust the layout.
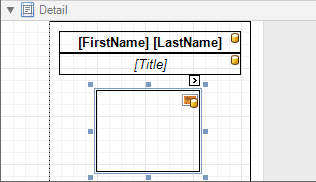
If required, you can apply mail merge to combine several fields (e.g. FirstName and LastName) within the same XRLabel.
For the XRPictureBox control bound to the Photo field, you can set its XRPictureBox.Sizing property to ZoomImage.
Your report is now ready to be generated. In Visual Studio, you can view the report by switching to the Preview tab.
Create Labels and Badges in the End-User Report Designer
Tutorials that explain how to create different reports in EUD Report Designers for WinForms and Web are included in the End-User Documentation online help section: