Add Custom Controls to the Toolbox
- 2 minutes to read
Add to the Visual Studio Toolbox
Do the following to add a custom control to the Visual Studio Toolbox:
Set the ToolboxItem attribute to true for the custom control class:
When you implement a custom control in a report project, the control appears in the Toolbox after you specify the ToolboxItem attribute and rebuild the project.
If you store a custom control in a separate assembly, follow steps 2-3 after you specify the ToolboxItem attribute to reference the assembly in the project:
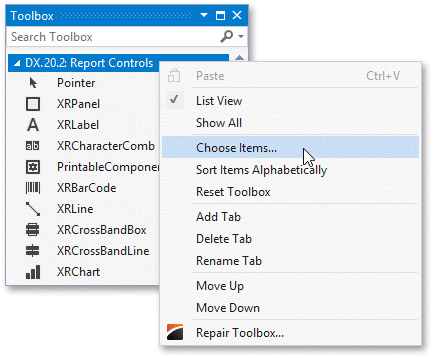
In the Toolbox, right-click the DX.20.2: Report Controls tab and select Choose items.
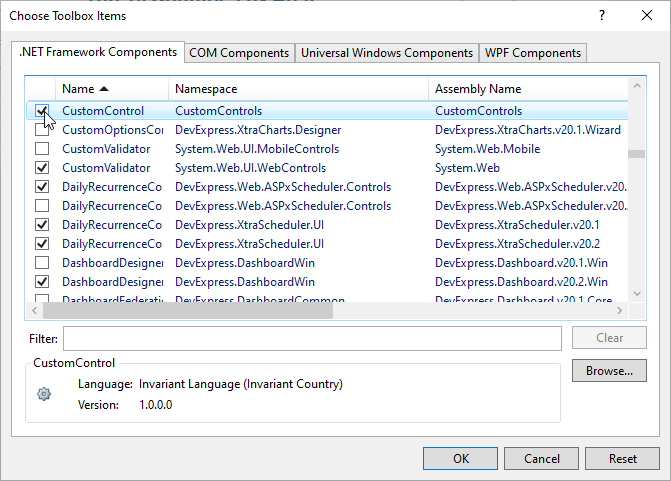
In the invoked Choose Toolbox Items dialog, click Browse and specify the path to the assembly. Then select the added assembly:
Specify an Icon for the Visual Studio Toolbox
After you add a custom control to the Toolbox, the control’s icon in the Toolbox and Report Explorer is set to the default icon. If you implement a control in a separate assembly, you can specify a custom bitmap icon for this control. To do this, do the following:
- Add an icon to the project where the control class is stored and set the icon’s Build Action property to Embedded Resource.
Apply the ToolboxBitmapAttribute attribute to the control’s class to specify the icon:
Rebuild the project and add the updated control to the toolbox.
Add to the End-User Report Designer Toolbox
Refer to the following tutorials for information on how to add a custom control to an End-User Report Designer’s toolbox on different application platforms:
- Add a Custom Control to the End-User Report Designer Toolbox (Windows Forms applications)
- Add a Custom Control to the Report Designer Toolbox (WPF applications)
- Create and Register a Custom Control in the Report Designer Toolbox (ASP.NET WebForms)
- Create and Register a Custom Control in the Report Designer Toolbox (ASP.NET MVC)
- Create and Register a Custom Control in the Report Designer Toolbox (ASP.NET Core)