Lesson 5 - Provide Interactivity to a Report
- 4 minutes to read
This step explains how to make the tutorial report interactive:
- enable document content editing in Print Preview,
- provide the drill-down functionality that allows end users to collapse and expand specific document sections,
- enable report data sorting in Print Preview.
Enable Content Editing in Print Preview
This section describes how to enable content editing of specific report controls in Print Preview.
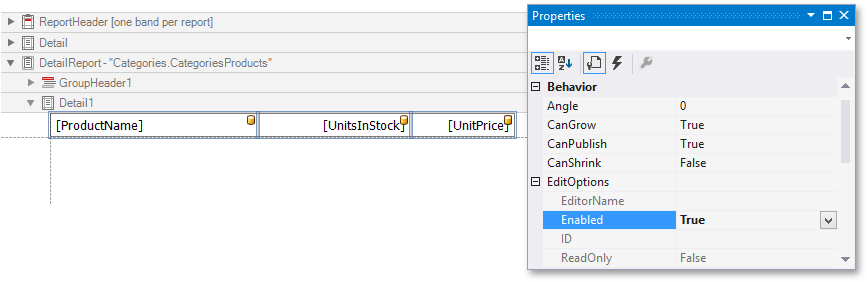
In the Detail band of the master report, select the cells that you want to edit in Print Preview (to select multiple cells, click them while holding down CTRL or SHIFT).
Switch to the Properties window, expand the XRLabel.EditOptions property and set the EditOptions.Enabled property to true.
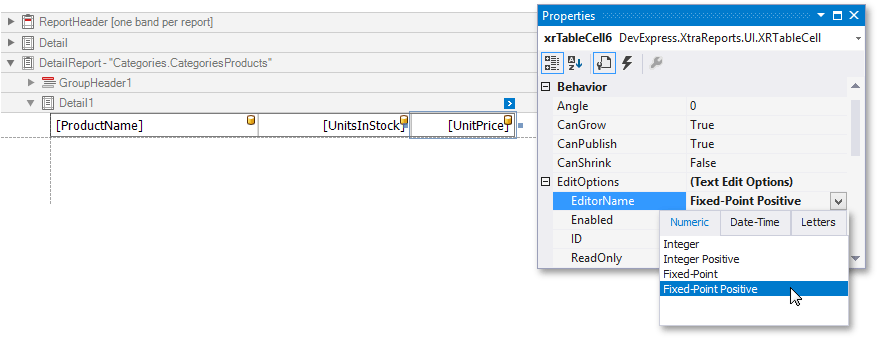
To provide a mask for editing decimal values of the UnitPrice field, set the TextEditOptions.EditorName property to Fixed-Point Positive to assign the required editor with a corresponding mask.
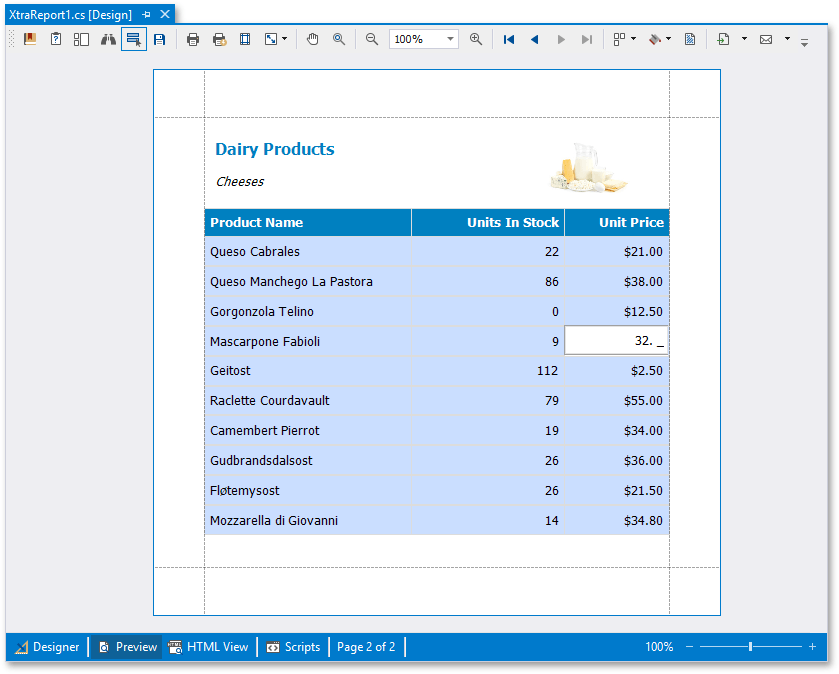
Switch to the Preview tab. Click the ![]() button on the Print Preview toolbar to highlight all editing fields available in the document.
button on the Print Preview toolbar to highlight all editing fields available in the document.
Clicking a field invokes the appropriate editor. Use the TAB and SHIFT+TAB keys to apply the entered values and navigate between editing fields.
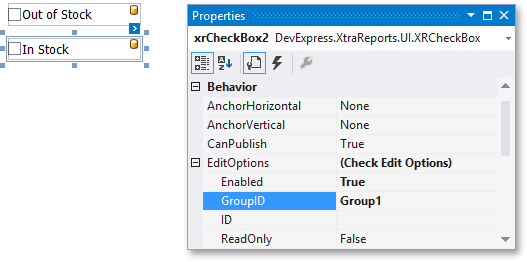
In addition to editing text, you can enable switching check box states in Print Preview. When two or more check boxes have identical CheckEditOptions.GroupID values, the corresponding editors belong to a single logical group (that is, only one option can be selected within a group at a time).
Note
The changes made to a control’s content in Print Preview have no effect on other parts of the document (for example, the related summary results, grouping, sorting, bookmarks and other settings that have already been processed before generating the document).
See Content Editing in Print Preview to learn more about this feature.
Create a Drill-Down Report
This section describes how to add drill-down functionality to your report, hide the detail data in a document and access this data by clicking a link in the document.
Drop a label onto the master report’s Detail band to create a link for toggling the detail report’s visibility state.
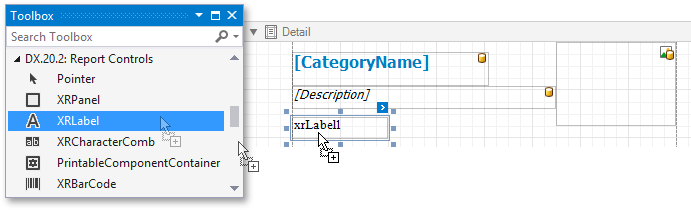
Double-click the added label and type Show/Hide Details. To identify this label, specify its Name.
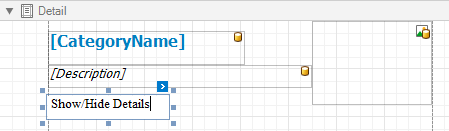
- Apply the required formatting (for example, the blue color and underlined text) for this label to resemble a link.
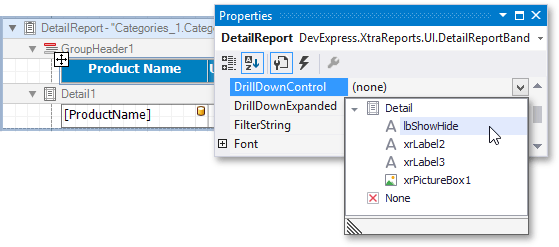
Select the Detail Report band, and in the Properties window, expand the drop-down list for the DetailBand.DrillDownControl property.
The list displays all report controls available on the report band that is one level above the current band in the hierarchy. Select the previously added label to make it expand or collapse the detail report when clicked in Print Preview.
You can also use the DetailBand.DrillDownExpanded property to specify whether or not the band is initially expanded. By default, this property is enabled.
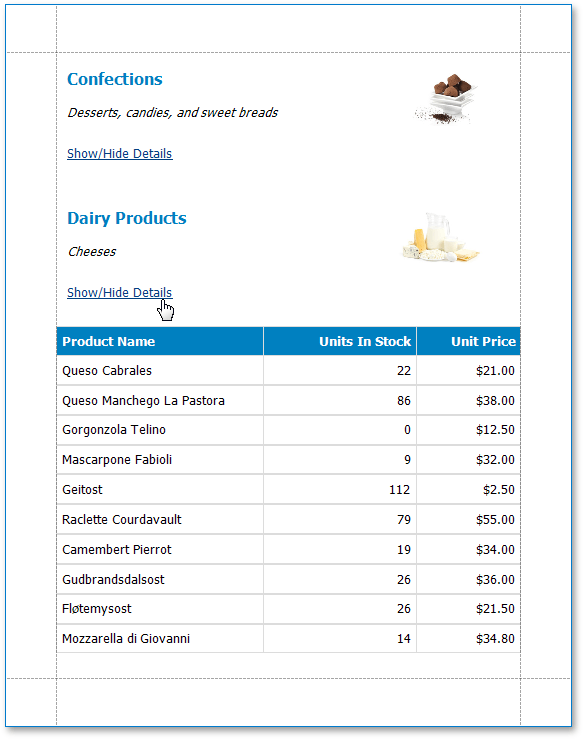
The drill-down report is now ready. Switch to the Preview tab to view the result.
See Create Drill-Down Reports to learn how to dynamically switch the text displayed by the lblShowHide label depending on whether the associated band is collapsed or expanded.
Enable Data Sorting in Print Preview
To enable the sorting of report data in Print Preview, do the following:
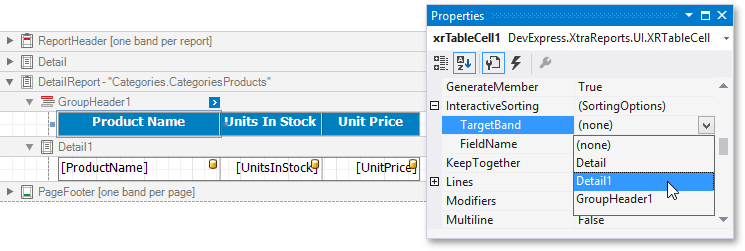
Select the table cell displaying the ProductName caption in the Group Header band of the detail report.
Switch to the Properties window and expand the XRLabel.InteractiveSorting option. Set the SortingOptions.TargetBand property to the Detail band of the detail report.
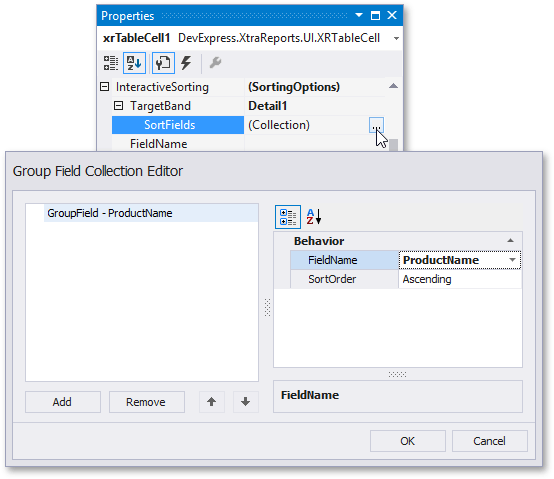
Click the ellipsis button for the SortFields property. In the invoked collection editor, add a new group field and set the GroupField.FieldName property to the ProductName field. The GroupField.SortOrder property specifies the default sorting direction in Print Preview. Set this property to None if no default sorting is required.
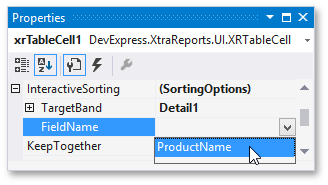
Set the SortingOptions.FieldName property of the table cell to the ProductName field.
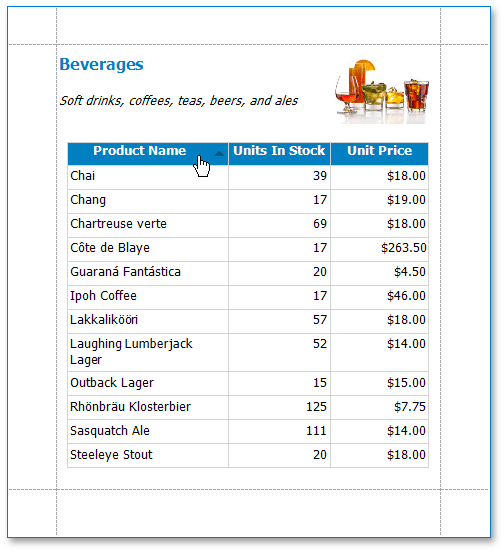
Switch to the Preview tab to sort data in the Detail band by the ProductName field. When a mouse pointer hovers over the ProductName caption, it changes to a hand indicating the sorting capability. The arrow displayed at the element’s right edge indicates the sorting order.
If you provide interactive sorting to multiple fields, clicking another field clears all the previously applied data sorting. Hold the SHIFT key while clicking to preserve the existing sorting settings and thus sort against multiple fields.
To disable data sorting against a specific field, hold the CTRL key on its caption click.
Next Lesson: Lesson 6 - Group Report Data and Calculate Summaries