Conditionally Suppress Controls
- 2 minutes to read
This document describes how to display or hide a report control in a published document based on a specified logical condition.
Note
You can use this approach to conditionally suppressing controls when the UserDesignerOptions.DataBindingMode is set to DataBindingMode.Expressions or DataBindingMode.ExpressionsAdvanced.
See Conditionally Suppress Controls to learn about the legacy approach to solving this task.
See Data Binding Modes to learn more about the available binding modes.
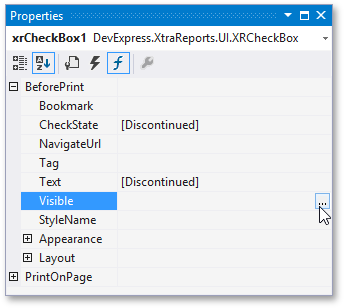
Create a check box bound to the Discontinued data field.

Select the required control and switch to the Expressions section in the Visual Studio property grid. Click the ellipsis button for the control’s Visible property (you can find it under the BeforePrint event’s category if you are using the ExpressionsAdvanced binding mode):
This invokes the Expression Editor where you can specify the required expression:
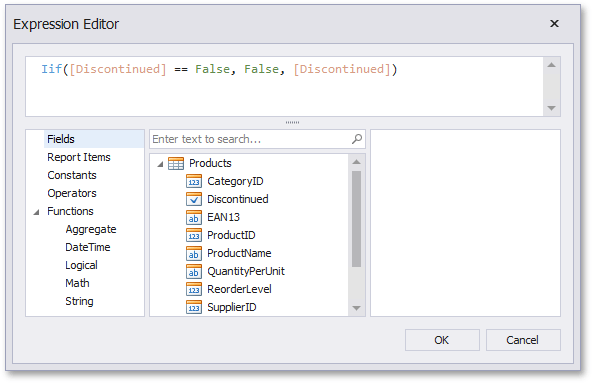
Use the Iif function to define the required condition. For example:
Iif([Discontinued] == False, False, [Discontinued])
This expression means that if the Discontinued data field’s value is False, the control’s Visible property’s value is also False.
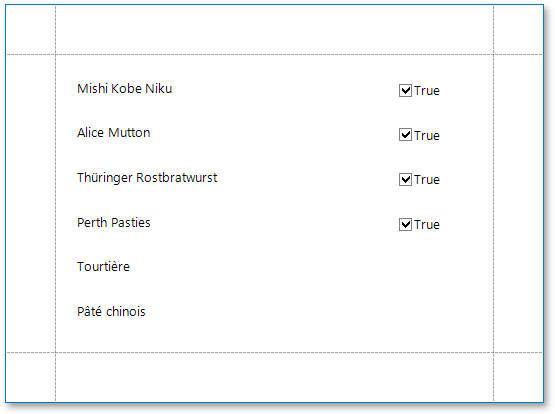
When switching to Print Preview, you can view the report control’s visibility changes according to the assigned condition:
Tip
See Hide Table Cells to learn how to conditionally suppress table cells and define the mode for processing them.