Create an Interactive Polling
- 6 minutes to read
This tutorial describes how to create a polling report with various types of questions, make this report fillable in Print Preview and analyze the resulting data.
Tip
Open an existing reporting application or create a new one from scratch to get started with this tutorial. See Adding a Report to Your .NET Application to learn how to create a reporting application on the platform of your choice.
Prepare a Data Source
Prepare a data source to provide polling data to your report. In this tutorial, the report is bound to an Excel file, whose content is shown below.
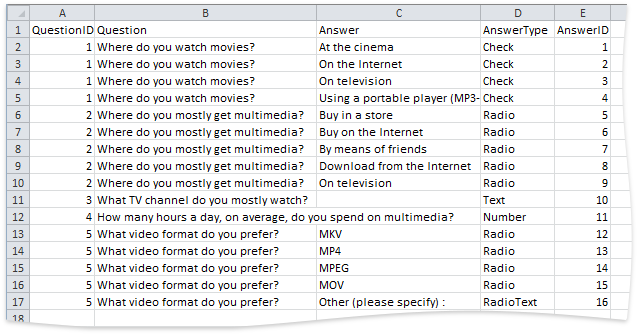
The data source stores several questions with their IDs, available answers, answer types and answer IDs.
The AnswerType column specifies each question’s response format.
- Check - Answers are displayed with checkboxes, and users can select multiple answers for each question.
- Radio - Answers are displayed with checkboxes, and users can select only one answer for each question.
- Text - Open-ended questions provided with a text editor, where users can type a custom answer.
- Number - Open-ended questions provided with a text editor for entering numbers only.
- RadioText - An answer is displayed with a checkbox and a text editor for entering custom values.
Construct the Report Layout
Do the following to construct the polling report layout:
- Bind a report to a required data source. See Bind a Report to an Excel Workbook to learn about binding to an Excel file.
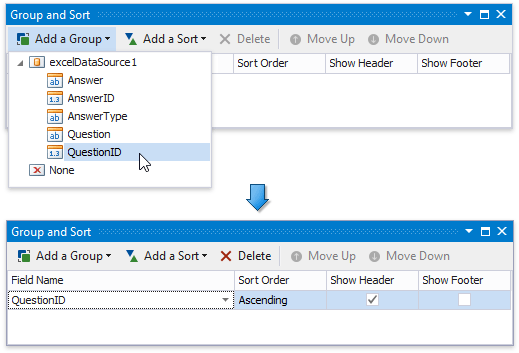
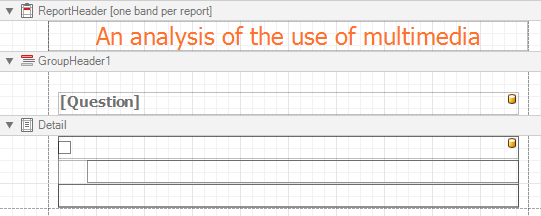
Group report data by questions using the Group and Sort Panel. Click Add a Group, and in the invoked list, select the QuestionID data member. Enable the Show Header option to add the Group Header band to the report.
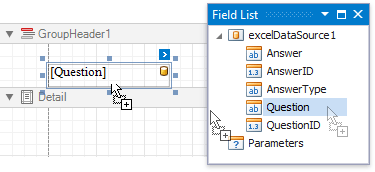
Drop the Question data field from the Field List onto the Group Header to display the question text before each group of answers.
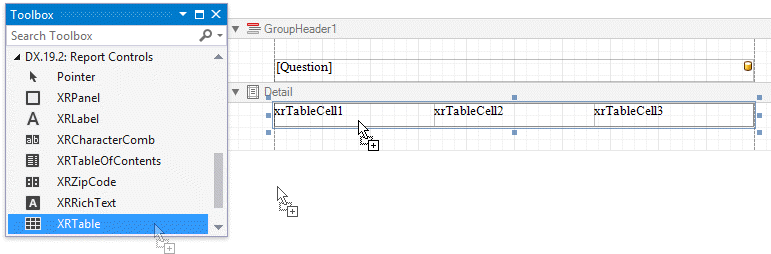
Drop the Table control from the Toolbox onto the Detail band to display answers in the report.
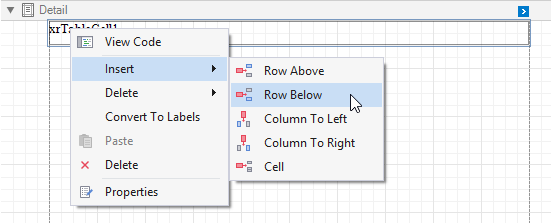
Remove two table cells by selecting them and pressing DELETE. Add two new rows by right-clicking the table and selecting Insert | Row Below.
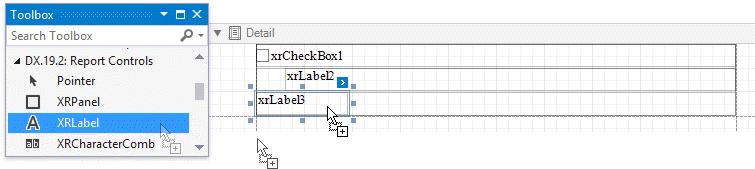
Add the required controls to the created table rows, such as check boxes and labels.
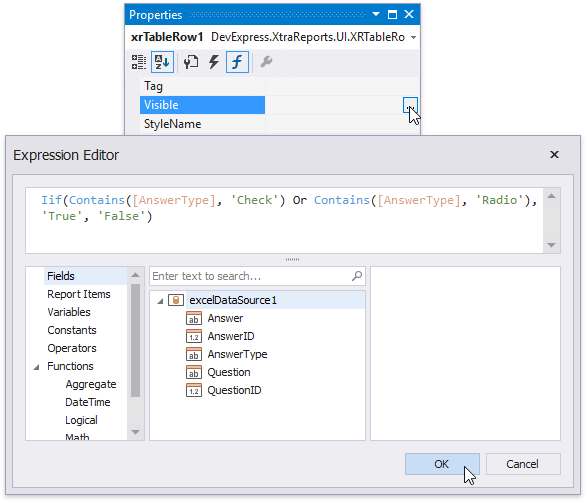
Define the table rows’ visibility based on the specified answers. Select a table row. Switch to the Properties window’s Expressions tab and click the Visible property’s ellipsis button. In the invoked Expression Editor, specify the following logical condition depending on the row’s number and purpose:
- Iif(Contains([AnswerType], ‘Check’) Or Contains([AnswerType], ‘Radio’), ‘True’, ‘False’)
- Iif([AnswerType] == ‘RadioText’, ‘True’, ‘False’)
- Iif([AnswerType] == ‘Text’ Or [AnswerType] == ‘Number’, ‘True’, ‘False’)

Note
If your report uses legacy data bindings (the UserDesignerOptions.DataBindingMode is set to DataBindingMode.Bindings), hide all table rows by default by disabling their XRControl.Visible option and create the corresponding formatting rules with the following logical conditions:
- Contains([AnswerType], ‘Check’) Or Contains([AnswerType], ‘Radio’)
- [AnswerType] == ‘RadioText’
- [AnswerType] == ‘Text’ Or [AnswerType] == ‘Number’
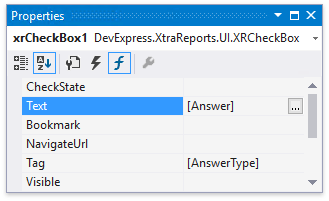
Specify that the check box displays the answer and stores information about the answer type. Go to the Properties window’s Expressions tab, assign the Answer data field to the XRControl.Text property and the AnswerType data field to the XRControl.Tag property.
Note
In the legacy binding mode (the UserDesignerOptions.DataBindingMode is set to DataBindingMode.Bindings), you can access the Text and Tag properties in the Properties tab’s DataBindings group.
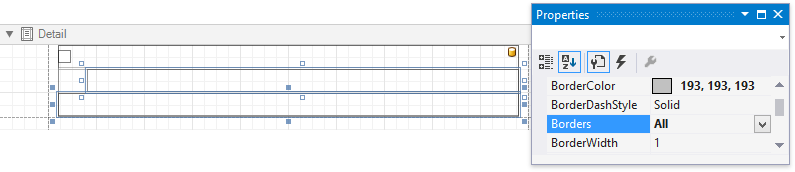
Specify labels’ border settings to display bounds around text editors.
Add the Report Header band to display the report title and specify the report’s appearance settings.
Enable Editing in Print Preview
Do the following to enable editing the created report in Print Preview:
Enable content editing for the checkbox and labels in the Detail band. Select these controls, and in the Properties window, set the EditOptions.Enabled property to True.
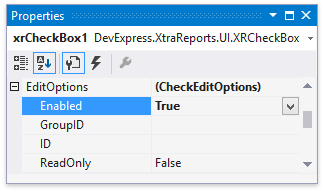
For the label corresponding to a RadioText type answer, set the EditOptions.ReadOnly property to True to disable the text editor by default.
Handle the Detail band’s XRControl.BeforePrint event. In the event handler, do the following:
- Provide the answer ID to the EditOptions.ID property.
- Specify the CheckEditOptions.GroupID property to combine the Radio type answers into logical groups.
- Set the TextEditOptions.EditorName property to EditingFieldEditorNames.IntegerPositive to assign masked editors to numeric fields.
using DevExpress.XtraPrinting; // ... private void Detail_BeforePrint(object sender, System.Drawing.Printing.PrintEventArgs e) { string id = Report.GetCurrentColumnValue("AnswerID").ToString(); xrCheckBox1.EditOptions.ID = xrLabel2.EditOptions.ID = xrLabel3.EditOptions.ID = id; if (Report.GetCurrentColumnValue("AnswerType").ToString().Contains("Radio")) { string id2 = Report.GetCurrentColumnValue("QuestionID").ToString(); xrCheckBox1.EditOptions.GroupID = id2; } if (Report.GetCurrentColumnValue("AnswerType").ToString() == "Number") xrLabel3.EditOptions.EditorName = EditingFieldEditorNames.IntegerPositive; }Handle the detail band’s XRControl.AfterPrint event and clear the required edit options (such as GroupID, EditorName, etc.).
In the report’s XRControl.BeforePrint event handler, subscribe to the PrintingSystemBase.EditingFieldChanged event, which occurs each time a control’s content changes in Print Preview. In the EditingFieldChanged event handler, identify the RadioText answer type’s editing field. Then, change the field’s EditOptions.ReadOnly property and the foreground color based on the corresponding checkbox’s state.
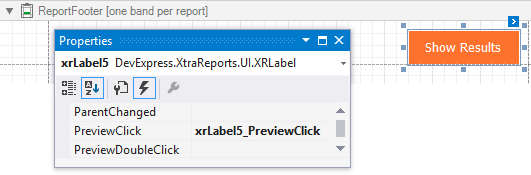
using DevExpress.XtraPrinting; using System.Collections.Generic; using System.Linq; using System.Windows.Forms; // ... private void XtraReport1_BeforePrint(object sender, System.Drawing.Printing.PrintEventArgs e) { PrintingSystem.EditingFieldChanged += PrintingSystem_EditingFieldChanged; } private void PrintingSystem_EditingFieldChanged(object sender, EditingFieldEventArgs e) { if (Equals("RadioText", e.EditingField.Brick.Value)) { IEnumerable<EditingField> EditingFields = PrintingSystem.EditingFields.Where <EditingField>(item => item.ID == e.EditingField.ID); foreach (EditingField item in EditingFields) if (!ReferenceEquals(item, e.EditingField)) { item.ReadOnly = e.EditingField.EditValue.Equals(CheckState.Unchecked); ((TextBrick)item.Brick).ForeColor = item.ReadOnly ? System.Drawing.Color.LightGray : System.Drawing.Color.Black; } } }Switch to the report designer and add the Report Footer band. Drop a Label control onto this band, change the control’s text and specify appearance settings. Handle the label’s XRControl.PreviewClick event and write your logic to analyze answers.
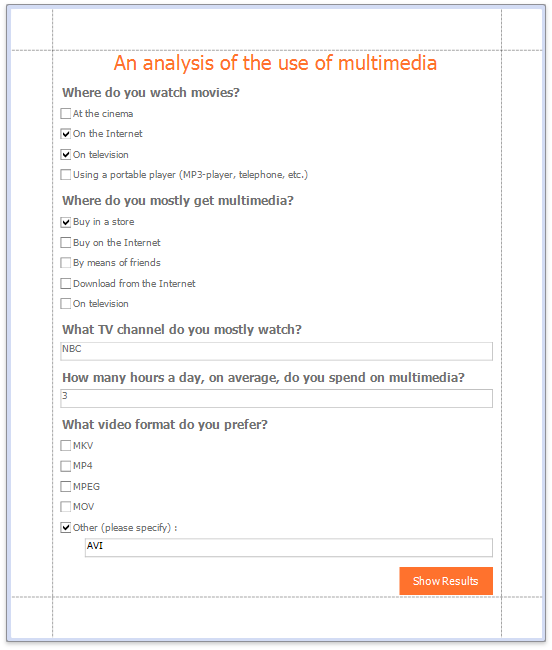
The polling report is now ready. Switch to the Preview tab to view the result.