Invoices
- 8 minutes to read
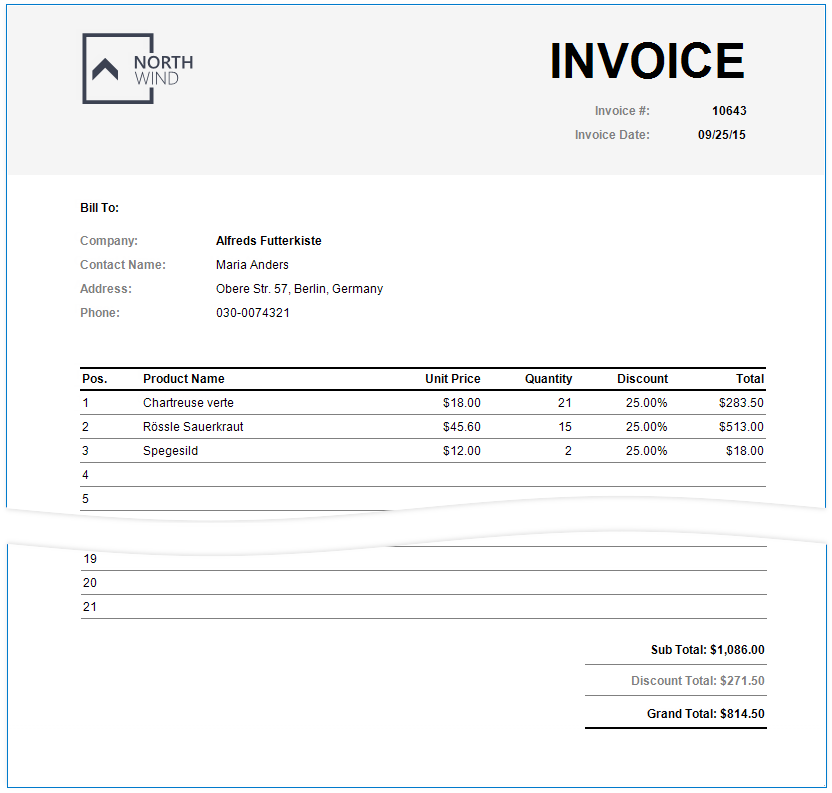
This tutorial describes how to create a report similar to the Invoice demo at design time.
- View Online Demo.
- View Desktop Demo (requires the DevExpress Demo Center to be installed).
Tip
The following topics describe different ways to create an invoice report:
Bind a Report to Data
Add a new blank report to your application.
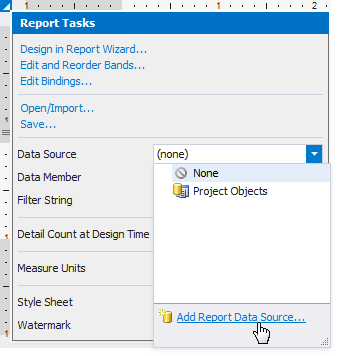
Click the report’s smart tag. Expand the Data Source property’s drop-down list and click Add Report Data Source.
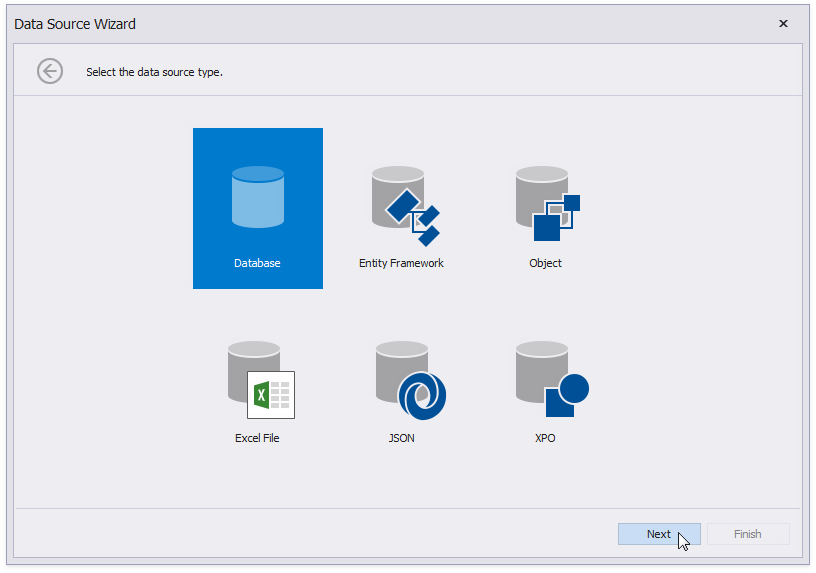
Select a data source type in the invoked Data Source Wizard and click Next.
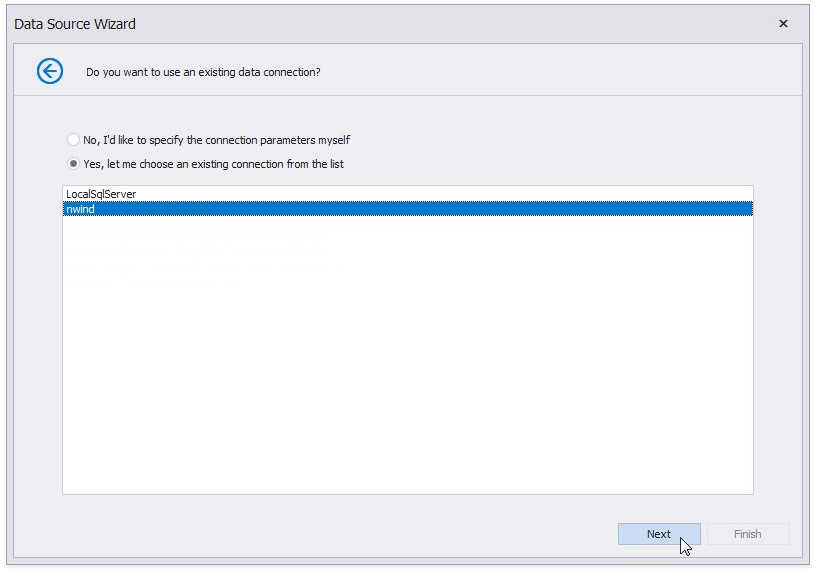
Select an available connection or specify new connection settings. This topic uses a connection to the sample Northwind database. Click Next to continue.
Select the tables, views and/or stored procedures to add to the report.
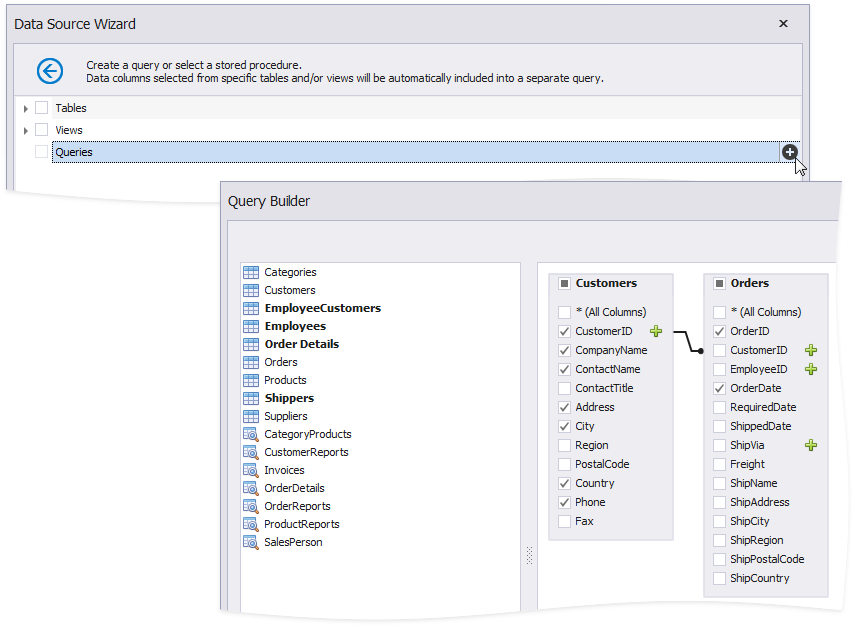
You can obtain data from two different tables to display the customers and orders data at the same hierarchical level in the report. Click the Queries category’s
 button. In the invoked Query Builder dialog, add the Customers and Orders tables to a query and join them based on a key column. Click OK to close the Query Builder.
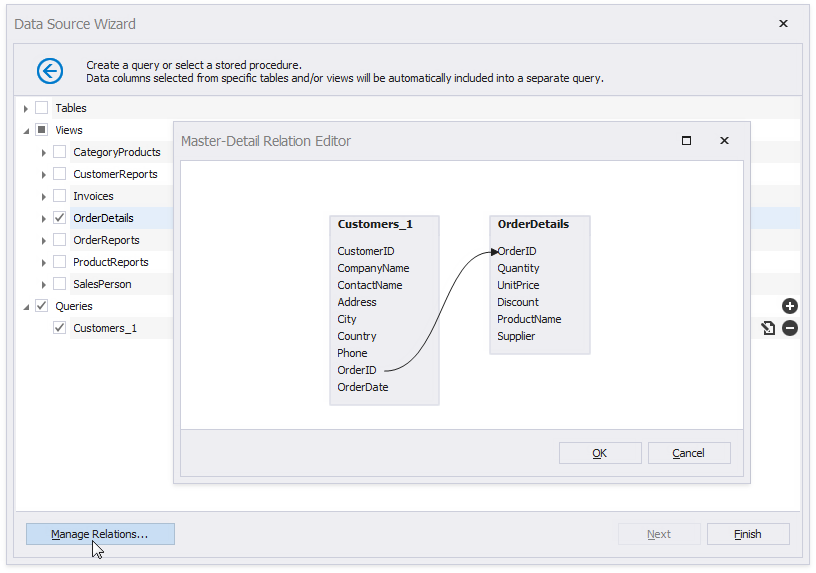
Select the view that provides order details (the OrderDetails view). Click the Manage Relations button to specify a master-detail relationship between the queries. Drag the key field from one query onto the other query’s key field in the invoked dialog and click OK.
Click Finish to complete the wizard.
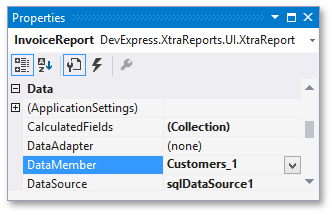
Ensure that the Customers data member is assigned to the report.
Create the Master Report Layout
Add customer information to the report.
Drop the XRTable item from the Toolbox onto the design surface.
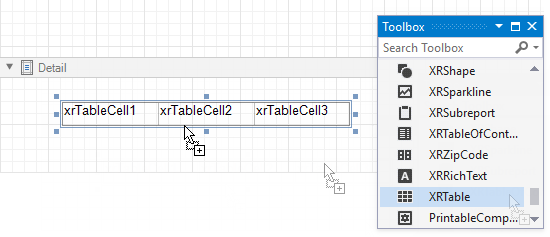
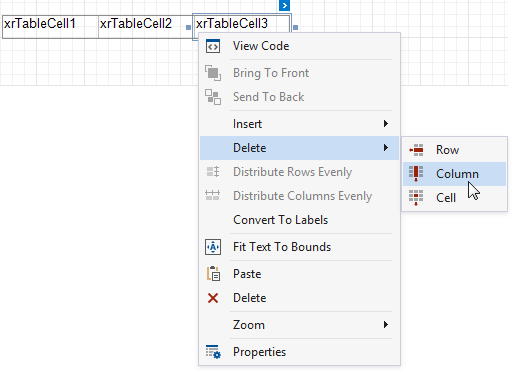
Right-click the table’s right column and select Delete / Column from the context menu.
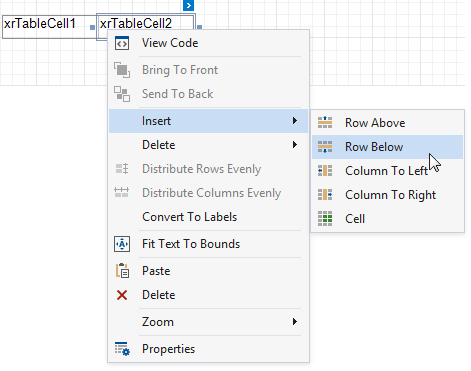
Add rows to the table. Right-click the table and select Insert / Row Below from the context menu.
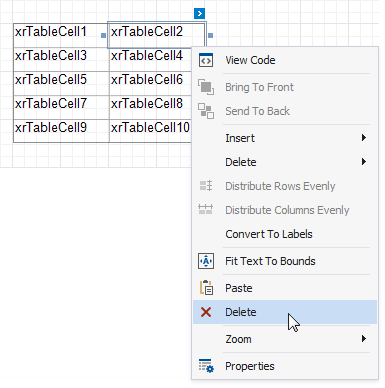
Delete the table’s top right cell. Right-click the cell and select Delete from the context menu. This makes the left cell span across both table rows.
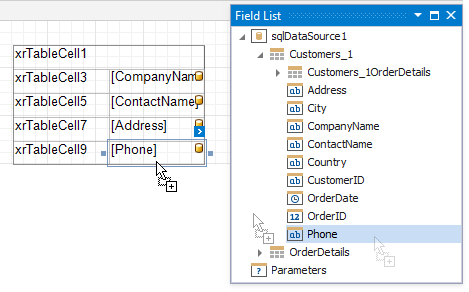
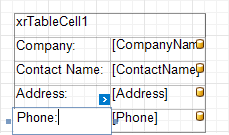
Display the customer’s contact information in the right column. Switch to the Field List and drop data fields onto the column cells.
Add captions. Double-click a cell to open an in-place editor and enter the caption text.
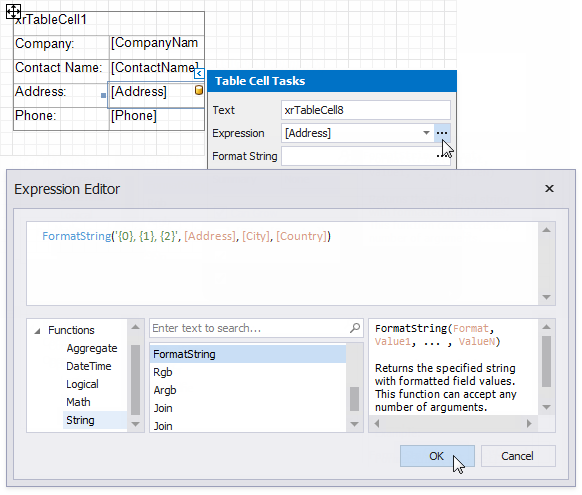
Format the address line to display data from the Address, City, and Country fields. Expand the cell’s smart tag and click the Expression property’s ellipsis button. Specify a format string in the invoked expression editor and click OK.
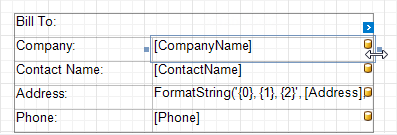
Drag cell borders to adjust the table size.
Create the Detail Report Layout
Create a detail report to show the order details in a tabular form:
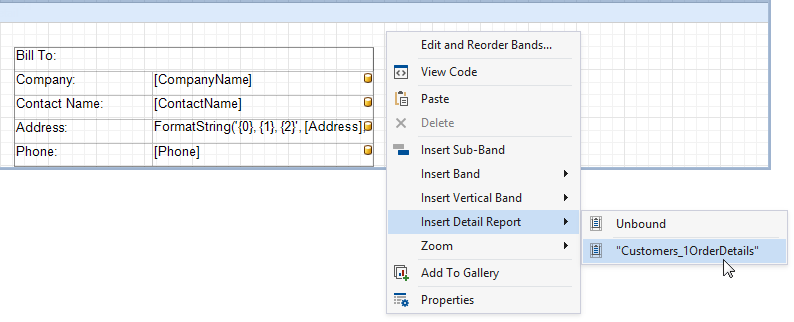
Add a Detail Report band to the report. Right-click the design surface. Select Insert Detail Report and the query relationship’s name from the context menu.
Place order details on the added band. Switch to the Field List and hold CTRL or SHIFT to select multiple fields. Drop the selected fields onto the band to create a table with cells bound to these fields.

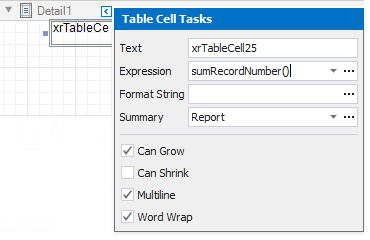
Add a cell on the table’s left to display record numbers. Expand the cell’s smart tag and set the Summary property to Report to display the numbers within an entire detail report. Specify the SumRecordNumber() expression in the Expression property.
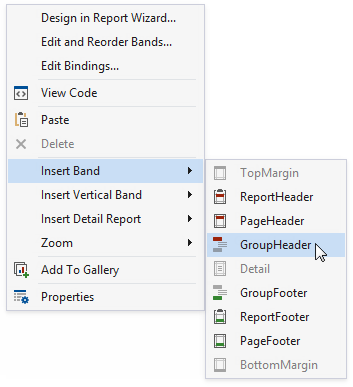
Add a Group Header band to the detail report to display column titles. Right-click the detail report and select Insert Band / GroupHeader.
Switch to the Field List and select the fields for which you want to create column titles. Drag these fields onto the Group Header band with the right mouse button.

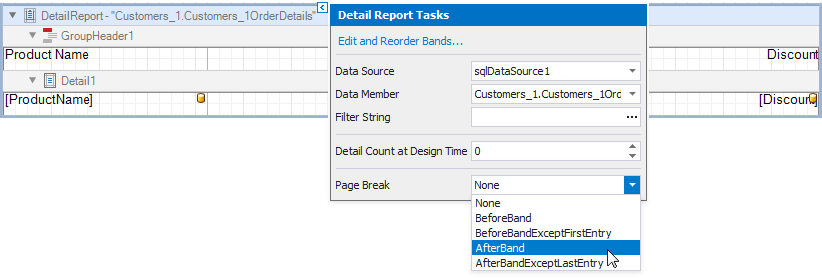
Add a page break after the Detail Report band to print each invoice on a separate page. Expand the Detail Report band’s smart tag and set the Page Break property to AfterBand.
Create a Calculated Field
Create a custom field that calculates an extended price based on the price, quantity, and discount values obtained from the database.
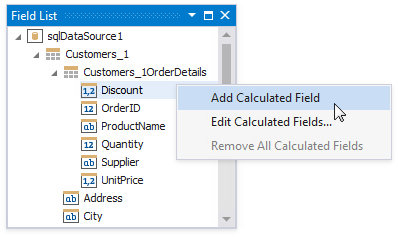
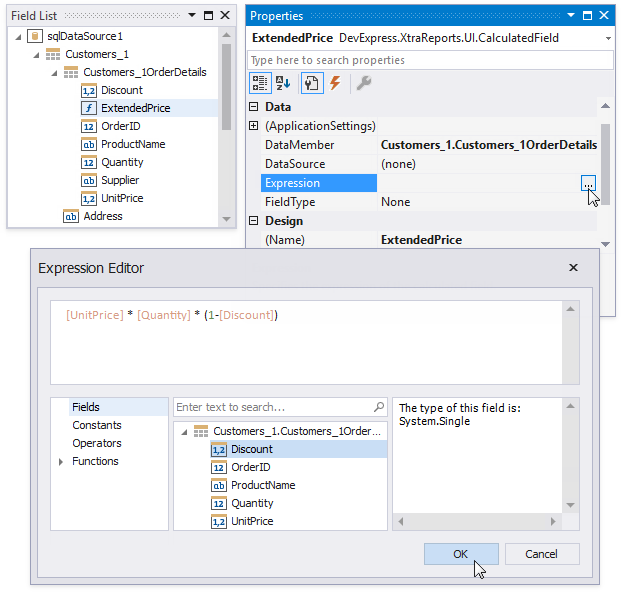
Go to the Field List and right-click any item within the relationship node. Select Add Calculated Field.
Select the created field and switch to the Properties window. Change the field name to ExtendedPrice. Click the Expression property’s ellipsis button. Create an expression in the invoked Expression Editor and click OK.
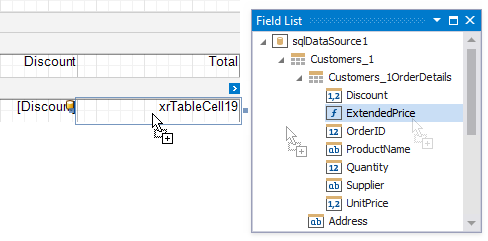
Add a cell to the Detail Report band’s table and drop the calculated field onto this cell. Add a cell to the Group Header band’s table to display the new column’s title.
Format Data
Format report element values.
Hold CTRL or SHIFT and select controls bound to price fields. Switch to the Properties window and click the TextFormatString property’s ellipsis button. Choose the Currency category in the invoked Format String Editor and select a format.
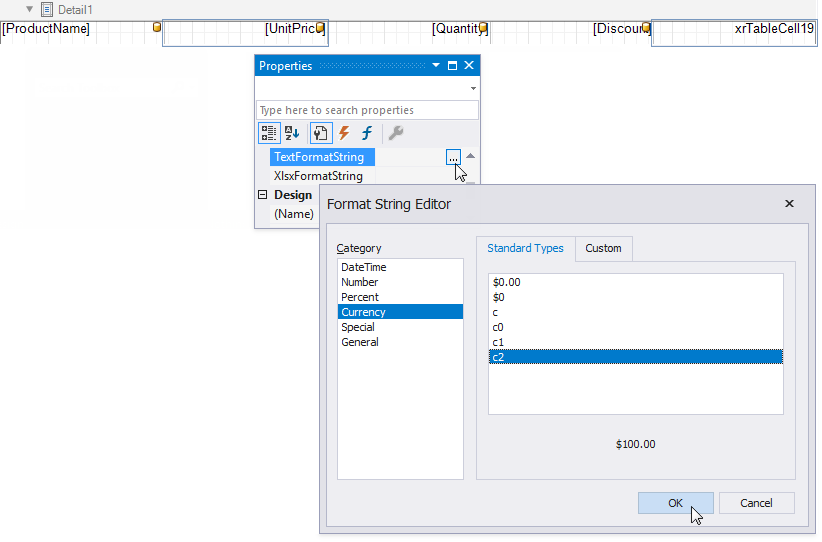
Follow the same steps to apply a Percent format to the cell that displays Discount.
Calculate a Summary
Calculate an order’s subtotal, discount total, and grand total.
Add a Group Footer band to the detail report.
Drop the XRLabel control onto the added band and expand the control’s smart tag. Click the Summary property’s ellipsis button.
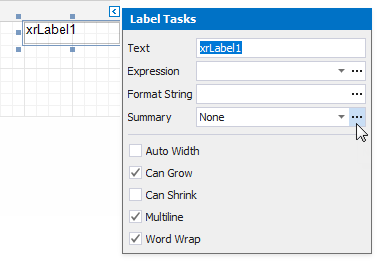
Specify the following properties in the Summary Editor window and click OK:
- Summary running - specify the Report value to calculate the summary for an entire detail report.
- Summary function - Sum.
- Argument Expression - [Quantity] * [UnitPrice].
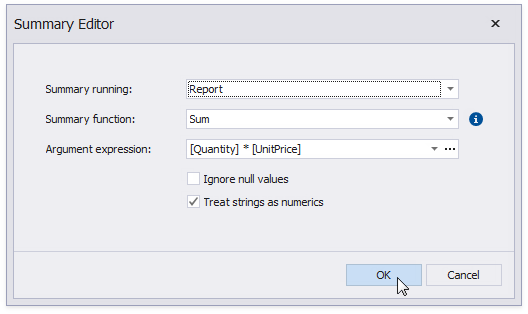
Set the label’s Format String property to Sub Total: {0:c2}.
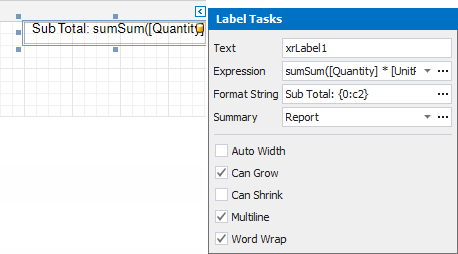
Repeat steps 3 and 4 to display the following data:
- Discount total
Set Argument Expression to [UnitPrice] * [Quantity] * [Discount] to calculate the total discounted amount. - Grand total
Set Argument Expression to [ExtendedPrice] to calculate the total payable amount.
- Discount total
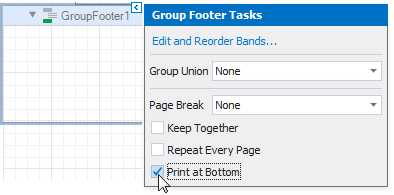
Align invoice totals to the bottom of the page. Expand the Group Footer band’s smart tag and enable the PrintAtBottom property.
Add empty lines to invoices to populate the empty space between the Detail band’s data and the totals. Expand the Detail band’s smart tag and enable the FillEmptySpace property.
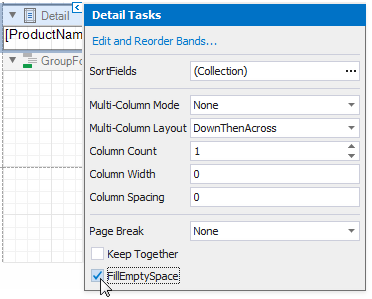
The empty region below the Detail band is populated with copies of the band. These band copies retain the layout and display the controls’ Text property values instead of data.
Expand each cell’s smart tag and clear its Text property to display empty lines.
Sort Data
Select the detail report’s Detail band and switch to the Group and Sort Panel. Click Add a Sort and select the ProductName field from the drop-down list.
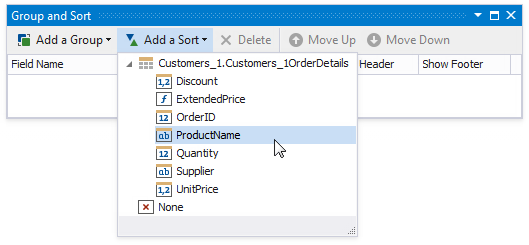
Use the Sort Order property to change the sort order.

Customize the Report Appearance
Switch to the Properties window and select the report. Specify the font name and size. These settings apply to all report elements.
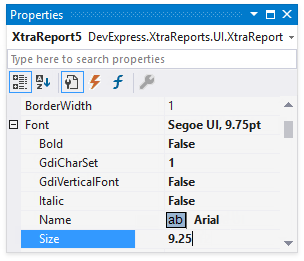
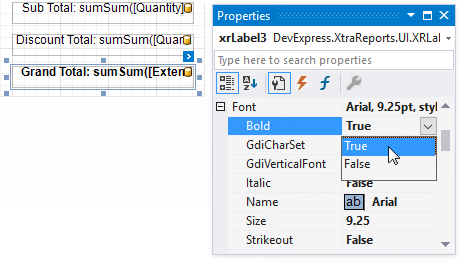
You can specify an individual control’s font (for instance, make summary values bold).
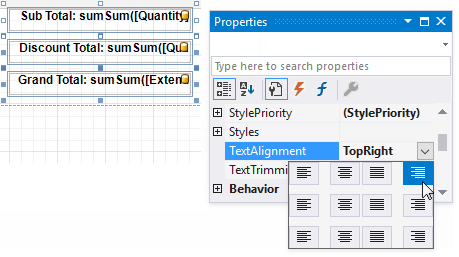
Specify the TextAlignment property to align text within a control. For instance, right-align text in the summary labels.
Specify borders for summary labels. Select a label and set its Borders property to Bottom. Specify the BorderColor property to change the border color.
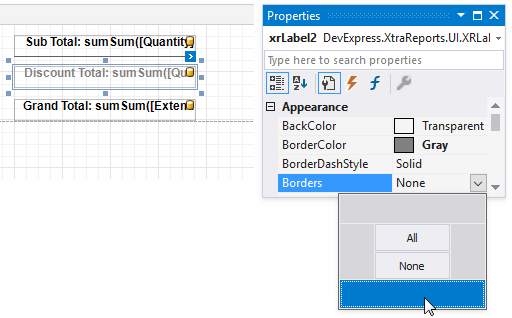
Create a visual style to apply it to multiple controls.
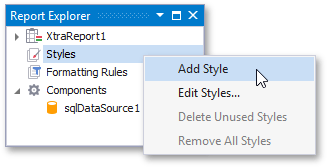
Right-click Styles in the Report Explorer and select Add Style.
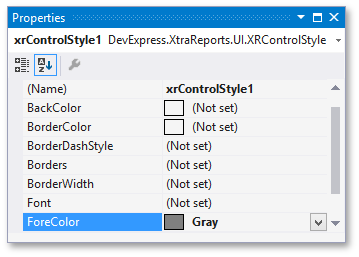
Select the created style and specify its settings in the Properties window. For instance, specify a foreground color.
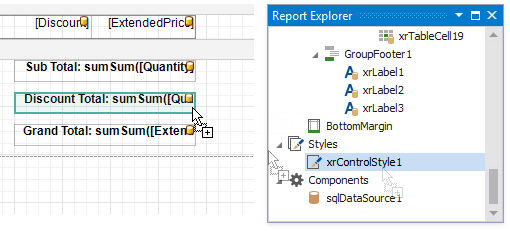
Drag the created style from the Report Explorer onto a report element to apply the style settings to this element.
You can differentiate odd and even table rows. Select the table and expand the Styles property in the Properties window. Expand the EvenStyle property’s drop-down list and select New.

Specify the created style’s appearance settings (for example, a background color).
Add Invoice Header
Add a Page Header band to the master report to display the order number and your company’s logo.
Drop the XRPanel control onto the band to visually outline the header. Drag the panel’s borders to make the control occupy the entire Page Header band. Set the panel’s BackColor property to WhiteSmoke.

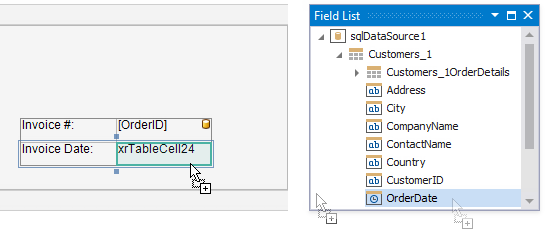
Drop the XRTable control from the Toolbox onto the panel. Delete the table’s last column and insert the second row of cells. Drop the OrderID and OrderDate fields from the Field List onto the right column’s cells. Specify a date/time format string for the cell that displays the order date. Change the left column cells’ text to Invoice #: and Invoice Date:. Adjust the appearance settings (for instance, the font, foreground color, and text alignment).
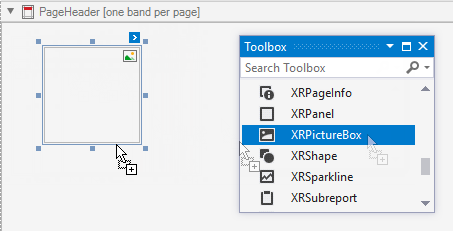
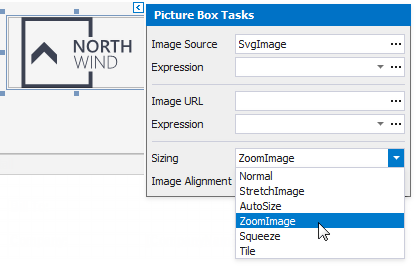
Drop the XRPictureBox control onto the panel to display your company’s logo.
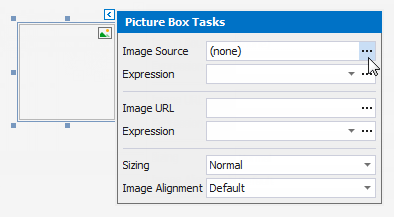
Expand the control’s smart tag and click the Image Source property’s ellipsis button.
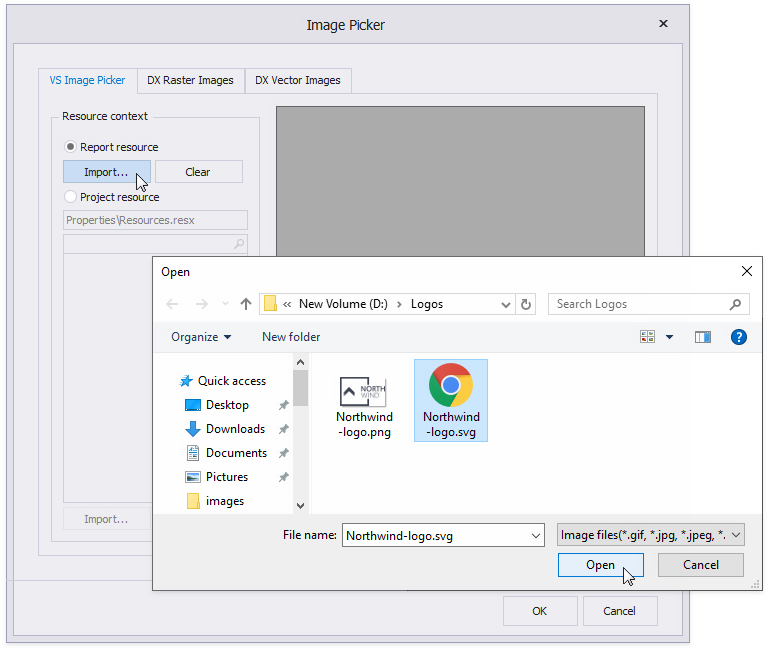
In the invoked Image Picker dialog, enable the Report resource option and click Import. Choose an image file in the invoked Open dialog.
Set the Sizing property to ZoomImage to make the image fit the control.
View the Result
The invoice is ready. Switch to Preview to view the result.
