Customize the ASP.NET Document Viewer's Toolbar
- 2 minutes to read
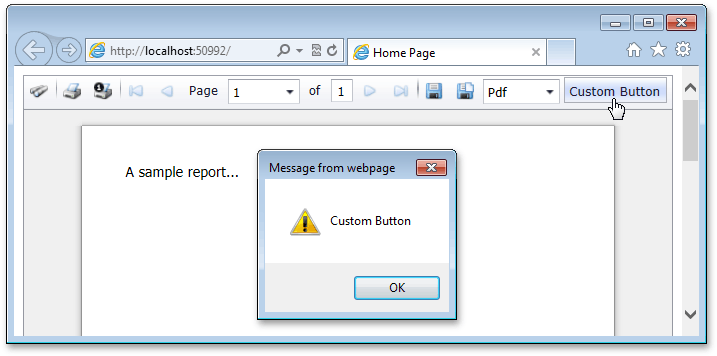
This example demonstrates how you can customize the toolbar of the Document Viewer control in an ASP.NET MVC application. It particular, it shows how you can add a custom button to the toolbar.
For general information on DevExpress ASP.NET MVC extensions, see How It Works and Extension Sheet.
To customize the Document Viewer Toolbar, do the following.
- In Visual Studio, switch to the Solution Explorer (by pressing CTRL+ALT+L) and expand the Views | Home directory. Then, double-click the DocumentViewerPartial.cshtml file to edit its code.
In this file, locate the code that specifies the DocumentViewerSettings settings and add a new ReportToolbarItem with the required settings to the DocumentViewerSettings.ToolbarItems collection.
@Html.DevExpress().DocumentViewer(settings => {
    // The following settings are required for a Document Viewer.
    settings.Name = "documentViewer1";
    settings.Report = (DXWebApplication1.Reports.XtraReport1)ViewData["Report"];
    // Callback and export route values specify corresponding controllers and their actions.
    // These settings are required as well.
    settings.CallbackRouteValues = new { Controller="Home", Action="DocumentViewerPartial" };
    settings.ExportRouteValues = new { Controller="Home", Action="ExportDocumentViewer" };
    // Add a new button to the Document Viewer Toolbar.
    settings.ToolbarItems.Add(new ReportToolbarButton {
        ItemKind = ReportToolbarItemKind.Custom,
        Text = "Custom Button",
        Name = "CustomButton"
    });
    // Handle the ToolbarItemClick event on the client side.
    settings.ClientSideEvents.ToolbarItemClick =
        "function(s, e) { if(e.item.name =='CustomButton' ) alert ('Custom Button'); }";
}).GetHtml()
Run the application to view the result.
See Also