Lesson 4 - Show a Print Preview for Individual Data Records
- 3 minutes to read
This example explains how you can show a Print Preview for individual records in a LightSwitch application.
To show a Print Preview in a separate screen for every data record, do the following.
- Run Visual Studio (2010, 2012, 2013, 2015, 2017, or 2019) or Visual Studio LightSwitch.
- Create a new LightSwitch Application or open an existing one.
- To use XtraReports in the application, enable the XtraReports Extension, add a Reporting Service and add a report to the Server directory. For detailed instructions on this, see Lesson 1 - Create a Data-Aware Report.
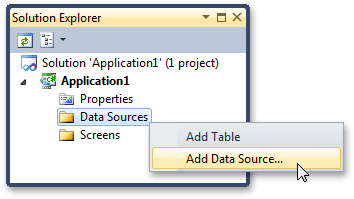
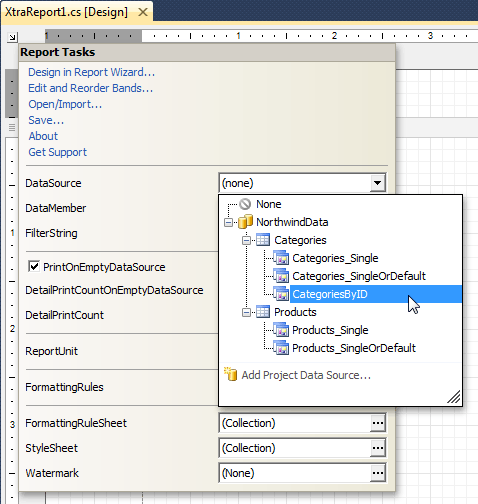
Create a data source in your application.
In this tutorial, we will use a hierarchical data source that includes two tables from a sample Northwind database: Categories and Products.
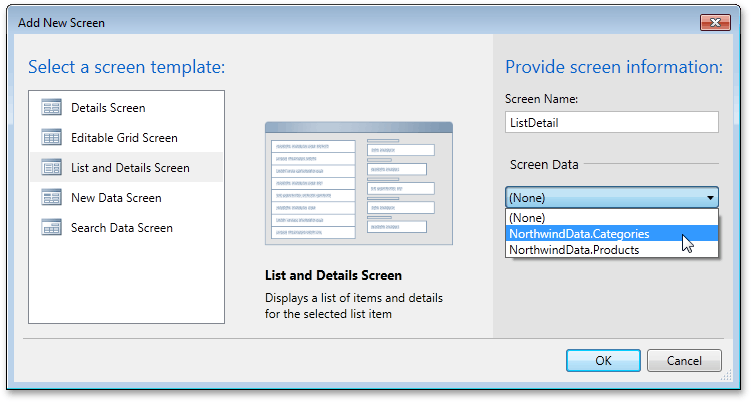
Add a new screen to your application.

Choose a List and Detail Screen and set its data source to NorthwindData.Categories.
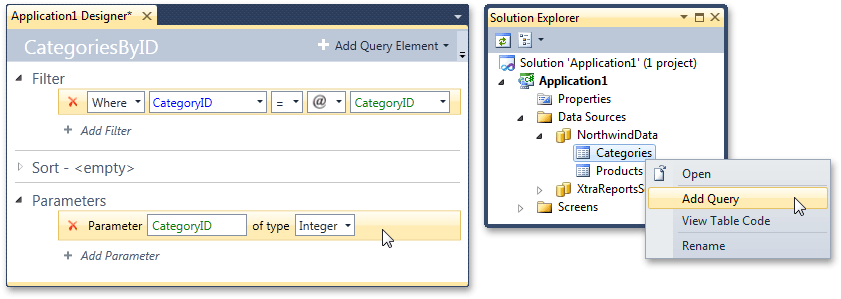
Create a query for the Categories table with a parameter value set to the CategoryID data field. To learn how this is done, see Lesson 2 - Filter a Report on the Server using LightSwitch Query.
Then, bind the report to this query.
To access the query’s parameters, right-click lightSwitchDataSource1 and click Properties. Then, click the ellipsis button for the QueryParameters property.
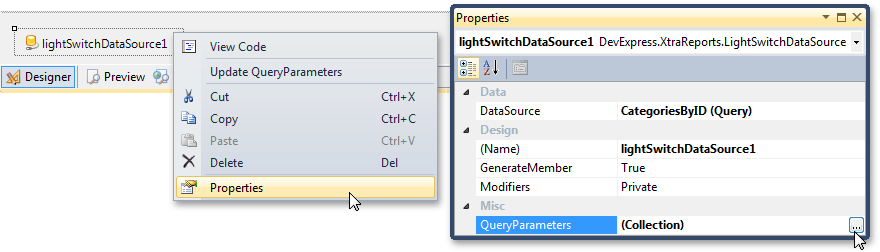
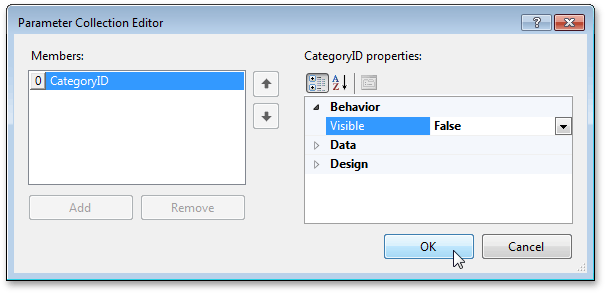
In the invoked Parameter Collection Editor, disable the parameter’s Visible property
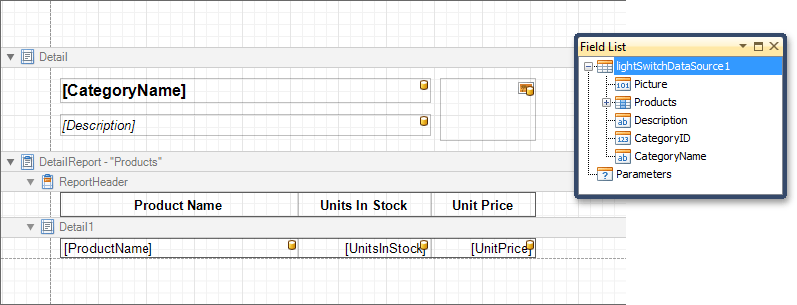
Adjust the report layout as required. To learn how you can create a hierarchical master-detail report, see Creating a Master-Detail Report using Detail Report Bands.
Switch back to the Logical View in the Solution Explorer and add another screen to the application.
At this time, select the Report Preview Screen and click OK.

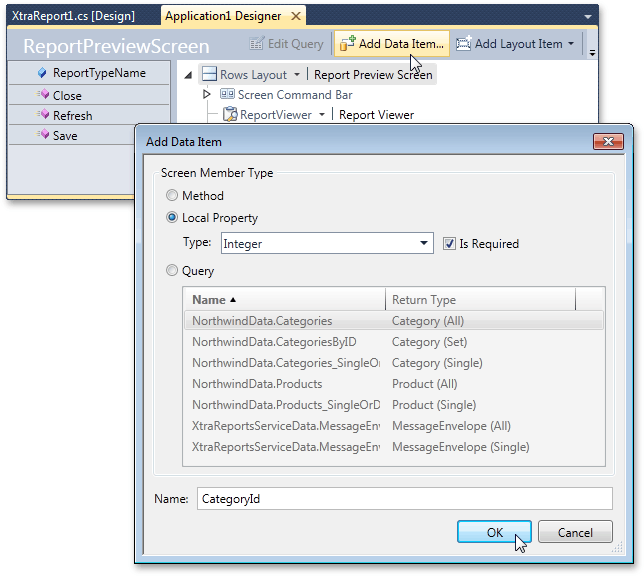
In the opened screen designer, click the Add Data Item… button. In the invoked editor, choose Local Property, set its Type to Integer and Name to CategoryId.
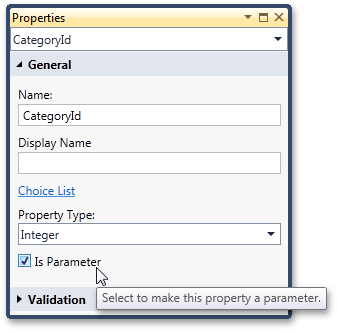
After the local property is created, press F4 and enable its Is Parameter option in the invoked Properties window.
Now, click Write Code to switch to the screen’s code behind, and in the body of the CustomizeReportPreviewModel method, assign the value of the parameter that is passed to the report from the query to the value of the created local property.
namespace LightSwitchApplication { public partial class ReportPreviewScreen { public void CustomizeReportPreviewModel(DevExpress.Xpf.Printing.ReportPreviewModel model) { model.Parameters["CategoryID"].Value = CategoryId; } partial void ReportPreviewScreen_Activated() { this.ReportTypeName = "XtraReport1"; } } }Switch back to the CategoriesListDetail screen designer and add a button named ShowPrintPreview to the command bar of the Categories list.
Handle its Execute method to pass the parameter name to the method that shows the report preview screen.
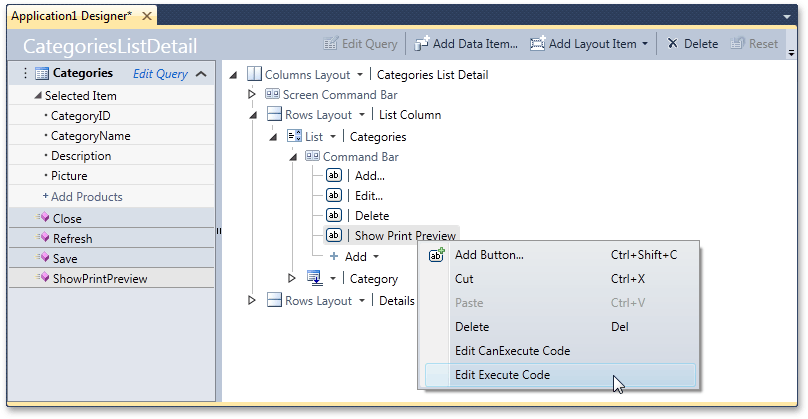
In addition, you can check whether or not this value is null in the button’s CanExecute method body.
namespace LightSwitchApplication {
    public partial class CategoriesListDetail {
        partial void ShowPrintPreview_Execute() {
            Application.ShowReportPreviewScreen(Categories.SelectedItem.CategoryID);
        }
        partial void ShowPrintPreview_CanExecute(ref bool result) {
            result = Categories.SelectedItem != null;
        }
    }
}
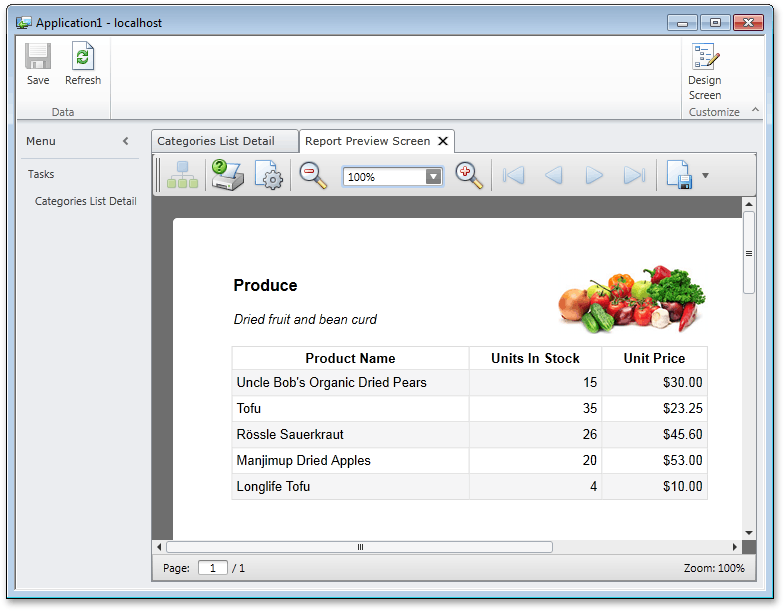
Run the application, choose any category and click the Show Print Preview button.
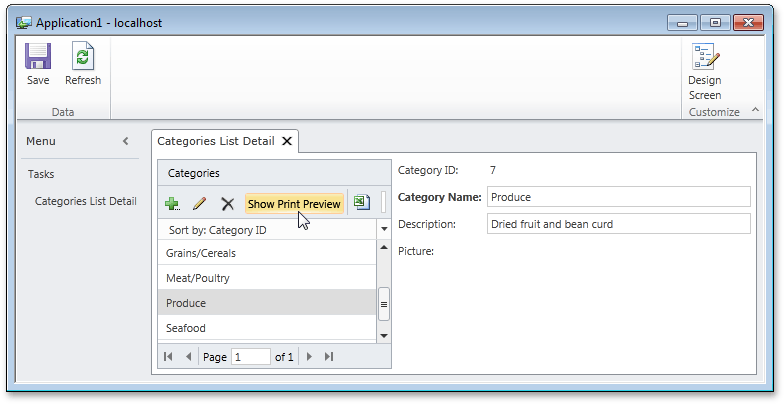
As a result, a report showing the category details is displayed in a separate screen.