Tutorial 6 - A Simple Guestbook (ASP.NET)
- 6 minutes to read
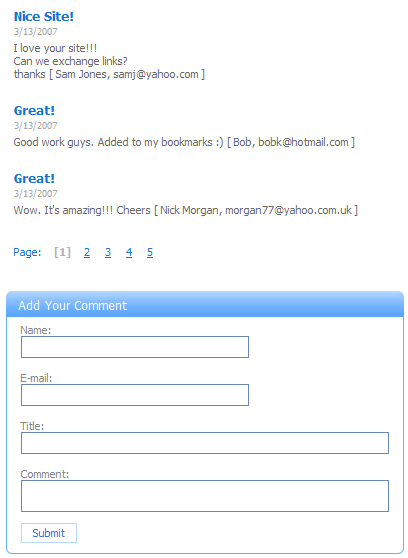
A guest book is a web site page that provides site visitors with a simple way to post their comments about your web site. In this tutorial, you will learn how to make a simple guest book.
An edit form is used to enable visitors to enter their name, email address, and the comment title and text. Comments will be displayed by the ASPxNewsControl. The image below illustrates a sample guest book.
Follow the steps below to create your guest book. In this tutorial, it is assumed that the guest book’s edit form has already been created.
- Step 1: Define a Persistent Data Store
- Step 2: Connect XPO to a Database Server
- Step 3: Customize the XpoDataSource Component
- Step 4: Create XPO Sessions
- Step 5: Create the ASPxNewsControl and Bind it to a Data Source
- Step 6: Create the New Comments Form
- Step 7: Save New Comments
Implementation
Step 1: Define a Persistent Data Store
Define a persistent object class. Persistent objects are stored as records in database tables, and encapsulate all relationships. The class properties are stored as field values in the records, and the collection of persistent objects is the equivalent of a data table. All you need to do is to define a persistent object class, and XPO will automatically generate a database (MS Access Database by default) and the required table structure for it.
- Add a new class to the project (the Comment.cs file).
Define the “Comment” persistent class as shown below:
using System; using System.Data; using System.Configuration; using System.Web; using System.Web.Security; using System.Web.UI; using System.Web.UI.WebControls; using System.Web.UI.WebControls.WebParts; using System.Web.UI.HtmlControls; using DevExpress.Xpo; public class Comment : XPObject { public Comment(Session session) : base(session) {} public Comment(Session session, DateTime date, string text, string title, string email, string visitorName) : base(session) { this.Date = date; this.Text = text + " [ " + visitorName + ", " + email + " ]"; this.Title = title; } public DateTime Date { get { return fDate; } set { SetPropertyValue(nameof(Date), ref fDate, value); } } DateTime fDate; public string Text { get { return fText; } set { SetPropertyValue(nameof(Text), ref fText, value); } } string fText; public string Title { get { return fTitle; } set { SetPropertyValue(nameof(Title), ref fTitle, value); } } string fTitle; public string Email { get { return fEmail; } set { SetPropertyValue(nameof(Email), ref fEmail, value); } } string fEmail; }The Date, Title and Text properties of this class represent the values of the corresponding fields in the database table.
Note
Note that the property implementations in these samples do not include all of the recommended code in the setters. The sample code has been shortened for simplicity. If you follow Tutorial 4 - A Windows Forms Application for Data Editing, you can see the recommended approach to implementing property setters.
Step 2: Connect XPO to a Database Server
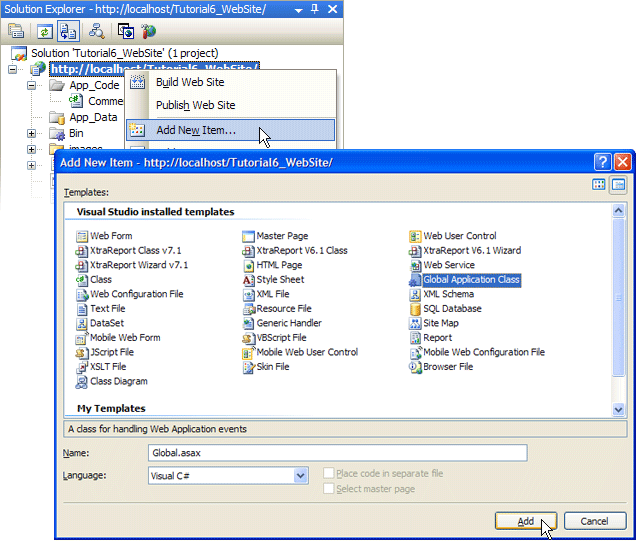
Connect XPO to your database server. To do this, handle the Application_Start event in the Global.asax module of your website to create an IDataLayer object. It is recommended that you use the ThreadSafeDataLayer in ASP.NET applications.
void Application_Start(object sender, EventArgs e)
{
    // Code that runs on application startup
    // Specify the connection string, which is used to open a database.
    // It is assumed that you have already created the Comments database within the App_Data folder.
    string conn = DevExpress.Xpo.DB.AccessConnectionProvider.GetConnectionString(
      Server.MapPath("~\\App_Data\\Comments.mdb"));
    DevExpress.Xpo.Metadata.XPDictionary dict = new DevExpress.Xpo.Metadata.ReflectionDictionary();
    // Initialize the XPO dictionary.
    dict.GetDataStoreSchema(typeof(Comment).Assembly);
    DevExpress.Xpo.XpoDefault.Session = null;
    DevExpress.Xpo.DB.IDataStore store = DevExpress.Xpo.XpoDefault.GetConnectionProvider(conn,
        DevExpress.Xpo.DB.AutoCreateOption.SchemaAlreadyExists);
    DevExpress.Xpo.XpoDefault.DataLayer = new DevExpress.Xpo.ThreadSafeDataLayer(dict, store);
}
Note
The image below shows how to add the Global.asax module:
Step 3: Customize the XpoDataSource Component
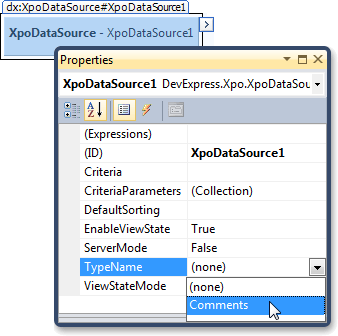
To retrieve persistent objects from a database, use the XpoDataSource component. Place it on your page, rebuild the project, and specify the XpoDataSource.TypeName property.
Handle the page’s Init event to create a Session for the XpoDataSource component. The session must be linked to your DataLayer.
using DevExpress.Xpo;

Session session1;
protected void Page_Init(object sender, EventArgs e) {
    session1 = new Session();
    XpoDataSource1.Session = session1;
}
It is recommended that you create an XPO Session for each request. To do this, create a new session for each page.
Step 5: Create the ASPxNewsControl and Bind it to a Data Source
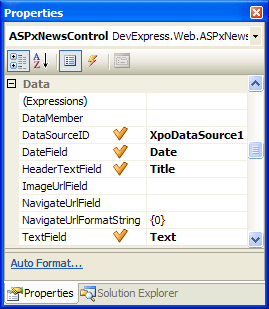
Place the ASPxNewsControl onto a Web form and bind it to the XpoDataSource component.
Step 6: Create the New Comments Form
Drop three ASPxTextBox controls onto the form to allow users to specify their name, email address, and title. Rename the text boxes as tboxName, tboxEmail, and tboxTitle. Add an ASPxMemo control that will be used to enter the actual comments. Add an ASPxButton and set its caption to “Submit”.
Handle the Submit button’s Click event to save a new comment. Once a visitor has clicked this button, a new Comment is initialized and saved to the database.