Tutorial 2 - Relations (One to Many)
- 7 minutes to read
In this lesson, you will create a Customers-Orders data-aware application that stores and modifies Customers and Orders in a database. Each Order belongs to a specific Customer. A Customer can have a number of associated Orders.
Tip
A complete sample project is available in the DevExpress Code Examples database at http://www.devexpress.com/example=E4557.
Before proceeding, we recommend that you review the Tutorial 1 - Your First Data-Aware Application with XPO lesson.
Define a One-to-Many Association
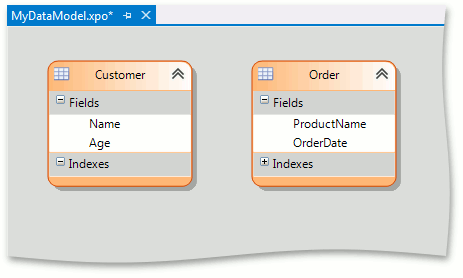
First, create a Windows Forms Application project and declare the Customer object that has the Name and Age properties, and the Order object that has the ProductName and OrderDate properties (for details, see Tutorial 1).
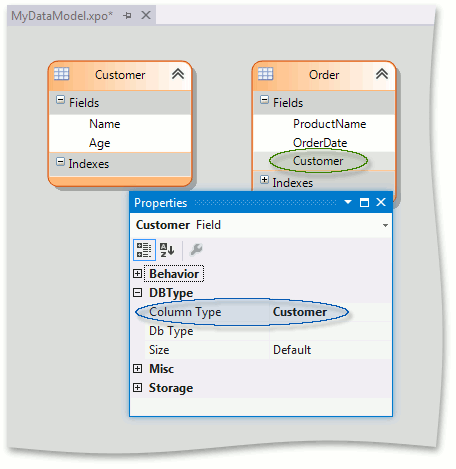
The Customer and Order objects must be connected with a one-to-many relationship since each customer can have multiple orders. Add the Customer property of the Customer type to the Order persistent class. This property will represent the “one” part of the association.
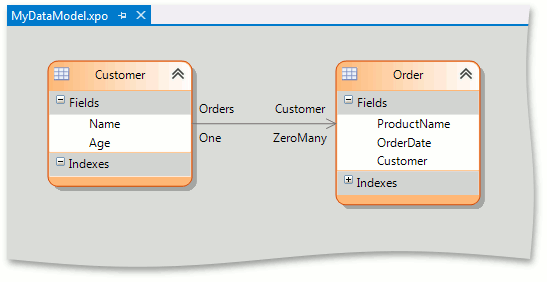
Next, focus the AggregationRelationship toolbox item and draw a line from Customer to Order.
Alternatively, you can define an association in code. To do this, the AssociationAttribute is used on both ends of an association. This attribute specifies the name of the relationship and points to the corresponding properties. The association name specified via the AssociationAttribute.Name parameter should match the name used at the other end of the association. The Orders property, which represents the ‘many’ side of a relationship, should be of the XPCollection type. It’s value should be calculated via the XPBaseObject.GetCollection method that returns all persistent objects related to the property.
public class Order : XPObject {
   // ...
   private Customer _customer;
   [Association("Customer-Orders")]
   public Customer Customer {
      get { return _customer; }
      set { SetPropertyValue(nameof(Customer), ref _customer, value); }
   }
}
public class Customer : XPObject {
   // ...
   [Association("Customer-Orders")]
   public XPCollection<Order> Orders { get { return GetCollection<Order>(nameof(Orders)); } }
}
Design a Master-Detail Grid
Save changes and rebuild the project. Add the GridControl to the form and bind it to the XPCollection of Customers, as demonstrated in the previous lesson. The grid rows will display master-detail expand buttons that enable a user to expand and collapse master rows, since the XPBaseCollection.DisplayableProperties list includes the Orders collection property. Clicking the master-detail expand button at runtime expands the master row and opens its first detail view.
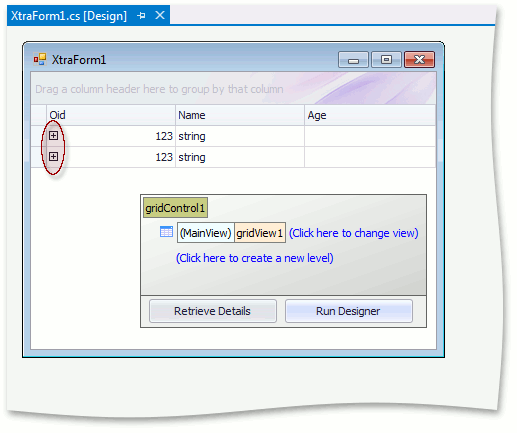
The steps below show you how to customize the XtraGrid control to display master-detail relations.
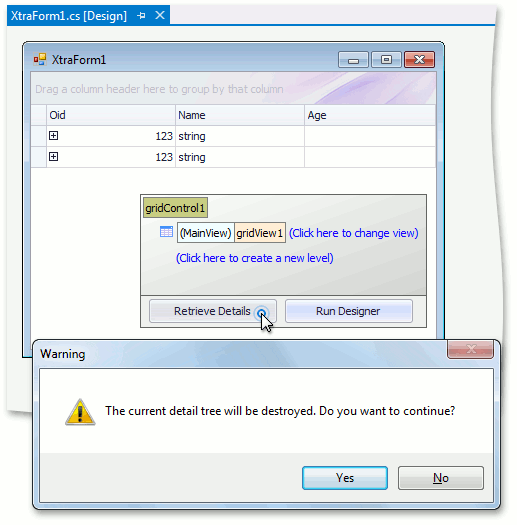
Retrieve information about master-detail relationships from the bound XPCollection. To do this, click the Retrieve Details button, and then click Yes in the invoked warning dialog.
As a result, the new level whose name matches the name of the relationship to which the level corresponds is created.
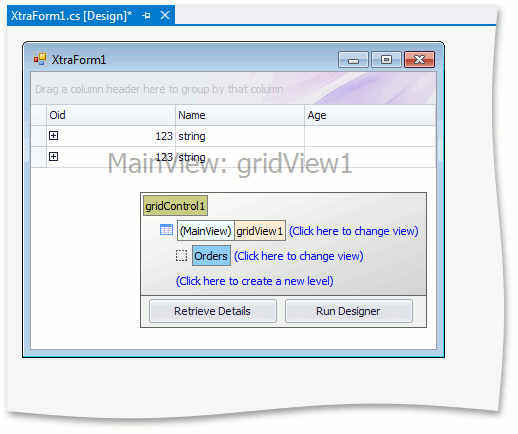
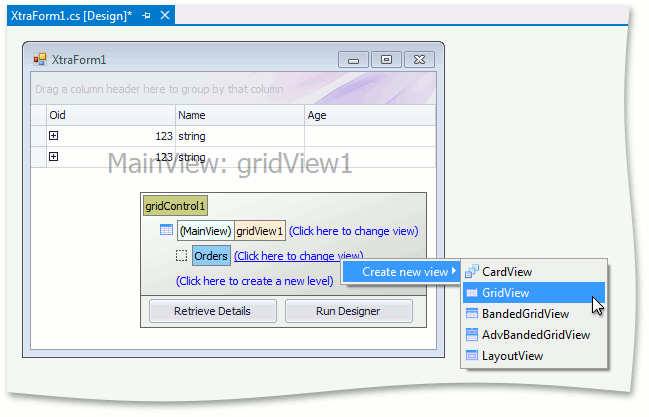
Associate the Orders level with the view. The XtraGrid’s Level Designer provides a context menu that allows a new view of any type to be created and associated with the relationship. Click the Click here to change view link located to the right of the level name to invoke the menu. Choose Create new view | GridView.
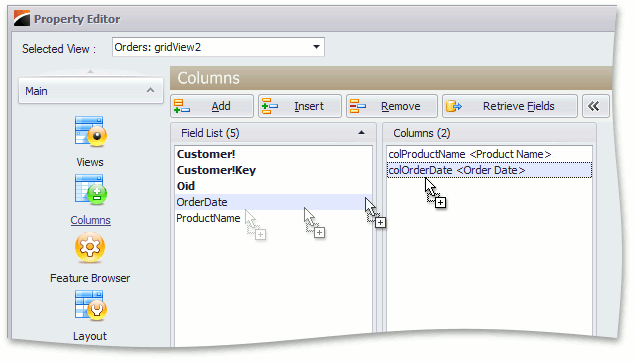
Right-click the created gridView2 item and choose the Columns in the invoked context menu.
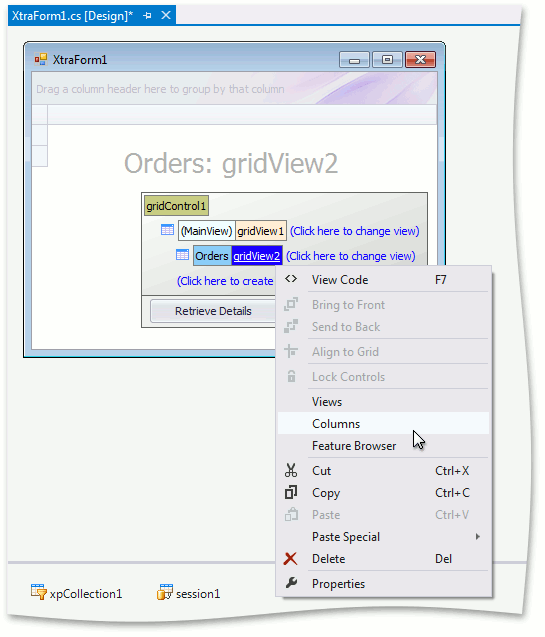
In the invoked designer, create the ProductName and OrderDate columns. To do this, click the Show Field List button and double click the corresponding items in the Field List, or drag these items and drop them within the Columns list.
- Close the Designer.
Create and Persist Objects in Code
You can add new objects to an association explicitly or use the back master reference property.
Add Persistent Objects Explicitly
Create Customer objects and populate the Customer.Orders collections with Orders.
if (xpCollection1.Count == 0) {
    Customer customer1 = new Customer(session1);
    customer1.Name = "John";
    customer1.Age = 21;
    customer1.Orders.Add(new Order(session1) {
        ProductName = "Chai",
        OrderDate = new DateTime(2013, 3, 11)
    });
    customer1.Orders.Add(new Order(session1) {
        ProductName = "Konbu",
        OrderDate = new DateTime(2013, 1, 23)
    });
    customer1.Save();
    xpCollection1.Add(customer1);

    Customer customer2 = new Customer(session1);
    customer2.Name = "Bob";
    customer2.Age = 37;
    customer2.Orders.Add(new Order(session1) {
        ProductName = "Queso Cabrales",
        OrderDate = new DateTime(2013, 2, 9)
    });
    customer2.Save();
    xpCollection1.Add(customer2);
}
Note
The Save method checks whether the database contains the Customer and Order tables (these names match the names of the XP Objects being saved). If no such tables are found, they are created and relationships are established based on the declarations of the XP Objects.
Use the Back Master Reference Property
You can assign the Customer object to the Order object’s Customer property. The new Order objects automatically appear in the Customer object’s Orders collection.
if(xpCollection1.Count == 0) {
    Customer customer1 = new Customer(session1);
    customer1.Name = "John";
    customer1.Age = 21;
    new Order(session1) {
        ProductName = "Chai",
        OrderDate = new DateTime(2013, 3, 11),
        Customer = customer1
    };
    new Order(session1) {
        ProductName = "Konbu",
        OrderDate = new DateTime(2013, 1, 23),
        Customer = customer1
    };
    customer1.Save();
    xpCollection1.Add(customer1);

    Customer customer2 = new Customer(session1);
    customer2.Name = "Bob";
    customer2.Age = 37;
    new Order(session1) {
        ProductName = "Queso Cabrales",
        OrderDate = new DateTime(2013, 2, 9),
        Customer = customer2
    };
    customer2.Save();
    xpCollection1.Add(customer2);
}
If you can access only the object’s ID, get the object’s instance from the current Session.
//...
int customer1Id = 15;
Customer customer1 = session1.GetObjectByKey<Customer>(customer1Id);
new Order(session1) {
    ProductName = "Chai",
    OrderDate = new DateTime(2013, 3, 11),
    Customer = customer1
};
//...
Results
Run the project. The image below shows the result.
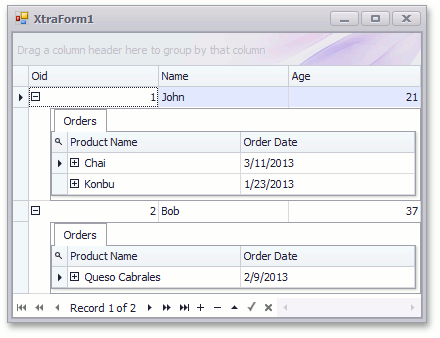
- A simple Customers-Orders data-aware application that allows end-users to view and edit customer details (name, age and orders) is created. Data is stored in an MS SQL Server database.
- The Order class whose instances represent records in the Order table has been declared.
- We’ve associated the orders with a specific customer by creating a relationship between the Orders property in the Customer object (the primary key) and the Customer property in the Orders object (the foreign key).
- New records have been added and saved to the Order table. Each record is represented by an Order object. Its public properties represent the fields in this table.