Tutorial 1 - Your First Data-Aware Application with XPO
- 8 minutes to read
This lesson will guide you through creating a simple WinForms application into which you can enter and then view customer details.
Tip
A complete sample project is available in the DevExpress Code Examples database at http://www.devexpress.com/example=E4555.
Create a Persistent Class
The first step when using eXpress Persistent Objects (XPO) is to define a persistent object class. Persistent objects are stored as records in database tables and encapsulate all relationships. Class properties are stored as record field values. A collection of persistent objects is the equivalent of a data table. After you define a persistent object class, XPO will automatically generate a database and the required table structure for it. XPO supplies a Data Model Designer that simplifies the creation of persistent classes.
Start with a new Windows Forms application project. You can use the standard Windows Forms Application project template. Then, create a persistent class in a designer (Model First approach) or in code (Code First approach). Model First is recommended for beginners.
Model First
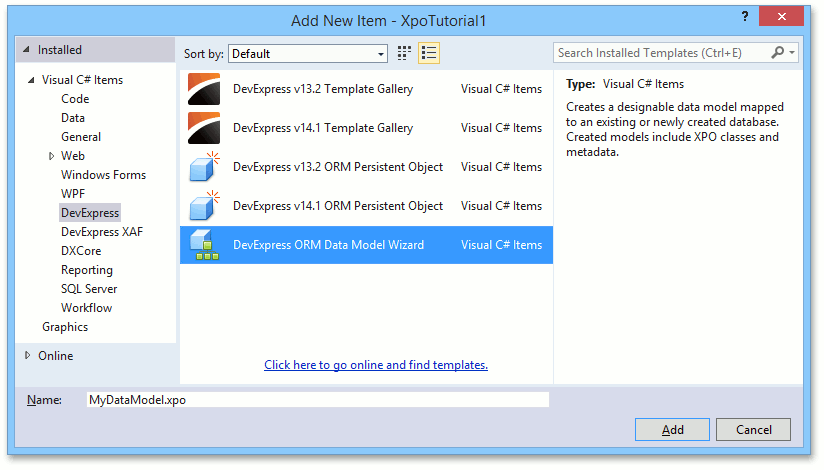
Click Add New Item in the Project menu. The Add New Item dialog box will appear.

In the DevExpress category, select the DevExpress ORM Data Model Wizard template and click Add.
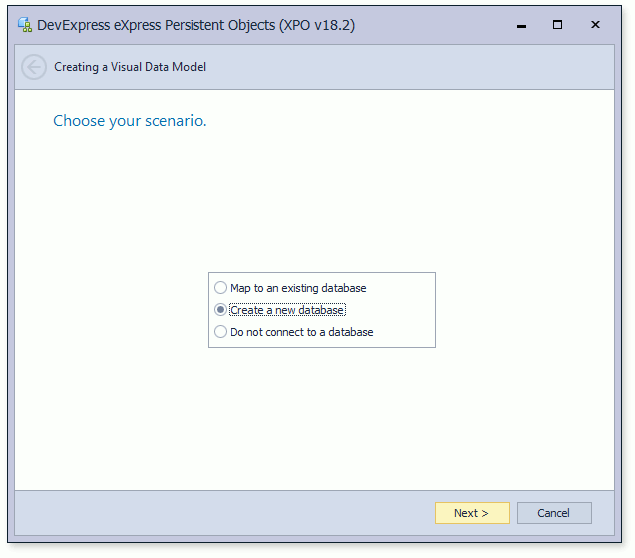
In the invoked Data Model Wizard, choose Create a new database and click Next.
Specify database connection settings and click next. In this lesson, a local instance of the Microsoft SQL Server accessed via the Windows Authentication and the XpoTutorial1 database is used.
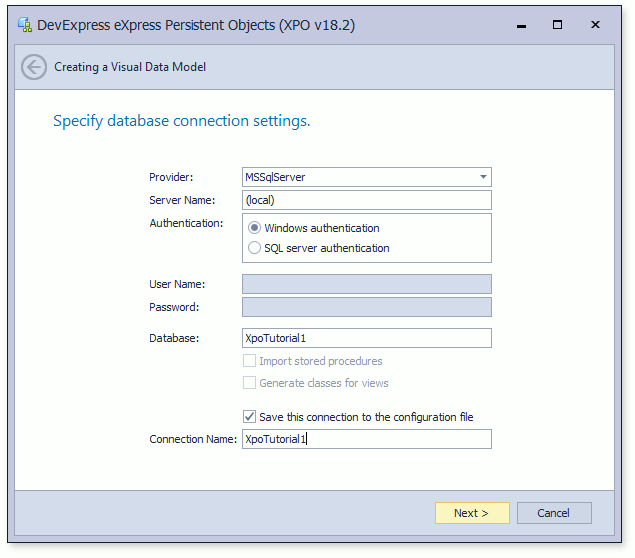
Note
The XpoTutorial1 database does not exist at this point. It will be created automatically by XPO.
Click Finish to complete the wizard. The XPO Data Model Designer will be invoked.
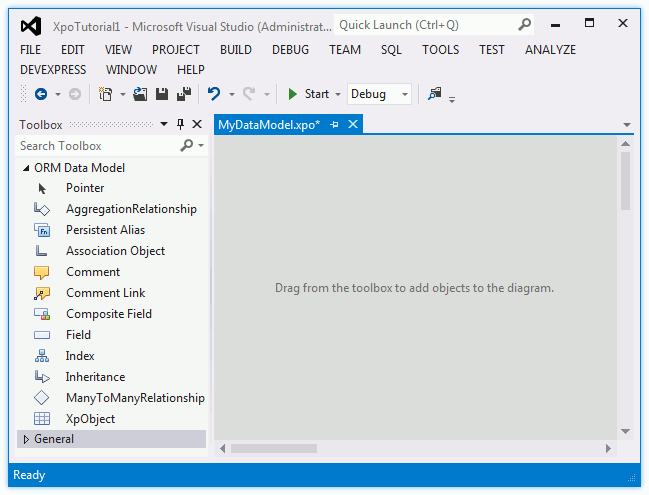
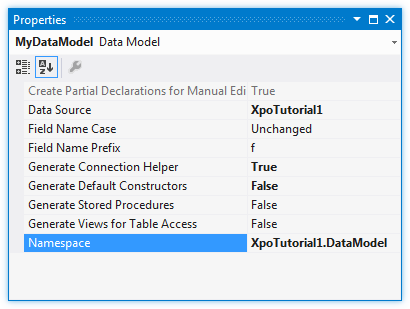
Right-click the empty designer surface and choose Properties. In the invoked Properties window, specify a namespace for your persistent classes, e.g., XpoTutorial1.DataModel.
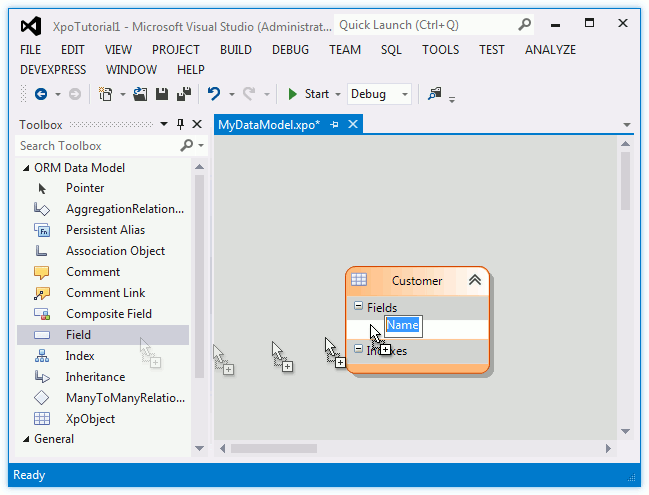
To add a new persistent class, drag the XpObject item from the Toolbox to the designer.
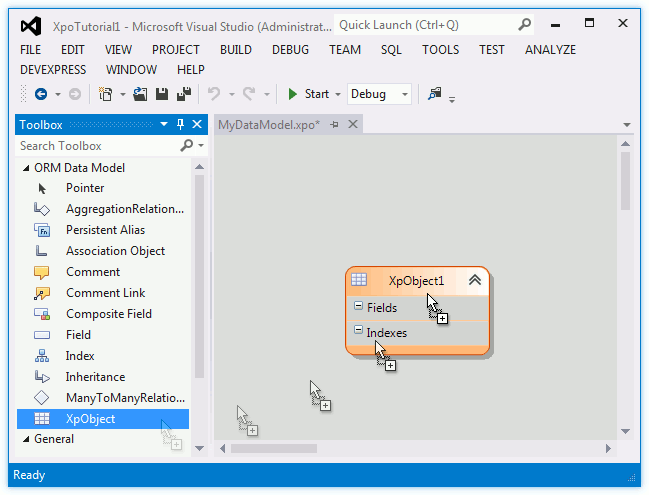
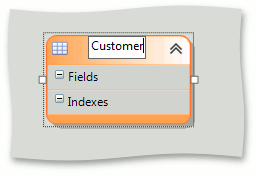
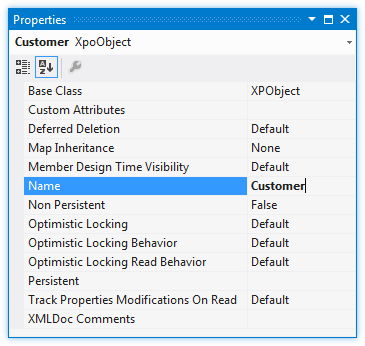
To specify a new class name, double-click the XpObject1 text in the box header and change it to Customer, or invoke the Properties window and change the object’s Name.
To add a Name persistent property, drag the Field item from the toolbox and drop it into the Customer. Rename the newly added field to Name.
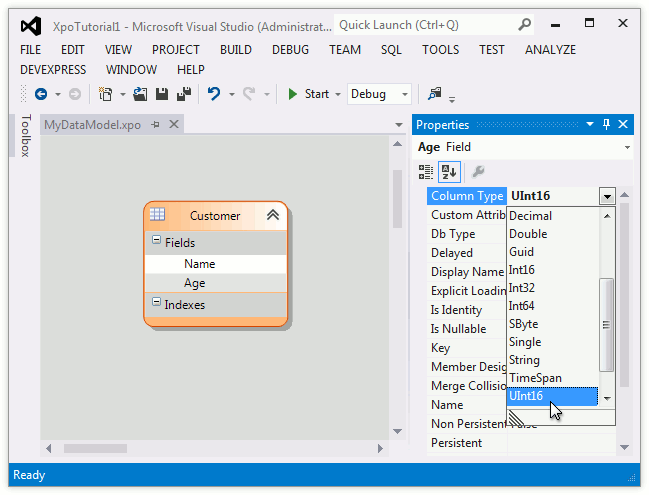
Add the Age property in the same manner. Change its Column Type to UInt16 via the Properties window.
Note
The default type is string, so the Name property added in the previous step is of the string type.
- Save changes in the designer.
The designer has created a declaration of the Customer class inherited from XPObject with default constructors and an object initialization method. Individual persistent objects (instances of this class), will be stored as records in a “Customer” table, while class properties (Name and Age) are mapped to the table’s field values.
Code First
As an alternative to using the designer, you can add a persistent class manually in code. Below is the Customer class code which is equivalent to the designed implementation.
using DevExpress.Xpo;
// ...
public partial class Customer : XPObject {
    public Customer(Session session) : base(session) { }
    public override void AfterConstruction() { base.AfterConstruction(); }
    string fName;
    public string Name {
        get { return fName; }
        set { SetPropertyValue<string>("Name", ref fName, value); }
    }
    ushort fAge;
    public ushort Age {
        get { return fAge; }
        set { SetPropertyValue<ushort>("Age", ref fAge, value); }
    }
}
You can use the DevExpress v18.2 ORM Persistent Object project item template to simplify the creation of such a class. This template creates a new XPObject descendant and adds required assembly references to the project.
Bind the Data Model and User Interface
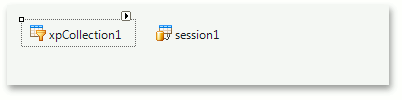
Persistent objects are usually retrieved from a database using the XPCollection or XPView. Drag the XPCollection component from the Toolbox and drop it onto a form. Use the default Form1.cs (Form1.vb) form, or add the XtraForm using the DXperience v18.2 Form template to maintain a consistent look-and-feel to the GridControl control, which will be used later in this lesson.
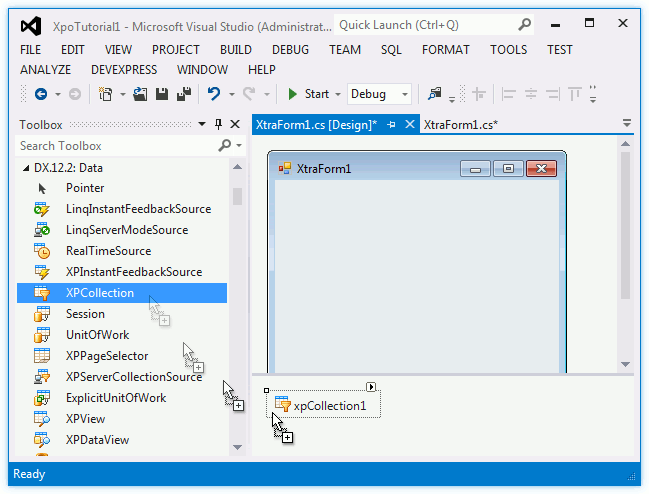
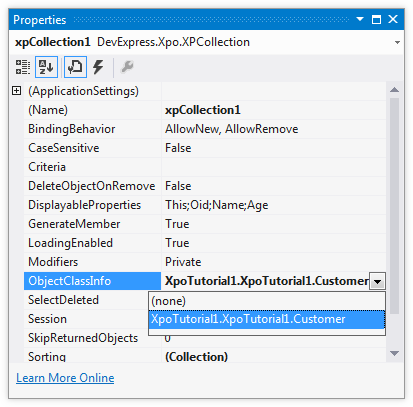
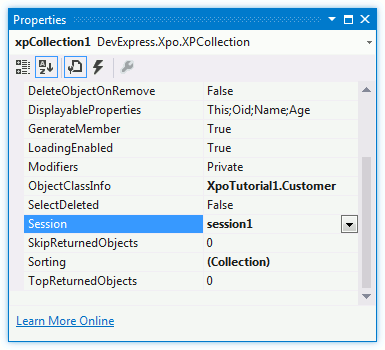
Next, assign our persistent class to the collection’s XPCollection.ObjectClassInfo property. If the class is not available in the drop-down, rebuild the project and retry.
Drag the Session component from the Toolbox and drop it onto the form. Assign it to the XPBaseCollection.Session property using the Properties window.
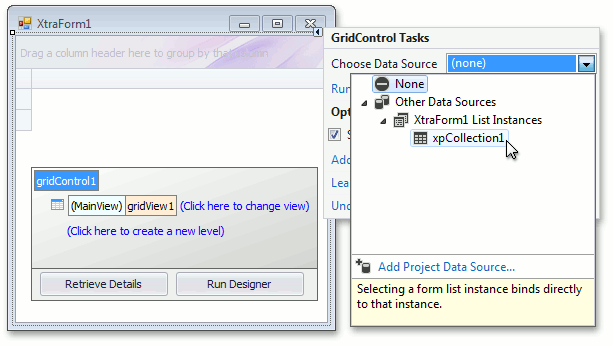
The XPCollection can be bound to a visual control since it implements the standard .NET IBindingList and ITypedList interfaces. Add the GridControl to the form and assign xpCollection1 to the grid’s GridControl.DataSource property.
Note
In addition, you can set the GridControl.UseEmbeddedNavigator property to True to enable the Data Navigator.
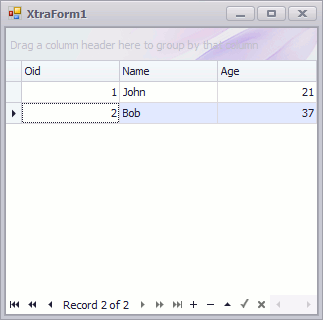
After the XPCollection has been assigned to the grid control, the grid automatically generates columns for all persistent properties (see the image above). In our case, these are the Name and Age columns (the Oid field is automatically created by XPO). Since the XPObject.Oid values are auto-generated, remove the Oid column from the grid, or make this column readonly so that end-users will not be able to edit it.
Create and Persist Objects in Code
Handle the form’s Load event to add records to the Customer table and populate XPCollection.
private void XtraForm1_Load(object sender, EventArgs e) {
    if (xpCollection1.Count == 0) {
        var customer1 = new Customer(session1);
        customer1.Name = "John";
        customer1.Age = 21;
        customer1.Save();
        xpCollection1.Add(customer1);
        var customer2 = new Customer(session1);
        customer2.Name = "Bob";
        customer2.Age = 37;
        customer2.Save();
        xpCollection1.Add(customer2);
    }
}
The XPBaseObject.Save method checks whether or not the database contains the Customer table. (By default, this name matches the name of the object being saved.) If no such table is found, it will be created. Then, it saves the new data to the data table.
Note
It is not necessary to add objects to XPCollection to create and save them. In this lesson, objects are added to show new records in the user interface without having to force a collection reload from the database.
Initialize the Database Connection
Model First
To initialize the Data Access Layer, call the ConnectionHelper.Connect in the application’s Main method.
using DevExpress.Xpo.DB;
// ...
[STAThread]
static void Main() {
    ConnectionHelper.Connect(AutoCreateOption.DatabaseAndSchema);
    Application.EnableVisualStyles();
    Application.SetCompatibleTextRenderingDefault(false);
    DevExpress.Skins.SkinManager.EnableFormSkins();
    Application.Run(new XtraForm1());
}
Code First
The ConnectionHelper class is automatically added to your project by the ORM Data Model Wizard. If you do not use the wizard, then manually assign a Data Layer to the static XpoDefault.DataLayer property instead of calling the ConnectionHelper.Connect.
using DevExpress.Xpo;
using DevExpress.Xpo.DB;
// ...
[STAThread]
static void Main() {
    const string ConnectionString =
        @"XpoProvider=MSSqlServer;data source=(local);integrated security=SSPI;initial catalog=XpoTutorial1";
    XpoDefault.DataLayer = XpoDefault.GetDataLayer(ConnectionString, AutoCreateOption.DatabaseAndSchema);
    // …
}
Results
Run the project. XPO automatically generates the database for persistent objects. If the database does not exist, XPO creates it. A user can view and edit data in the grid. You do not need to write any code to save data: all changes are automatically persisted. The image below illustrates the result.
- A simple data-aware application that allows end-users to view and edit customer details (name and age) is created. Data is stored in an MS SQL Server database.
- The Customer class, whose instances represent records in the Customer table is declared. XPO automatically generates the database.
- New records are added and saved to the Customer table. Each record is represented by a Customer object. Its public properties represent the fields in this table.
- End-users can add new records using the XtraGrid’s data navigator, displayed at the bottom of the grid.