Lesson 9 - Create a Multi-Page Document
- 4 minutes to read
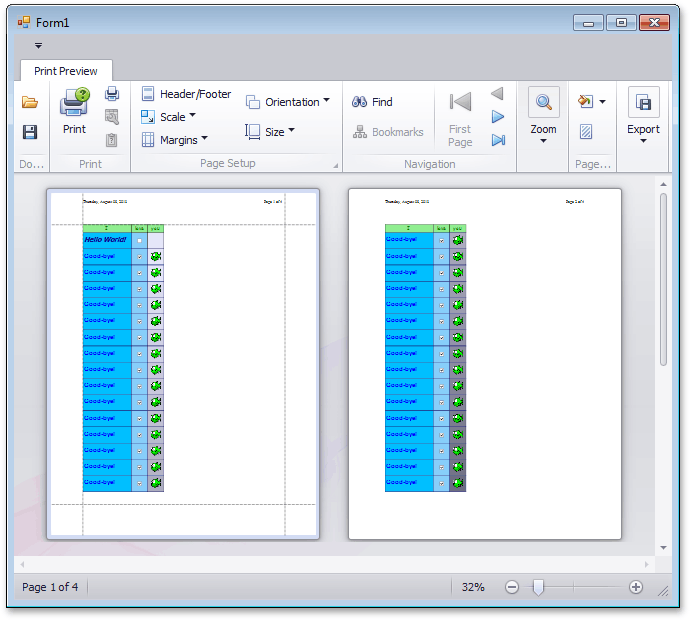
The link created in this lesson generates a multi-page document that contains a detail header, and displays the current date and page numbers on page margins.
Tip
A complete sample project is available in the DevExpress Code Examples database at https://supportcenter.devexpress.com/ticket/details/e161/xtraprinting-getting-started.
To create a multi-page document, do the following.
To create a new printing link, declare a new class (Lesson9) derived from the Lesson8 class defined in the previous lesson. The new class overrides the CreateMarginalHeader method to add two page info bricks.
The detail section is also modified, and the CreateRow method creates multiple rows. These rows have a different background color behind the image. The color is gradually changed using the RGB approach.
using System.Drawing; using System.Windows.Forms; using DevExpress.XtraPrinting; // ... public class Lesson9 : Lesson8 { public Lesson9(PrintingSystem ps, Bitmap img) : base(ps, img) {} protected override void CreateRow(BrickGraphics graph) { // Set the number of iterations for row creation. int c = 230; for(int i = 0; i < 50; i++) { // Set the background color using RGB. bkImageColor = Color.FromArgb(c, c, c + 20); base.CreateRow(graph); c = c - 4 > 0 ? c - 4 : c; } } protected override void CreateMarginalHeader(BrickGraphics graph) { // Set the format string for a page info brick. string format = "Page {0} of {1}"; // Set font to the default font. graph.Font = graph.DefaultFont; // Set the background color to Transparent. graph.BackColor = Color.Transparent; // Set the rectangle for drawing. RectangleF r = new RectangleF(0, 0, 0, graph.Font.Height); // Add a page info brick without borders that displays // the current page number and the total number of pages. PageInfoBrick brick = graph.DrawPageInfo(PageInfo.NumberOfTotal, format, Color.Black, r, BorderSide.None); // Set brick alignment. brick.Alignment = BrickAlignment.Far; // Enable auto width for a brick. brick.AutoWidth = true; // Add a page info brick without borders // that displays the date and time. brick = graph.DrawPageInfo(PageInfo.DateTime, "", Color.Black, r, BorderSide.None); // Set brick alignment. brick.Alignment = BrickAlignment.Near; // Enable auto width for a brick. brick.AutoWidth = true; } }Next, modify the main form’s Load event handler to pass the Printing System of the Document Viewer and the image to the new link.
using System;
using System.Drawing;
using System.Windows.Forms;
using DevExpress.XtraPrinting;
// ...

private void Form1_Load(object sender, System.EventArgs e) {
    Bitmap img = WindowsFormsApplication1.Properties.Resources.fish;
    img.MakeTransparent();
    Lesson9 lesson = new Lesson9(printingSystem1, img);
}
Launch the application and view the result.