Mail Merge
- 4 minutes to read
RichEditControl allows you to perform mail merge in three steps:
Create or Load a Document Template
The template is a document containing fields. These fields refer to the data source’s data column names.
Call the RichEditControl.LoadDocument or RichEditControl.LoadDocumentTemplate method to load a document template.
The RichEditControl allows you to add fields to the template. Call the FieldCollection.Create method to insert one of the following fields to the desired document position:
-
Used for plain text.
-
Used for formatted content. You can use the DOCVARIABLE field to insert formatted strings or content from the RichEditDocumentServer or SubDocument objects. Refer to the How to: Insert Dynamic Content topic for a code sample.
-
Used for images.
Use the INCLUDEPICTURE field as follows: {INCLUDEPICTURE “{MERGEFIELD PictureLocation}” \d} (the PictureLocation is the path to the desired picture).
If you need to merge different images, make sure that the images have the same name as the field’s contents in the database (for example, as the “FirstName” field), and insert the INCLUDEPICTURE as follows: { INCLUDEPICTURE “PicturesLocation\{ MERGEFIELD FieldName }.jpg” *MERGEFORMAT \d }.
Tip
Use the IUriStreamProvider to insert pictures from a data base. Refer to the E4164 code example for details.
Refer to the Fields topic for a code sample on how to insert fields to the document.
Provide a Data Source
RichEditControl supports the following data source types:
- System.Collections.IList;
- System.Collections.ArrayList;
- System.Data.DataTable.
Use the RichEditMailMergeOptions.DataSource property to set the data source to used in a mail merge.
richEditControl1.Options.MailMerge.DataSource = new SampleData();
richEditControl1.Options.MailMerge.ViewMergedData = true;
If the data source contains multiple data tables, use the RichEditMailMergeOptions.DataMember property to define a specific data member. The RichEditMailMergeOptions.ViewMergedData property specifies whether to display field results or field codes.
Merge and Save the Document
Use the following API to set additional merge options (the number of records, merged ranges delimitation, etc.) and merge the document:
| API | Description |
|---|---|
| RichEditControlOptionsBase.MailMerge | Provides access to the default mail merge options. Use the richEditControl.Options.MailMerge notation to access these settings. |
| Document.CreateMailMergeOptions | Initializes an MailMergeOptions instance, which contains additional mail merge options. |
| MailMergeOptions.FirstRecordIndex | Gets or sets the record index from which the merge starts. |
| MailMergeOptions.LastRecordIndex | Gets or sets the record index at which the merge finishes. |
| MailMergeOptions.HeaderFooterLinkToPrevious | Gets ors sets whether headers (footers) in the merged document have the same content in all sections. |
| MailMergeOptions.NumberedListRestart | Sets the behavior of numbered lists when the mail merge operation is performed. |
| MailMergeOptions.MergeMode | Gets or sets how the merged ranges are delimited in the resulting document. |
| Document.MailMerge | Merges the current document using the specified options, and sends the result to the specified document. |
The following code uses records 1 to 3 to perform a mail merge. Each record is merged into a new section in a merged document. The target document is created in another RichEditControl (richEditControl2).
using DevExpress.XtraRichEdit.API.Native;

MailMergeOptions myMergeOptions = richEditControl1.Document.CreateMailMergeOptions();
myMergeOptions.FirstRecordIndex = 1;
myMergeOptions.LastRecordIndex = 3;
myMergeOptions.MergeMode = MergeMode.NewSection;
richEditControl1.Document.MailMerge(myMergeOptions, richEditControl2.Document);
Mail Merge Events
RichEditControl provides the following events to control specific mail merge steps:
| Event | Description |
|---|---|
| RichEditControl.CustomizeMergeFields | Fires when the ‘Insert Merge Field’ command button is clicked, and enables you to customize a drop-down field list. |
| RichEditControl.MailMergeStarted | Fires before mail merge starts. |
| RichEditControl.MailMergeFinished | Fires when mail merge is completed. |
| RichEditControl.MailMergeRecordStarted | Fires before each data record is merged with the document in the mail merge process. |
| RichEditControl.MailMergeRecordFinished | Fires after each data record is merged with the document in the mail merge process. |
The code sample below shows how to handle the RichEditControl.MailMergeRecordStarted event to insert and format additional content to the mail merge result:
private void richEditControl1_MailMergeRecordStarted(object sender, MailMergeRecordStartedEventArgs e)
{
    DocumentRange _range = e.RecordDocument.InsertText(e.RecordDocument.Range.Start,
    String.Format("Created on {0:G}\n\n", DateTime.Now));
    CharacterProperties cp = e.RecordDocument.BeginUpdateCharacters(_range);
    cp.FontSize = 8;
    cp.ForeColor = Color.Red;
    cp.Hidden = true;
    e.RecordDocument.EndUpdateCharacters(cp);
}
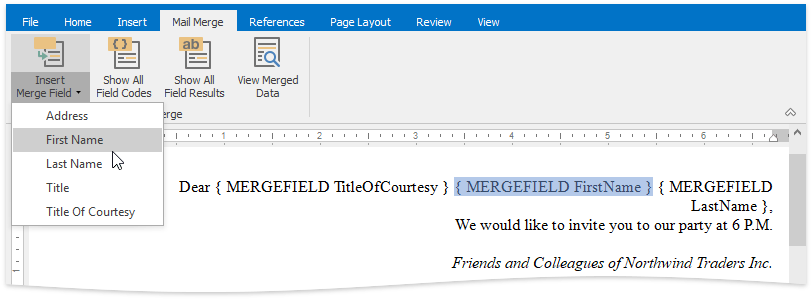
Mail Merge Functionality in the User Interface
The RichEditControl provides the Mail Merge ribbon tab, which allows end-users to insert merge fields, toggle field codes and results and view the merged data. Refer to the How to: Create the RichEditControl with a Ribbon UI topic for details on how to provide the ribbon UI for the RichEditControl.