Disabled Cell Behavior
- 3 minutes to read
Overview
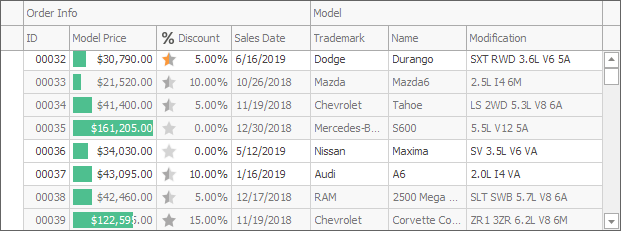
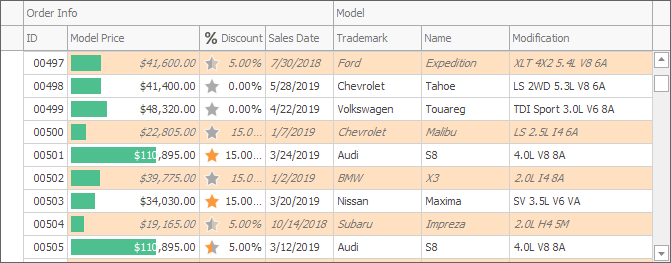
This Behavior allows you to disable cells in rows that meet a certain condition. Disabled cells are grayed-out according to the skin settings. Users cannot edit disabled cells. For example, you can disable rows that display orders that are older than six months.
Supported Controls
How to Attach the Behavior to a Control in the Designer
To attach the Behavior to a control, use the standard approach:
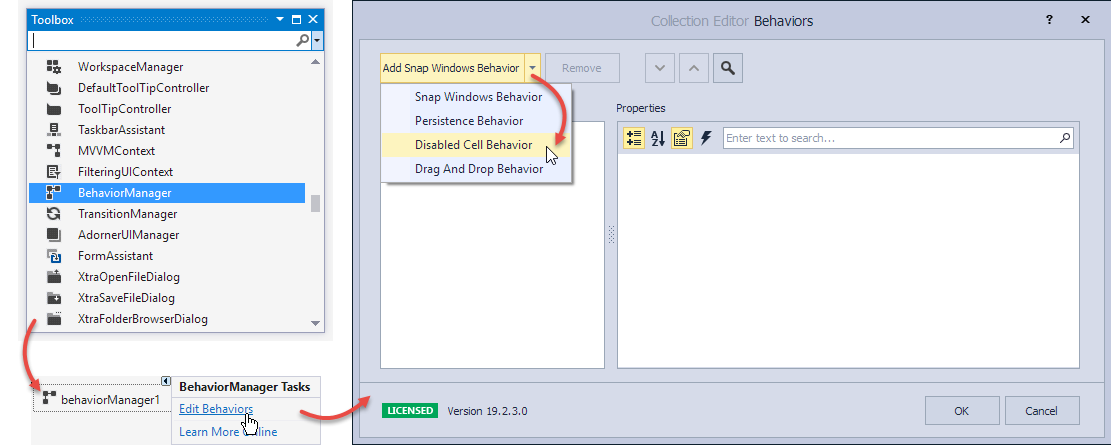
- Drop the
BehaviorManagercomponent from Visual Studio’s Toolbox onto the component tray. - Click Edit Behaviors in the component’s smart
 tag menu.
 - In the Add drop-down menu, select Disabled Cell Behavior.
Options
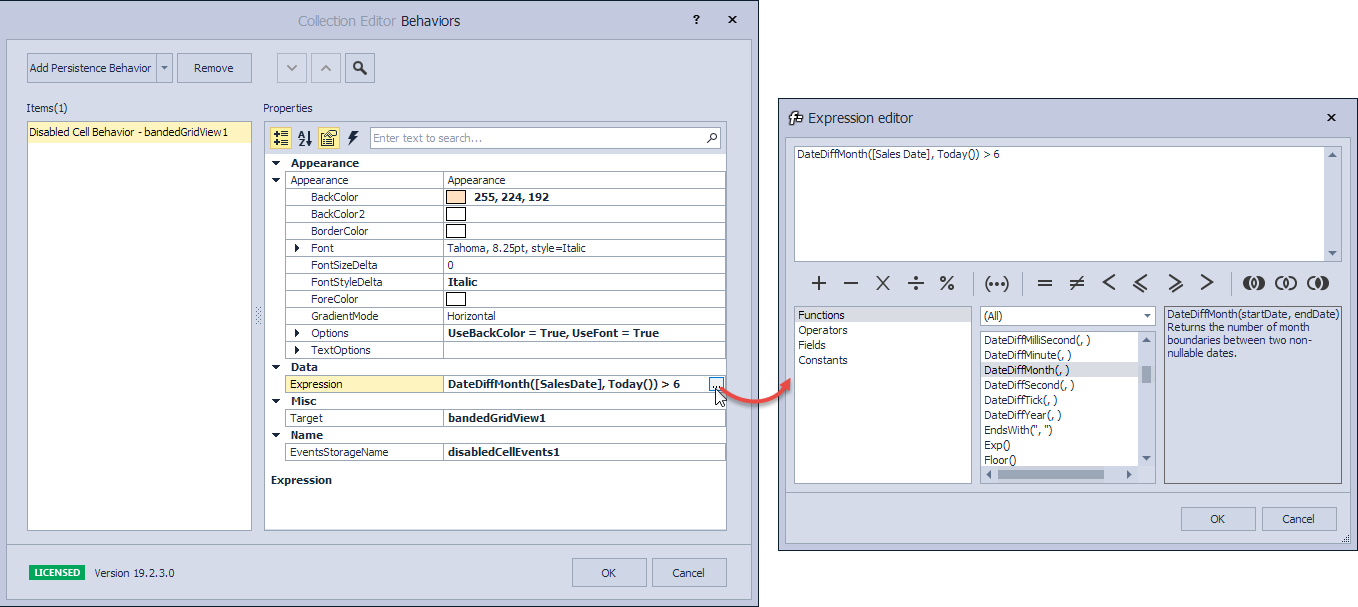
When the Behavior is attached, use the editor to specify the following options:
- The
Appearanceproperty — appearance settings applied to disabled cells. The default settings depend on the current skin. This property allows you to adjust them. For example, you can change the background color, font style, and so on. The
Expressionproperty — a string value that specifies a condition that disabled rows should meet. For example,DateDiffMonth([Sales Date], Today()) > 6disables rows with orders that are older than six months.Click the property’s ellipsis button to invoke the expression editor.
The
ProcessingCellevent — allows you to enable/disable a cell.Use the
FieldNameandRecordIdevent arguments to identify the processed cell. TheDisabledargument gets or sets whether the cell is disabled.The code below disables rows only if the user checked a dedicated option, but never disables cells in the ‘Order ID’ column.
using DevExpress.Utils.Behaviors.Common; private void disabledCellEvents1_ProcessingCell(object sender, ProcessCellEventArgs e) { bool evaluationResult = e.Disabled; evaluationResult = checkEdit1.Checked ? evaluationResult : false; e.Disabled = e.FieldName == "OrderID" ? false : evaluationResult; } // Use the grid view's LayoutChanged method to force the Behavior // to recalculate disabled cells. private void checkEdit1_CheckedChanged(object sender, EventArgs e) { gridView1.LayoutChanged(); }Note
See Code Examples in the XtraGrid demo for more samples.
You can add an event handler in the editor’s events tab, or use the
DisabledCellEventscomponent in the Properties window.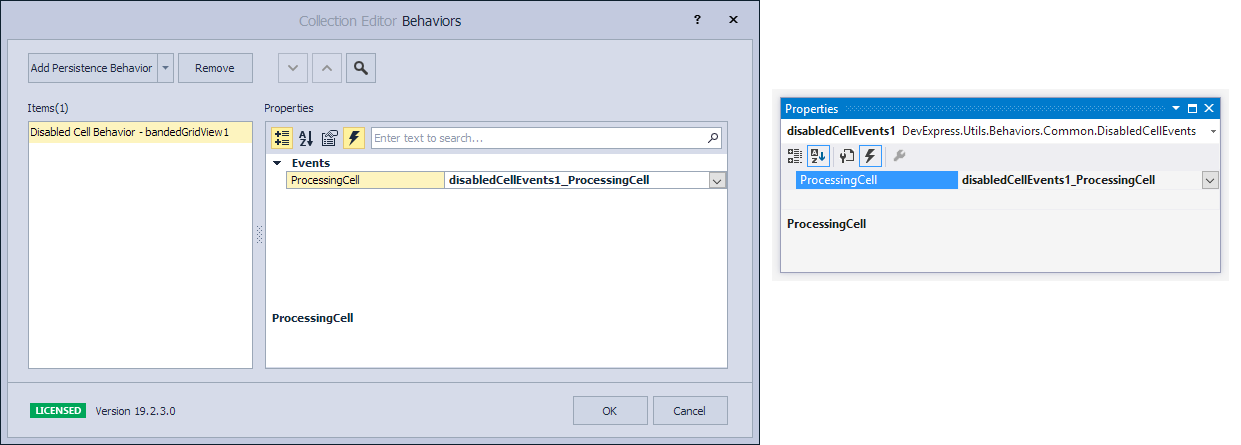
How to Attach the Behavior to a Control in Code
The example below shows how to attach the Behavior to a control in code, specify its settings, and add event handlers.
using DevExpress.Utils.Behaviors;
using DevExpress.Utils.Behaviors.Common;

BehaviorManager bm = new BehaviorManager(this.components);
bm.Attach<DisabledCellBehavior>(gridView1, behavior => {
    behavior.Properties.Expression = "DateDiffMonth([Sales Date], Today()) > 6";
    behavior.Properties.Appearance.BackColor = System.Drawing.Color.AliceBlue;
    behavior.Properties.Appearance.FontStyleDelta = System.Drawing.FontStyle.Italic;
    behavior.ProcessingCell += (s, e) => { if (!checkEdit1.Checked) e.Disabled = false; };
});

// Use the Detach method to remove the Behavior.
bm.Detach<DisabledCellBehavior>(gridView1);