Master-Detail Relationships
- 7 minutes to read
The Grid Control supports master-detail data presentation. This type of data representation requires the presence of at least two data tables - master and detail. These tables are linked by a one-to-many relationship, i.e., a single row in the first table can be related to one or more rows in the second table, but a row in the second table can be related to only one row in the first table. Master and detail tables are also called parent and child tables.
|
Get Started: Create a Data Grid with Master and Detail Views
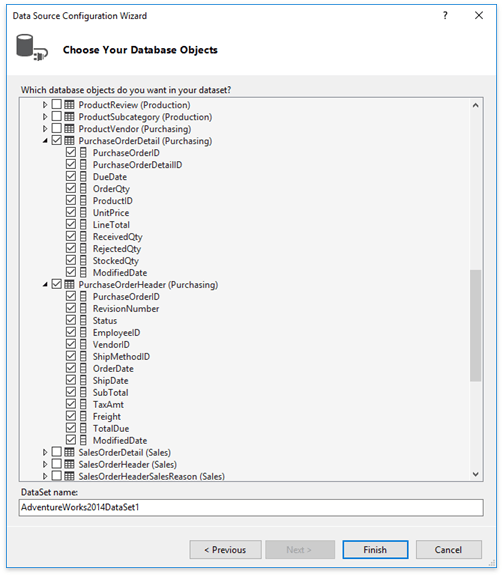
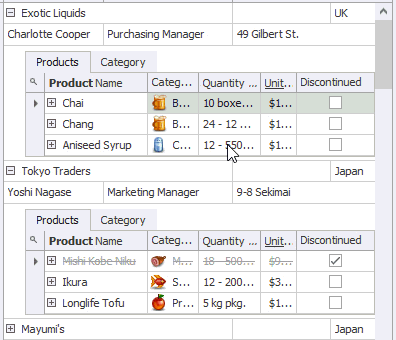
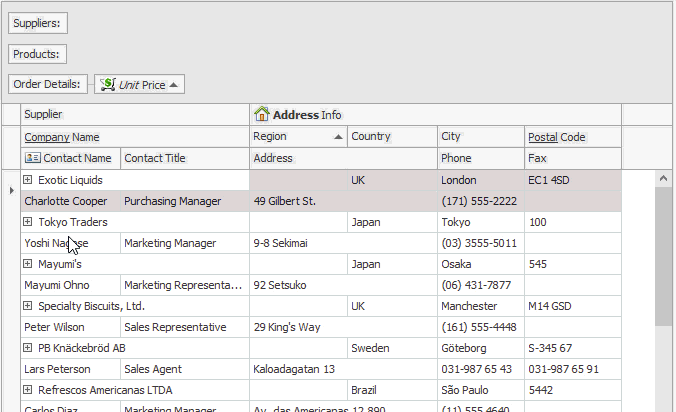
Follow the Data Binding section tutorials to bind a Data Grid to the sample AdventureWorks2014 data base running on a local SQL server. When choosing database objects, select two tables associated with the same key (in the figure below, the “PurchaseOrderID” field links a child “PurchaseOrderDetail” table with a master “PurchaseOrderHeader” table) and use the master table as a Data Grid source.
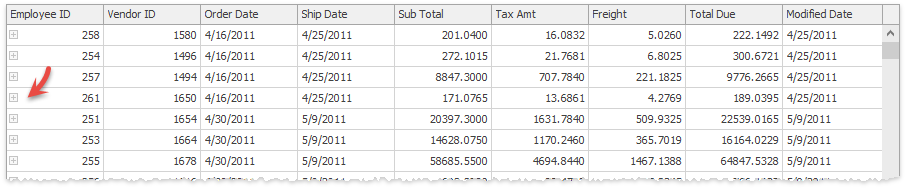
Run the application and notice row expand/collapse buttons within each row. These buttons are disabled because the detail data is not yet loaded.
Drag a TableAdapter component associated with the detail data table from the Visual Studio toolbox and add the following code.
public Form1() {
    InitializeComponent();
    // This line of code is generated by Data Source Configuration Wizard
    purchaseOrderHeaderTableAdapter1.Fill(adventureWorks2014DataSet1.PurchaseOrderHeader);
    // Add this line to load detail data
    purchaseOrderDetailTableAdapter1.Fill(adventureWorks2014DataSet1.PurchaseOrderDetail);
}
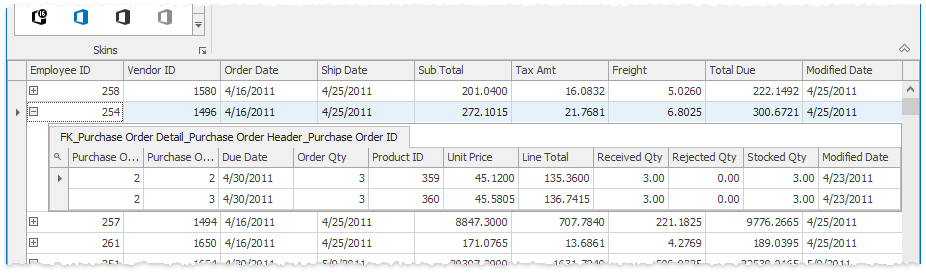
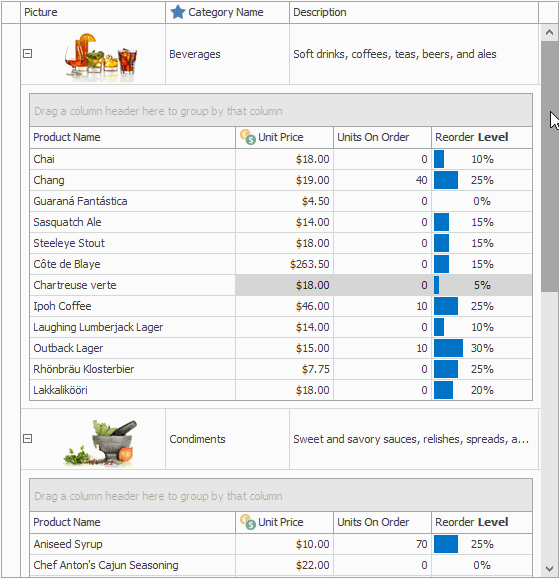
The Data Grid now displays both master and detail tables. Data from a detail table is shown in a View that is a copy of the master View (in the figure below, note how disabling the GridOptionsView.ShowGroupPanel setting for the master View leads to the detail View missing a group panel as well).
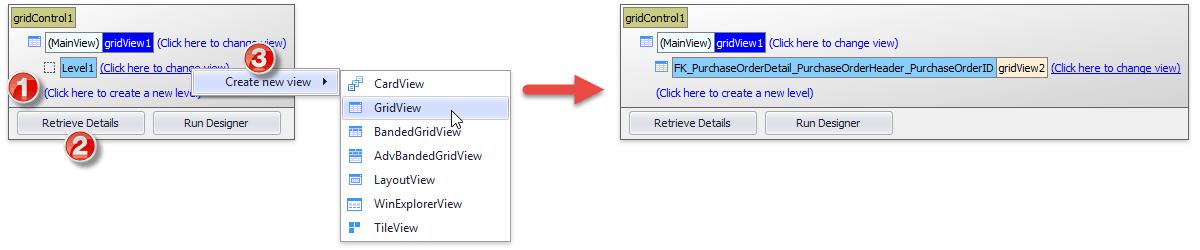
To replace this auto-generated detail View with your own, click the “Click here to create a new level” link in the Level Designer, then the “Retrieve Details” button. Finally, create a new View assigned to the detail level.
Important
Note that detail Views are retrieved by level names that must match real master-detail relation names. When you click “Retrieve Details” at design time, level names for all relations found in a data source are set automatically. For other cases, specify the valid name manually through the GridControl.LevelTree collection. Levels with invalid level names use master View copies instead of your custom Views.
Demo: Master-Detail (standard)
Note
See the Working with Master-Detail Relationships in Code article to learn about other binding scenarios.
Patterns and Clones
Views that you assign to detail Data Grid levels are pattern Views. When a master row expands, the Data Grid dynamically creates a copy of a pattern View to display detail data. This copy is called a clone View. In the example above, “gridView2” is a pattern View whose clones display actual data at runtime.
Detail View Height
Use the BaseView.DetailHeight property to set the height of a detail View. For Layout Views, this property specifies the maximum allowed height, while Views automatically resize themselves to fit displayed cards.
Rename Detail Tabs
In the example above, the child View level changed its name from the default “Level 1” to “FK_PurchaseOrderDetail_PurchaseOrderHeader_PurchaseOrderID” after clicking the “Retrieve Details” button. This text is called a level name.
Important
A level name mustmatch the name of the master-detail relationship with which the View is associated.
By default, tabs that contain detail Views have same captions as corresponding level names. To rename these tabs, use one of the following approaches:
- change the BaseView.ViewCaption property for the detail View;
- handle the GridView.MasterRowGetRelationDisplayCaption event for the detail View.
Synchronize Clones
Enable the BaseView.SynchronizeClones property to synchronize all clone Views created from the same pattern View. When you group data, resize a column, or perform any other operation that changes the appearance of a clone View, same changes will also be applied to all detail clones, synchronized with this one.
Demo: Master-Detail (advanced)
Scroll Modes
Every View, whether it is a master or a clone View, has its own scroll bar by default (Classic mode). By utilizing the GridOptionsDetail.DetailMode property, you can switch to Embedded mode where only one master scroll bar is present.
Detail Tooltips
The Expand/collapse buttons for master rows can display detailed tooltips with clickable links inside them. End-users can utilize these links to open required clone Views, which is the only way to do that in cases where View tabs are hidden (the GridOptionsDetail.ShowDetailTabs property).
The GridOptionsDetail.EnableDetailToolTip option turns detail tooltips on or off.
Demo: Master-Detail (advanced)
Master-Detail Grouping
The GridOptionsView.ShowChildrenInGroupPanel property allows you to have one group panel for all master and detail Views.
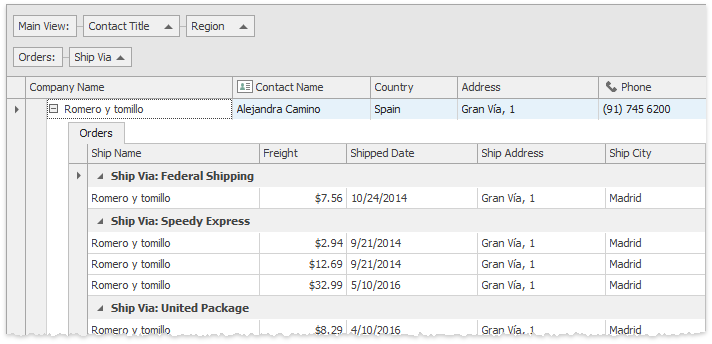
This feature requires clone Views to be synchronized The level name a group panel displays for clone View columns is specified by the GridView.ChildGridLevelName property.
Demo: Master-Detail Grouping
Zoom Details
If the GridOptionsDetail.AllowZoomDetail option is enabled, clone Views display the Zoom/Back button. By clicking it, end-users can maximize details for the current master row. If the master row has multiple related clone Views, they are placed inside tabs.
Related API
- BaseView.ZoomView, BaseView.NormalView - call these methods to manually zoom Views in and out.
Show exampleThe following example shows how to maximize the first detail View for the focused master row, process it, and then restore the layout.
using DevExpress.XtraGrid.Views.Grid;
using DevExpress.XtraGrid.Views.Base;

GridView View = gridControl1.FocusedView as GridView;
if(View.IsMasterRow(View.FocusedRowHandle)) {
    int detailIndex = 0;
    View.SetMasterRowExpandedEx(View.FocusedRowHandle, detailIndex, true);
    ColumnView childView = (ColumnView)View.GetDetailView(View.FocusedRowHandle, detailIndex);
    if(childView != null) {
        childView.ZoomView();
        // Perform some actions.
        // ...
        childView.NormalView();
    }
}
- GridControl.DefaultView - provides access to the currently maximized View. Matches the GridControl.MainView property value if no detail View is currently maximized.
Show exampleThe following code handles the CTRL+Left Arrow/CTRL+Right Arrow to zoom detail Views in and out.
private void gridControl1_ProcessGridKey(object sender, System.Windows.Forms.KeyEventArgs e) {
    if(e.Control) {
        if(e.KeyCode == Keys.Right) {
            gridControl1.FocusedView.ZoomView();
            e.Handled = true;
        }
        else if(e.KeyCode == Keys.Left) {
            gridControl1.DefaultView.NormalView();
            e.Handled = true;
        }
    }
}
- GridControl.DefaultViewChanged - fires upon zooming detail Views.
Demo: Master-Detail (advanced)
Master-Detail Mode Limitations
- Master-Detail mode is forcibly disabled when pixel-based scrolling is on. See GridOptionsBehavior.AllowPixelScrolling to learn more.
- Master-Detail mode is not supported in Large Data Sources: Server and Instant Feedback Modes.
- The Master-Detail mode is not supported while the Split Presentation feature is in use.
- Only GridView and its descendants (BandedGridView and AdvBandedGridView) can be master views.