How to: Create a Custom Brick Implementing the IBrick Interface
- 4 minutes to read
The XtraPrinting Library enables you to create your own custom bricks and use them in your document. In this topic we introduce one of the approaches to accomplishing this task, which requires implementing the IBrick interface. For more information on creating custom bricks by inheriting from any standard brick, refer to the How to: Create a Custom Brick Inherited from a Standard Brick tutorial.
Implementing the IBrick Interface
This example demonstrates how to create a custom brick class, which implements the IBrick interface and draws an elliptical figure. Its inner region is filled with a linear color gradient.
Note
A complete sample project is available at https://github.com/DevExpress-Examples/how-to-create-a-custom-brick-e91
[BrickExporter(typeof(EllipseBrickExporter))]
public class EllipseBrick : IBrick {

    // Set gradient colors for inner and outer ellipse regions.
    public Color InnerColor = Color.Transparent;
    public Color OuterColor = Color.Peru;

    // Set gradient direction.
    public LinearGradientMode GradientDirection = LinearGradientMode.Vertical;

    // Default constructor.
    public EllipseBrick() {
    }

    // Constructor, initializing gradient colors and direction.
    public EllipseBrick(Color InnerColor, Color OuterColor, LinearGradientMode GradientDirection) {
        this.InnerColor = InnerColor;
        this.OuterColor = OuterColor;
        this.GradientDirection = GradientDirection;
    }


    // This method is required by the IBrick interface.
    public Hashtable GetProperties() {
        return null;
    }

    // This method is required by the IBrick interface.
    public void SetProperties(object[,] properties) {
    }

    // This method is required by the IBrick interface.
    public void SetProperties(Hashtable properties) {
    }
}

public class EllipseBrickExporter : BrickExporter {
    EllipseBrick EllipseBrick { get { return Brick as EllipseBrick; } }
    // Fills an ellipse with a linear color gradient.

    public override void Draw(Graphics gr, RectangleF rect) {
        LinearGradientBrush brush = new LinearGradientBrush(rect, EllipseBrick.OuterColor,
            EllipseBrick.InnerColor, EllipseBrick.GradientDirection);
        ColorBlend colorBlend = new ColorBlend();
        colorBlend.Positions = new float[] { 0.0f, 0.5f, 1.0f };
        colorBlend.Colors = new Color[] { EllipseBrick.OuterColor, EllipseBrick.InnerColor, EllipseBrick.OuterColor };
        brush.InterpolationColors = colorBlend;
        gr.FillEllipse(brush, rect);
    }
}
Using the EllipseBrick
When a class is implemented, you can use it in your code. The code below demonstrates the EllipseBrick drawn within a specified rectangle.
Note
A complete sample project is available at https://github.com/DevExpress-Examples/how-to-create-a-custom-brick-e91
private void button2_Click(object sender, EventArgs e) {
    // Create a brick.
    IBrick brick = new EllipseBrick(Color.LightGreen, Color.Blue,
        LinearGradientMode.ForwardDiagonal);

    // Start the report generation.
    printingSystem1.Begin();
    IBrickGraphics graph = printingSystem1.Graph;

    // Specify the page area to draw a brick.
    printingSystem1.Graph.Modifier = BrickModifier.Detail;

    // Add the brick with specified dimensions to the document.
    graph.DrawBrick(brick, new RectangleF(0, 0, 150, 100));

    // Finish the report generation.
    printingSystem1.End();

    // Preview the result.
    printingSystem1.PreviewFormEx.Show();
}
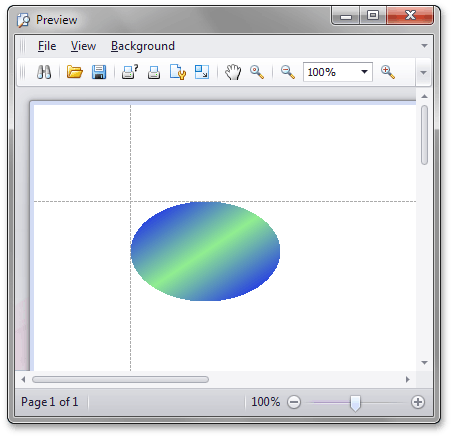
The EllipseBrick is displayed in the image below: