Create Appointments
- 4 minutes to read
Note
The actions available to end-users can be restricted by specifying the SchedulerOptionsCustomization properties. For an example, see the How to: Prevent End-Users from Editing Appointments document.
Context menu
An appointment can be created via the SchedulerControl‘s context menu. The corresponding items which may be used to create a new appointment are available in the context menu, invoked when an end-user right-clicks any scheduler area which is not occupied with an appointment.
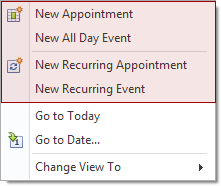
New Appointment
Invokes the Edit Appointment dialog.
The Start time and End time values are initially set to the low and upper boundaries of the current date and time selection. The Show time as field is set to the Busy value of the AppointmentStatusType enumeration. The Resource field value is Any, although when appointments are grouped by resources, this field is set to the resource to which the selected cell belongs.
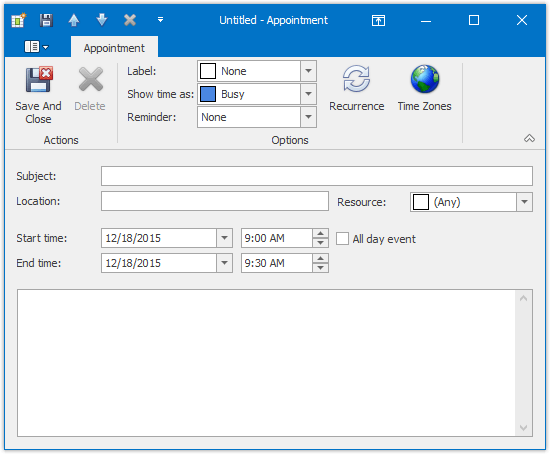
Scheduling an appointment means filling in the Subject (Appointment.Subject) and Location (Appointment.Location) fields. If necessary, an end-user may drop some lines of text into the Description text box (Appointment.Description), and they will be shown within an appointment in either Day View or Work-Week View.
To learn how to set the appointment’s label and status values, refer to the Appointment Labels and Statuses. End-users can switch the appointment’s Reminder for future notifications (Reminders for Appointments).
New All Day Event
Invokes the Edit Event dialog which is used to create a new all-day appointment (also called ‘all-day event’). The dialog is identical to Edit Appointment, except that in this case the All day event (Appointment.AllDay) option is checked, its time range is measured in days (not hours) and marked as Free. The appointment can be transformed into the all-day event and vice-versa by checking this box.
New Recurring Appointment
The concept of recurrence is explained in the Recurring Appointments and Exceptions document.
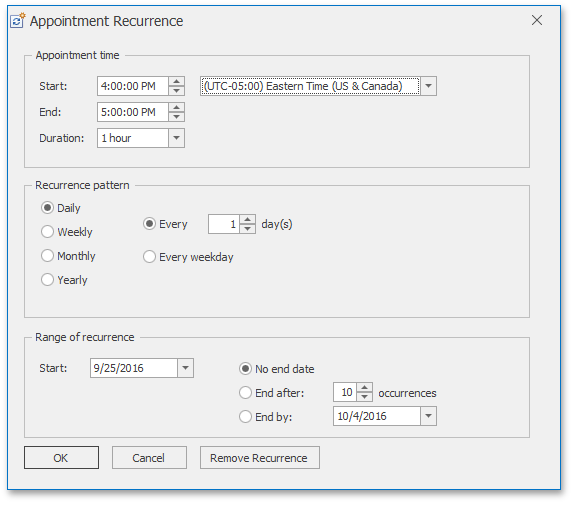
Selecting this menu item invokes the Edit Appointment dialog used to create a new appointment, and also invokes the Appointment Recurrence dialog, which allows the recurrence pattern to be specified for the new appointment.
New Recurring Event
The concept of recurrence is explained in the Recurring Appointments and Exceptions document.
Selecting this menu item invokes the Edit Event dialog used to create a new event, and also invokes the Appointment Recurrence dialog, which allows the recurrence pattern to be specified for the new event.
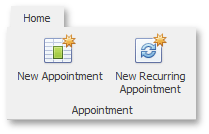
Bar or Ribbon UI
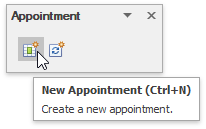
If a scheduling application is provided with the Bar or Ribbon UI, end-users can create new appointments (simple and recurring) using the New Appointment and New Recurring Appointment buttons on the Appointment toolbar or Ribbon page group. These buttons invoke the Edit Appointment and Appointment Recurrence dialog, respectively.
| Create a new appointment via Bar UI | Create a new appointment via Ribbon UI |
|---|---|
 |
 |
Key combinations and mouse clicks
Invoke the In-place Editor
Pressing an alphanumeric key or ENTER invokes an in-place editor that allows typing the subject of a new appointment occupying the currently selected area. Then, an end-user can either create and save the appointment by pressing ENTER or by changing the focus, or cancel the operation by pressing ESC.
The type of the created appointment depends on the selected time cell(s). When typing is done in Day or Work-Week view, the appointment is created with the time interval starting with the earliest time of the selected cells, and ending with the latest, and the time is marked as Busy. If an all-day area is selected, or the Timeline or Gantt view is active, then an all-day appointment is created with the time marked as Free. When the scheduler display mode is Week or Month view, the appointment is created with the start time set to 12 AM of the first selected day, and the end time is set to 12 AM of the day following the last selected day.
The built-in type of an in-place editor is simple. To customize it, handle the SchedulerControl.InplaceEditorShowing event. For an example, refer to How To: Implement a Custom Inplace Editor for Appointments.
Invoke the Edit Appointment Dialog
Double-clicking within a scheduler view’s time cell that does not contain any appointments or pressing CTRL+N, invokes the Edit Appointment dialog described above.
Copy an Existing Appointment
Dragging an appointment with the right mouse button invokes the context menu, which an end-user can use to decide whether to move or copy the appointment, or cancel the operation.
Dragging an appointment while holding CTRL creates a copy of the selected appointment and moves it, leaving the original appointment intact.