How To: Implement a Custom Inplace Editor for Appointments
- 5 minutes to read
Note
Show Me A complete sample project is available on GitHub at https://github.com/DevExpress-Examples/how-to-implement-a-custom-inplace-editor-for-appointments-e4826.
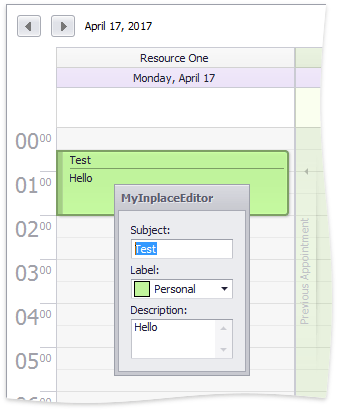
The following example demonstrates how to customize an inplace editor. An inplace editor (sometimes called an inline editor, since it is intended for inline editing) is activated when an end-user adds a new appointment by pressing the Enter key in selected cells, or edits the appointment’s Appointment.Subject by pressing the F2 key when the appointment is selected, or by single-clicking it (a double click opens the Appointment Editing Form).
An inplace editor in the Scheduler is different from an inplace editor in the Data Grid because the inplace editor in the Scheduler is a separate form that can be shown in any location. Inplace editors for the Scheduler do not use repository item collections. To display an inplace editor to the user, handle the SchedulerControl.InplaceEditorShowing event, and specify the editor using the InplaceEditorEventArgs.InplaceEditor property or the InplaceEditorEventArgs.InplaceEditorEx property. The inplace editor must implement the ISchedulerInplaceEditor or the ISchedulerInplaceEditorEx interface.
Note
You can set restrictions on inplace editing by setting the SchedulerOptionsCustomization.AllowInplaceEditor property value. For example, set the property to UsedAppointmentType.None to disable inline editing, or set it to UsedAppointmentType.Custom to raise the SchedulerControl.AllowInplaceEditor event, which enables you to decide whether or not to invoke the editor.
To implement a custom inplace editor and use it instead of the default inplace editor, follow the instructions below.
- Create an Inplace Editor Form Layout
- Add the Code to Implement the Edit Functionality
- Implement an Inplace Editor Control
- Add the Code to Display a Custom Inplace Editor
- Run the Project
Create an Inplace Editor Form Layout
The following steps assume that you create the project in C#. However, if you choose a Visual Basic project, the actions will be the same.
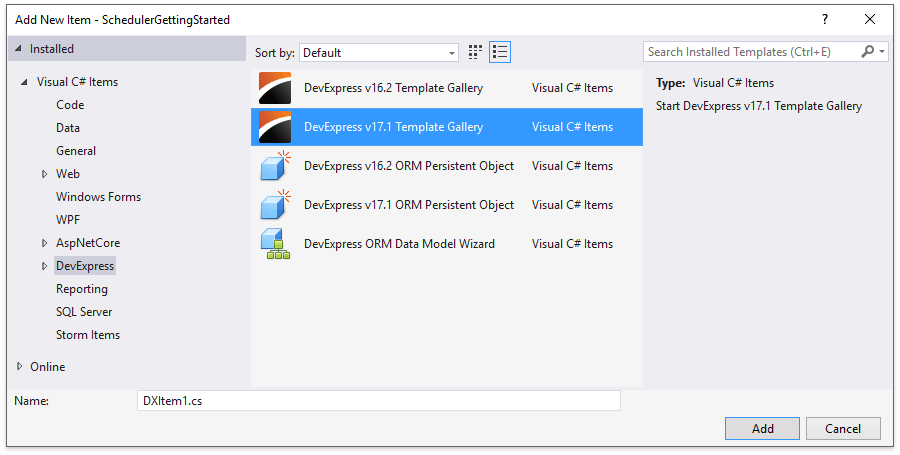
In the Visual Studio Designer, press CTRL+SHIFT+A to invoke the Add New Item dialog. In this dialog, select DevExpress v19.2 Template Gallery and click Add.
You can also invoke this dialog by selecting the DevExpress -> All Platforms -> New Item… menu in the Visual Studio esigner.
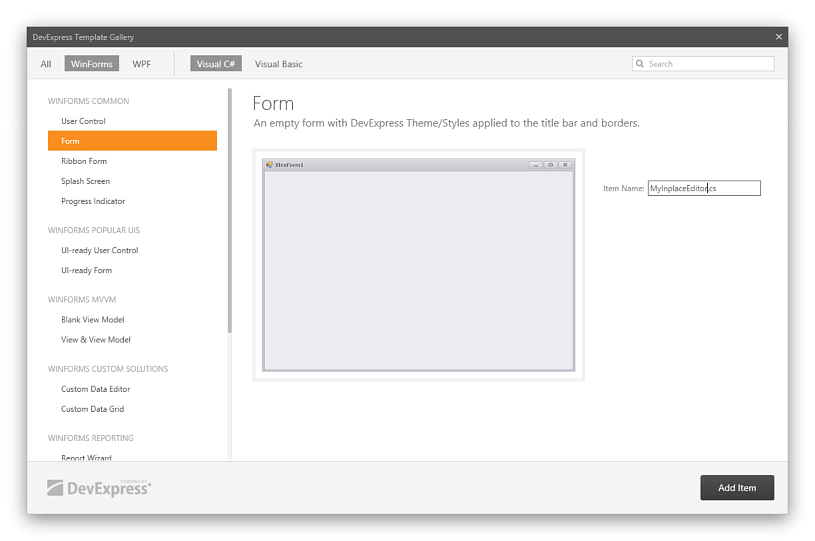
In the DevExpress Template Gallery window, select Form and specify MyInplaceEditor as the name of the new form. Click Add Item.
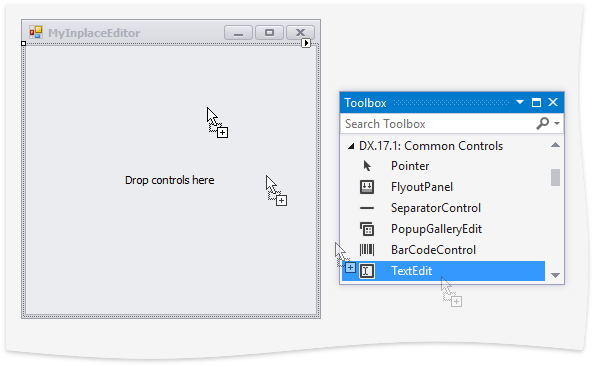
Locate the LayoutControl component in the Toolbox and drop it onto the form. In the Properties grid, set the LayoutControl’s Dock property to Fill, so that the control occupies the entire form. For more information on the Layout component, refer to the Tutorial: Creating a Simple Data Layout document.

Add a control that will be used to edit the Appointment.Subject property. To accomplish this, locate the TextEdit control in the Toolbox and drop it onto the LayoutControl.
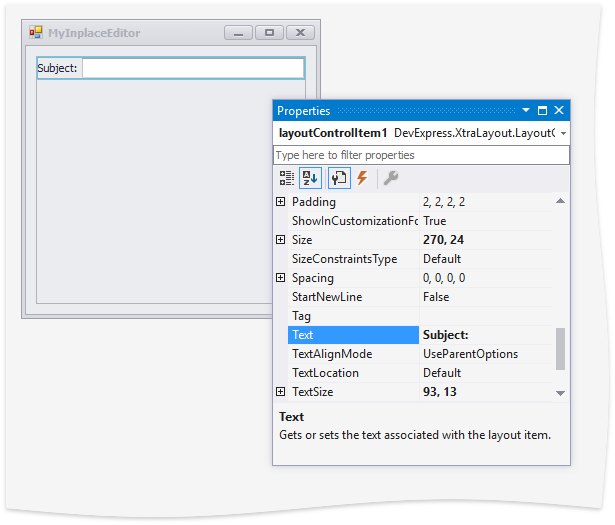
Change the text of the newly created layoutControlItem1 to Subject:. Change the name of the textEdit1 control to edtSubject.
Add a control that will be used to edit the Appointment.LabelId property. Locate the AppointmentLabelEdit control in the Toolbox and drop it onto the LayoutControl. Change the text of the newly created layoutControlItem2 to Label:.

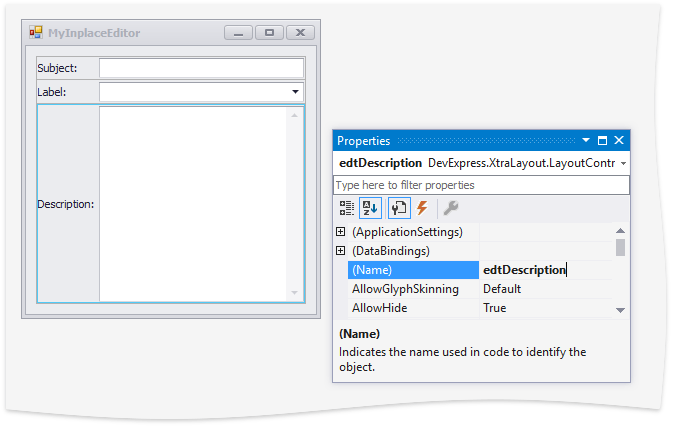
Add a control that will be used to edit the Appointment.Description property. Locate the MemoEdit control in the Toolbox and drop it onto the LayoutControl. Change the text of the newly created layoutControlItem3 to Description:. Change the name of the memoEdit1 control to edtDescription.
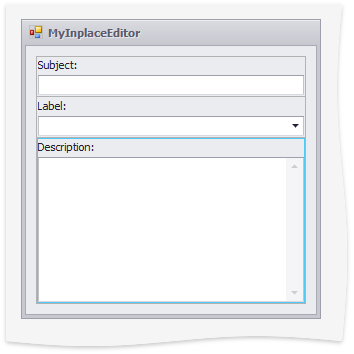
To improve the form layout, do the following.
- Hide the Control/System menu box by setting the ControlBox property to false.
- Set the Text property to an empty string to hide the form’s caption.
- Specify the minimum size of the form using the MinimumSize property. Set the minimum width to 132, and set the minimum height to 192.
- Set the StartPosition property to Manual.
- Set the BaseLayoutItem.TextLocation for each LayoutControlItem to Top.
The result is shown below.
Add the Code to Implement the Edit Functionality
Open the MyInplaceEditor.cs code file and replace the content of the public partial class MyInplaceEditor with the code provided in the complete sample project on GitHub (see the MyInplaceEditor.cs/MyInplaceEditor.vb file). Add using (Imports for Visual Basic) namespace directive for the DevExpress.XtraScheduler namespace.
Implement an Inplace Editor Control
The Scheduler requires an object that implements the ISchedulerInplaceEditorEx interface to use it as an inplace editor. Thus, you need to create a container object for your custom form. This container should implement the ISchedulerInplaceEditorEx interface (the container is also responsible for instantiating and positioning the MyInplaceEditor form).
To create a container class, add a new class file named MyInplaceEditorControl to the project. Copy and paste the code provided in the complete sample project on GitHub (see the MyInplaceEditorControl.cs/MyInplaceEditorControl.vb file) to replace the default class content.
Add the Code to Display a Custom Inplace Editor
To display a custom form instead of the default inplace editor, subscribe to the SchedulerControl.InplaceEditorShowing event and handle it as follows.
private void SchedulerControl1_InplaceEditorShowing(object sender, InplaceEditorEventArgs e) {
    e.InplaceEditorEx = new MyInplaceEditorControl(e.SchedulerInplaceEditorEventArgs);
}
Run the Project
Run the project, and type in the Scheduler view to create a new appointment or click an existing appointment. The inplace editor appears as illustrated in the picture below.