Text Boxes
- 6 minutes to read
The following topic describes how to insert and modify text boxes in the RichEditControl.
-
RichEditControl provides a comprehensive API that allows you to create and modify text boxes in code.
Text Boxes in the User Interface
Provide end-users with the capability to insert and customize text boxes in documents.
Manage Text Boxes in Code
Create a Text Box
To create a text box anchored to the given document position, use the ShapeCollection.InsertTextBox method as shown below.
By default, the inserted text box is positioned at the beginning of the first paragraph on the page that contains a floating object’s anchor.
Note
A complete sample project is available at https://github.com/DevExpress-Examples/text-boxes-simple-example-t481625
DocumentPosition myPosition = document.Paragraphs[0].Range.Start;

//Insert a text box to a given position
Shape myTextBox = document.Shapes.InsertTextBox(myPosition);
Select the Text Box in the Document
Both floating pictures and text boxes are stored in the document’s ShapeCollection. To determine the type of the retrieved collection item, check its Shape.TextBox property. If the property value is null, the target item is a floating picture; otherwise, it is a text box.
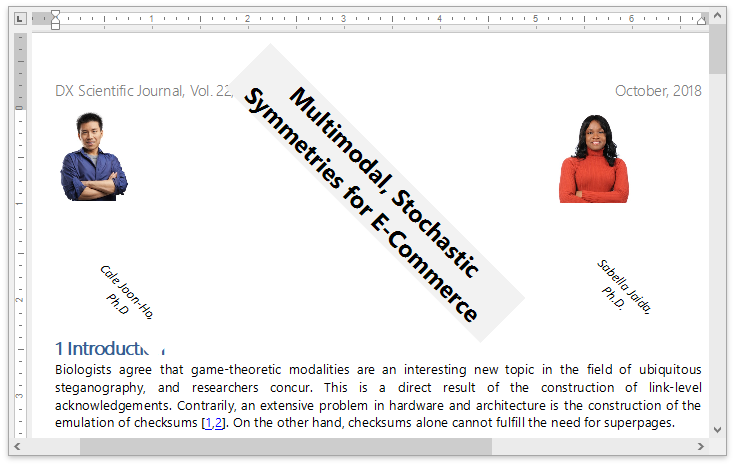
The code snippet below uses the Shape.TextBox property to distinguish text boxes from floating pictures and rotate them.
The following code rotates text boxes and resizes floating pictures.
document.LoadDocument("FirstLook.docx", DevExpress.XtraRichEdit.DocumentFormat.OpenXml);
foreach (Shape s in document.Shapes)
{
 // Rotate a text box and resize a floating picture.
    if (s.TextBox == null)
    {
        s.ScaleX = 0.1f;
        s.ScaleY = 0.1f;
    }
    else
    {
        s.RotationAngle = 45;
    }
}
Insert and Modify Text in the Text Box
To access the text box contents, use the TextBox.Document property. The following methods allow you to insert different document elements to the text box.
| Member | Description |
|---|---|
| SubDocument.BeginUpdate | Opens the given SubDocument instance for modification. |
| SubDocument.InsertText | Inserts a text string to the specified position. |
| TableCollection.Create | Inserts a table to the specified position within the document. |
| ShapeCollection.InsertPicture | Inserts a floating picture to the given document position. |
| DocumentImageCollection.Insert | Inserts an inline image to the specified position. |
| ShapeCollection.InsertTextBox | Inserts a text box to the specified position. |
| SubDocument.EndUpdate | Finalizes the document update. |
The text box content can be formatted as a regular text. For details, refer to the Text Formatting topic.
The code example below inserts a text string to the text box and applies formatting to the inserted content.
Note
A complete sample project is available at https://github.com/DevExpress-Examples/text-boxes-simple-example-t481625
//Access the text box content
SubDocument textBoxDocument = document.Shapes[0].TextBox.Document;

//Insert text to the text box
textBoxDocument.AppendText("Multimodal, Stochastic Symmetries for E-Commerce");

//Apply formatting to the text box content
CharacterProperties cp = textBoxDocument.BeginUpdateCharacters(textBoxDocument.Range);
cp.ForeColor = Color.DarkSlateGray;
cp.FontName = "Times New Roman";
cp.FontSize = 18;
textBoxDocument.EndUpdateCharacters(cp);
Change the Text Box Style
Use the API from the table below to change the text box appearance.
| Member | Description |
|---|---|
| ShapeFill.Color | Sets the text box’ background color. |
| ShapeLine.Color | Sets the text box’ border line color. |
| ShapeLine.Thickness | Sets the text box’ border line thickness. |
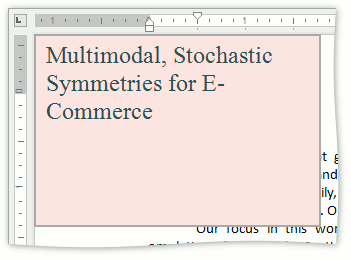
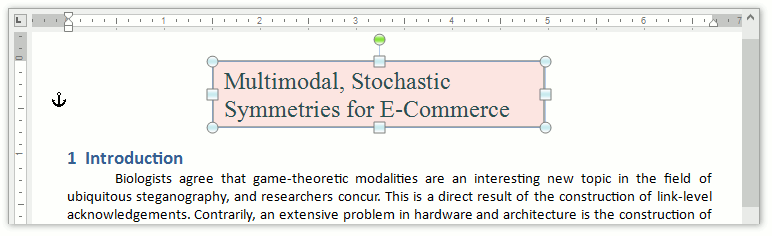
The code snippet below changes the text box’ color options so it appears as on the following image.
Note
A complete sample project is available at https://github.com/DevExpress-Examples/text-boxes-simple-example-t481625
Shape myTextBox = document.Shapes[0];

//Specify the background color
myTextBox.Fill.Color = Color.MistyRose;

//Draw a border around the text box
myTextBox.Line.Color = Color.DarkGray;
myTextBox.Line.Thickness = 1.5f;
Rotate and Resize the Text Box
To resize the text box, use one of the members from the table.
| Member | Description |
|---|---|
| Shape.ZOrder | Changes the shape position in the Z-order. Use this property to place the text box behind or in front of other document shapes. |
| Shape.Offset | Positions the text box relative to a certain point within the document layout. |
| Shape.ScaleX | Scales the text box width to a given value. |
| Shape.ScaleY | Scales the text box height to a given value. |
| Shape.RelativeHorizontalPosition | Specifies the horizontal alignment of the text box relative to the specific page element. |
| Shape.RelativeVerticalPosition | Specifies the vertical alignment of the text box relative to the specific page element. |
| Shape.RotationAngle | Rotates the text box at a given angle. |
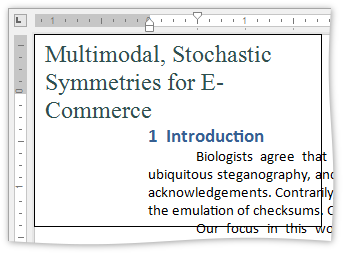
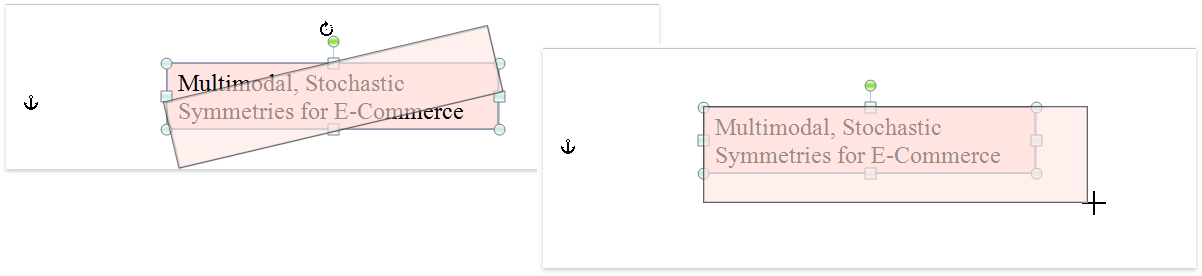
The following code snippet resizes the text box so it appears as on the image below.
Note
A complete sample project is available at https://github.com/DevExpress-Examples/text-boxes-simple-example-t481625
Shape myTextBox = document.Shapes[0];

//Resize the text box
myTextBox.ScaleX = 5f;
myTextBox.ScaleY = 1f;

//Set the horizontal alignment
myTextBox.HorizontalAlignment = ShapeHorizontalAlignment.Center;
myTextBox.RelativeHorizontalPosition = ShapeRelativeHorizontalPosition.Margin;

//Change the vertical alignment
myTextBox.VerticalAlignment = ShapeVerticalAlignment.Top;
myTextBox.RelativeVerticalPosition = ShapeRelativeVerticalPosition.Margin;
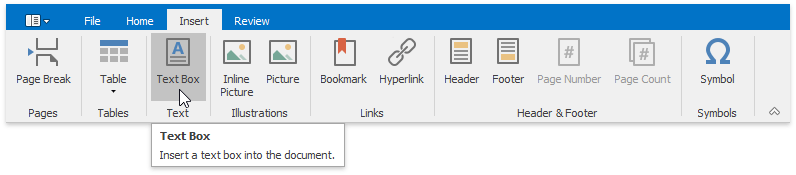
Text Boxes in the UI
End-users can insert the text box to any position within the document using the Insert Ribbon tab. To learn how to provide the application with the ribbon menu, refer to the How to: Create the RichEditControl with a Ribbon UI topic.
When the text box is selected, the Picture Tools | Format tab is activated. This tab allows end-users to position the text box within the document and set the shape’s fill or border color. The text box content can be formatted using the Home ribbon tab.

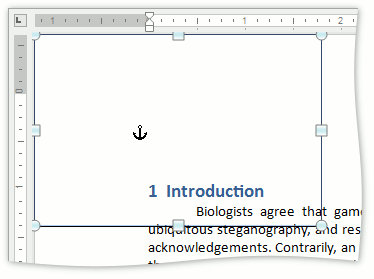
By default, the text box height is automatically increased to display the contained text. End-users can rotate and resize the text box using specially designed handles as shown on the following image. When the text box rotates, its content is also rotated.
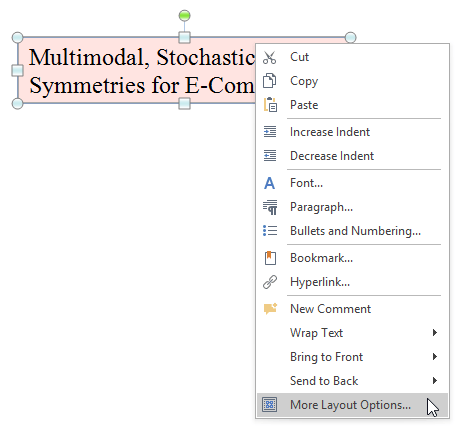
To set more advanced options, use the Shape Layout Dialog, which can be invoked from the context menu.
Tip
Inserting text boxes to the document can be forbidden. To do that, use the DocumentCapabilitiesOptions.FloatingObjects property.