Conditional Formatting
- 13 minutes to read
The Tree List control includes a Microsoft Excel-inspired conditional formatting feature, which allows you to change the appearance of individual cells or rows based on specific conditions. This feature helps to highlight critical information, identify trends and exceptions, and compare data. Formatting rules can be created at design time and runtime.
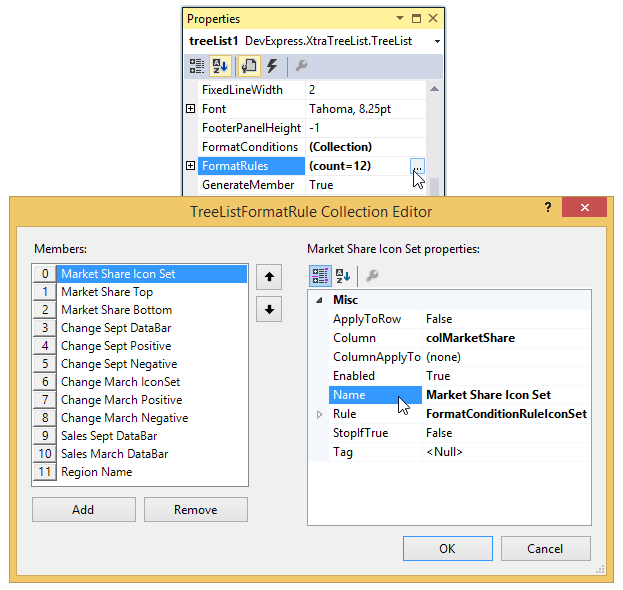
Multiple format rules can be applied to a Tree List control simultaneously. To add format rules, use the TreeList.FormatRules collection. Each rule specified by a TreeListFormatRule class object identifies a target column, the rule type and other options.
The Rule property (FormatRuleBase.Rule) of a TreeListFormatRule object allows you to specify the rule type. At design time, click the dropdown button for the Rule property to open the dropdown list showing available conditions in a human-readable form.
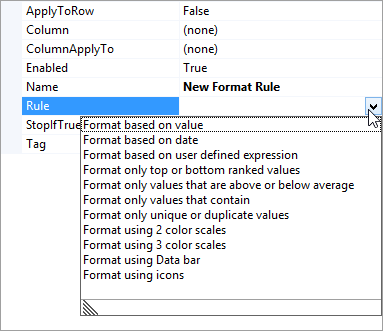
After choosing the rule type, a corresponding rule class object is created and assigned to the Rule property (when defining a format rule at runtime, create this object and assign it to the Rule property manually).
The following table lists available rule types.
Rule | Rule Class | Description | Format Examples |
|---|---|---|---|
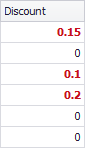
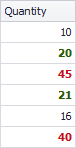
Format based on value | Applies a format if a column’s value meets a specified condition (Equal, Less, Between, etc.). |
You can customize appearance settings for this format rule using the following properties:
| |
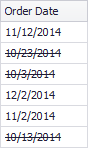
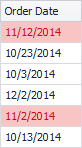
Format based on date | Applies a format if a column’s DateTime value refers to a specific date and/or date interval relative to today. These days and intervals include Today, Yesterday, This week, Earlier this month, Prior to this year, etc. |
You can customize appearance settings for this format rule using the following properties:
| |
Format based user defined expression | Applies a format if a cell value(s) meets a specific expression. |
You can customize appearance settings for this format rule using the following properties:
| |
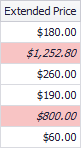
Format only top or bottom rank values | Applies a format if a value is in the range of the highest or lowest column values. |
You can customize appearance settings for this format rule using the following properties:
| |
Format only values that are above or below average | Applies a format if a cell value is above or below the column’s average. |
You can customize appearance settings for this format rule using the following properties:
| |
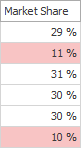
Format only values that contain | Applies a format if a value matches one of constants. |
You can customize appearance settings for this format rule using the following properties:
| |
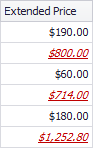
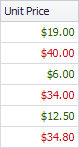
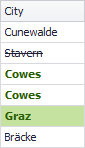
Format only unique or duplicate values | Applies a format if a column’s value is unique or a duplicate. |
You can customize appearance settings for this format rule using the following properties:
| |
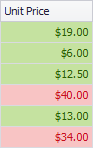
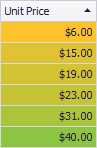
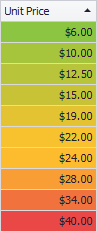
Format using 2 color scales | Applies a format using a two-color scale to display data distribution and variation. |
You can use the FormatConditionRule2ColorScale.PredefinedName property to apply one of the predefined color scales (White - Azure, Yellow - Green, etc.) or use the FormatConditionRule2ColorScale.MinimumColor and FormatConditionRule2ColorScale.MaximumColor properties to provide a custom color scale. | |
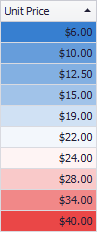
Format using 3 color scales | Applies a format using a three-color scale to display data distribution and variation. |
You can use the FormatConditionRule2ColorScale.PredefinedName property to apply one of the predefined color scales (Blue - White - Red, Green - Yellow - Red, etc.) or use the FormatConditionRule2ColorScale.MinimumColor, FormatConditionRule3ColorScale.MiddleColor and FormatConditionRule2ColorScale.MaximumColor properties to provide a custom color scale. | |
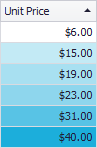
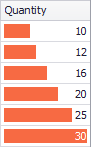
Format using Data bar | Applies a format using a data bar. |
You can use the FormatConditionRuleDataBar.PredefinedName property to apply one of the predefined bars styles (Coral, Blue Gradient, etc.) or use the FormatConditionRuleDataBar.Appearance and FormatConditionRuleDataBar.AppearanceNegative properties to provide a custom data bars appearance. | |
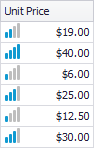
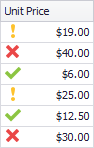
Format using icons | Applies a format using an icon set. |
You can use one of the predefined icon sets (Ratings4, Symbols3Uncircled, etc.) or provide a custom icon set. |


You can apply multiple format rules to the same column. The appearances imposed by these rules are combined by default. To prevent formats from being combined, use the FormatRuleBase.StopIfTrue property.
The TreeListFormatRule.Column property of each rule identifies the column that provides values to test against a formatting rule. By default, the format is applied to the same TreeListFormatRule.Column. However, you can apply this format to another column by setting the TreeListFormatRule.ColumnApplyTo property. In addition, you can apply the format to the entire row by setting the TreeListFormatRule.ApplyToRow property to true.
Applying Format Rules by End-Users at Runtime
If the TreeListOptionsMenu.ShowConditionalFormattingItem property is enabled, an end-user can apply style formats to a column using the column’s Conditional Formatting menu.
Right-click the column to which a formatting rule should be applied, and select Conditional Formatting.
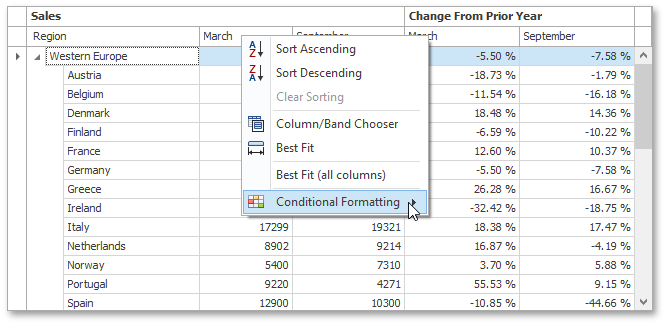
Select the rule type and then choose one of the predefined style formats.
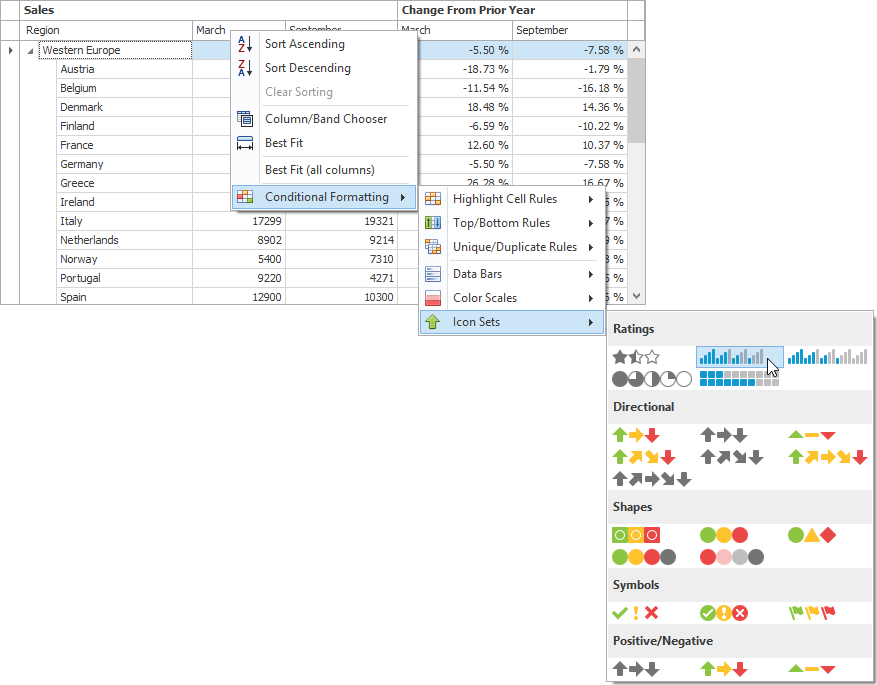
To enable the multi-column item layout at the third menu level shown in the image above, set the Tree List control’s MenuManager property (EditorContainer.MenuManager) to a BarManager component (if required, add this component to the form). Otherwise, menu elements at the third menu level will be arranged in a linear list; specific menu items will be displayed without glyphs.
Example: Creating Formatting Rules at Design Time and In Code
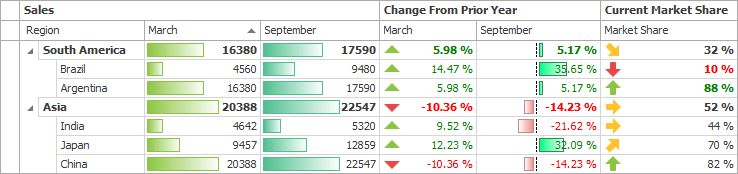
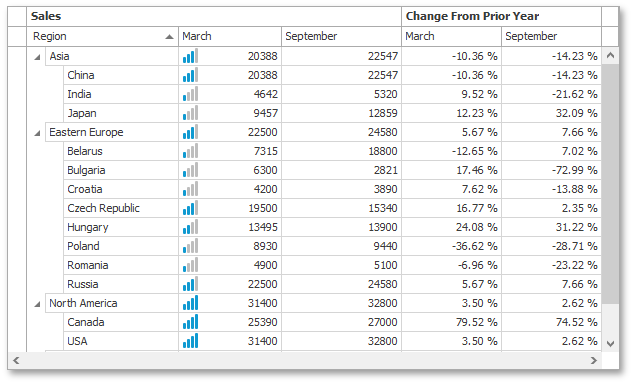
This example illustrates how to apply an icon set format to the March column in the Sales band at design time using the Tree List Designer and in code.
An icon set format allows you to classify column cell values into several ranges, assign an icon to each range, and display a specific icon in a cell according to the cell value. In this example, the predefined icon set  is used to classify column values in four grades. One vertical strip corresponds to column values from 0% to 25%, two strips correspond to values from 25% to 50%, three strips correspond to values from 50% to 75%, four strips correspond to values that are greater than or equal to 75%.
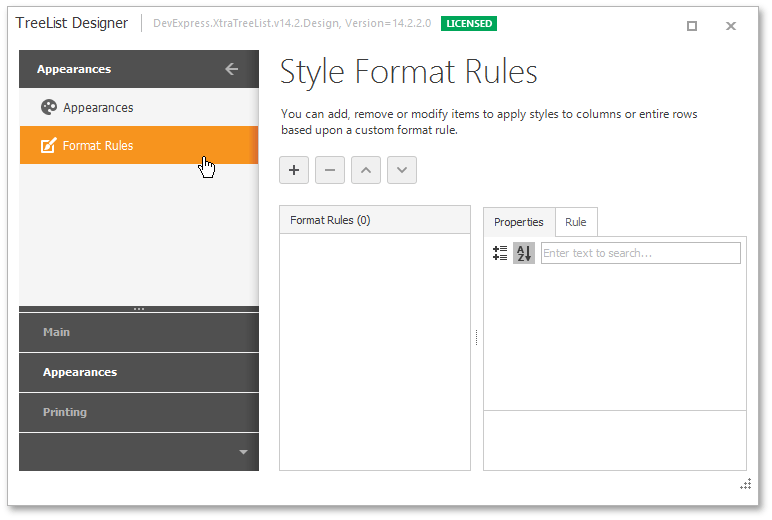
To create a new formatting rule at design time, invoke the Format Rule Collection Editor from the Tree List Designer. It can also be accessed from the Properties grid by clicking the ellipsis button for the TreeList.FormatRules property.
Invoke the Tree List Designer and switch to the Style Format Rules page (in the Appearance category).
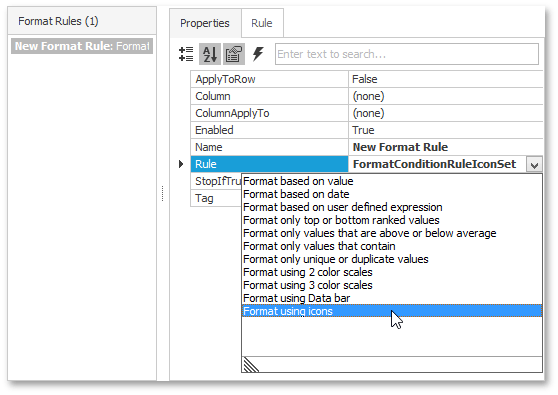
- Click the Add button
 to create a new format rule (format rules in a TreeList are encapsulated by TreeListFormatRule objects).
 Select the Format using icons rule type. The format rule’s FormatRuleBase.Rule property will be set to a new FormatConditionRuleIconSet object.
Set the TreeListFormatRule.Column property to the March column. This column provides values to test against the formatting rule.
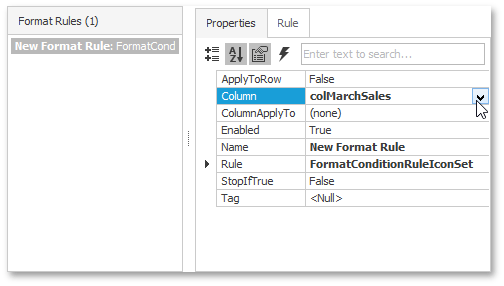
By default, this property also specifies the column to which formatting is applied. If required, you can apply formatting to another column by setting the TreeListFormatRule.ColumnApplyTo property.
Choose one of the predefined icon sets using the FormatConditionRuleIconSet.IconSet property. You can do this in the Properties tab or the Rule tab. The Rule tab allows you to see a preview of the selected icon set. In this example, the Ratings: Ratings4 icon set is selected.
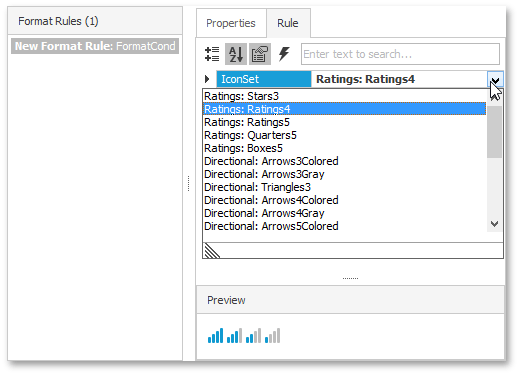
When choosing this predefined icon set (or any other predefined icon set), FormatConditionIconSetIcon objects are added to the IconSet.Icons collection. They refer to certain predefined icons by using the FormatConditionIconSetIcon.PredefinedName property. You can change a specific icon to another predefined icon using the FormatConditionIconSetIcon.PredefinedName property or to a custom icon using the FormatConditionIconSetIcon.Icon property.

In addition, threshold values, comparison operators and value type are automatically set according to the selected icon set. You can change these options to custom values using the FormatConditionIconSetIcon.Value, FormatConditionIconSetIcon.ValueComparison and FormatConditionIconSet.ValueType properties.
Run the application. The image below illustrates the result.
The following code is equivalent to design-time actions shown above.
using DevExpress.XtraEditors;
using DevExpress.XtraTreeList.StyleFormatConditions;

TreeListFormatRule treeListFormatRule = new TreeListFormatRule();
FormatConditionRuleIconSet formatConditionRuleIconSet = new FormatConditionRuleIconSet();
FormatConditionIconSet iconSet = formatConditionRuleIconSet.IconSet = new FormatConditionIconSet();
FormatConditionIconSetIcon icon1 = new FormatConditionIconSetIcon();
FormatConditionIconSetIcon icon2 = new FormatConditionIconSetIcon();
FormatConditionIconSetIcon icon3 = new FormatConditionIconSetIcon();
FormatConditionIconSetIcon icon4 = new FormatConditionIconSetIcon();

//Choose predefined icons.
icon1.PredefinedName = "Rating4_1.png";
icon2.PredefinedName = "Rating4_2.png";
icon3.PredefinedName = "Rating4_3.png";
icon4.PredefinedName = "Rating4_4.png";

//Specify the type of threshold values.
iconSet.ValueType = FormatConditionValueType.Percent;

//Define ranges to which icons are applied by setting threshold values.
icon1.Value = 75; // target range: 75% <= value
icon1.ValueComparison = FormatConditionComparisonType.GreaterOrEqual;
icon2.Value = 50; // target range: 50% <= value < 75%
icon2.ValueComparison = FormatConditionComparisonType.GreaterOrEqual;
icon3.Value = 25; // target range: 25% <= value < 50%
icon3.ValueComparison = FormatConditionComparisonType.GreaterOrEqual;
icon4.Value = 0; // target range: 0% <= value < 25%
icon4.ValueComparison = FormatConditionComparisonType.GreaterOrEqual;

//Add icons to the icon set.
iconSet.Icons.Add(icon1);
iconSet.Icons.Add(icon2);
iconSet.Icons.Add(icon3);
iconSet.Icons.Add(icon4);

//Specify the rule type.
treeListFormatRule.Rule = formatConditionRuleIconSet;
//Specify the column to which formatting is applied.
treeListFormatRule.Column = colMarchSales;
//Add the formatting rule to the TreeList.
treeList1.FormatRules.Add(treeListFormatRule);