How to: Filter Data
- 3 minutes to read
In most real-world scenarios, a data source used for mail merge contains more data rows than the number of rows required in a resulting document. In this case, data must be filtered according to certain criteria, which can be built upon a single or multiple data fields.
This tutorial illustrates how to filter data when performing a mail merge with the SpreadsheetControl.
- Prepare the Application
- Specify Filter Criteria
- How Filter Criteria are Saved in a Template
- Get the Result
Prepare the Application
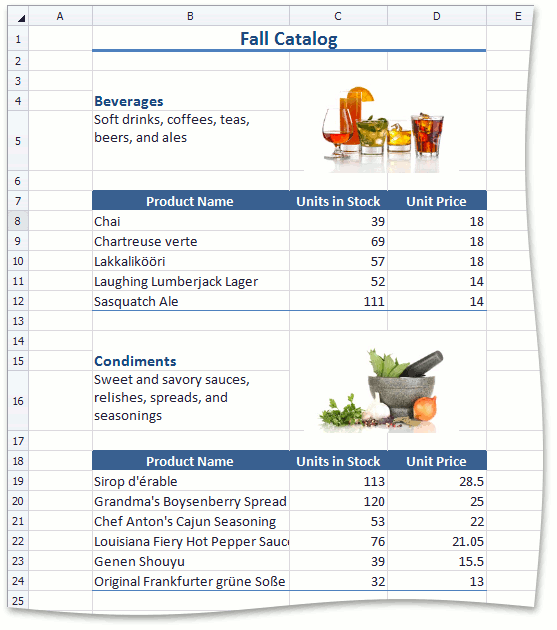
To get started with this tutorial, run the application created in the How to: Create a Master-Detail Report example. A master-detail template is automatically loaded into the SpreadsheetControl. This template contains a two-level detail range (click the Mail Merge Design View button in the Ribbon to show template ranges):
- Detail - the detail range that displays top-level data from the Categories table of the sample Northwind database.
- DetailLevel0 - the nested-level detail range that displays data from the CategoriesProducts child table.
You can filter data individually in each detail range of a template. In this example, filter category products (the DetailLevel0 range) by the unit price and the quantity of units in stock.
Specify Filter Criteria
Select any cell within the DetailLevel0 range and click the Edit Filter button on the Mail Merge tab.
Note
Note that the filtering feature is not available if the mail merge template is not bound to a data source, or if the currently selected cell in the template is outside the detail range.
In the invoked dialog, you can visually construct an expression in which the UnitPrice data field is compared with required values (to merge only products whose unit price is greater than or equal to 10 and less than or equal to 45).
- In the Fields list, click the UnitPrice item to select the data field by which data should be filtered.
- Select Between in the Operators list and enter the numbers (10, 45) to filter the specified field values by a lower (10) and upper (45) number limit.
Create the second filter criterion to additionally filter category products by the UnitsInStock field (to merge only products whose quantity in stock is greater than 30 units).
- Click the And operator to add one more criterion and filter data so that both criteria (before and after the And operator) must be true. Note that a complex filter criterion can include an unlimited number of filter conditions, combined by logical operators.
- In the Fields list, click the UnitsInStock item to select the data field by which data should be filtered.
- In the Operators list, select the “greater than or equal to” ≥ comparison operator.
- Type the number 30.
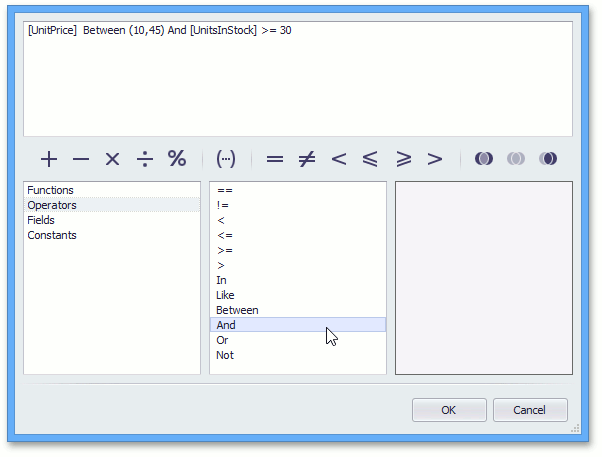
- Click OK.
How Filter Criteria are Saved in a Template
In a mail merge template, each filter criterion is stored as a “FILTERFIELD(n)” defined name, where (n) is the zero-based index of the filter criterion in the entire template. The DefinedName.RefersTo property value is a filter expression (filter conditions combined by logical operators) preceded by the data member name.
For example, after you have added the filter criteria as described above, the following defined name is added to the Worksheet.DefinedNames collection of the template worksheet.
| Name | RefersTo |
|---|---|
| FILTERFIELD0 | “CategoriesProducts;[UnitPrice] Between (10,45) And [UnitsInStock] >= 30” |
Get the Result
Click the Mail Merge Preview button to review the result.