Scrolling
- 3 minutes to read
End users can navigate a map using the Map control’s scrolling capabilities.
Overview
Scrolling is enabled in the Map Control by default. Set the MapControl.EnableScrolling property to false to disable scrolling.
Use the MiniMap.EnableScrolling property to manage scrolling on a mini-map. Refer to the Mini Map topic to learn more about mini-maps.
Circular Scrolling
The Map Control allows you to scroll a map horizontally infinitely. Use the GeoMapCoordinateSystem.CircularScrollingMode property to set the appropriate circular scrolling mode.
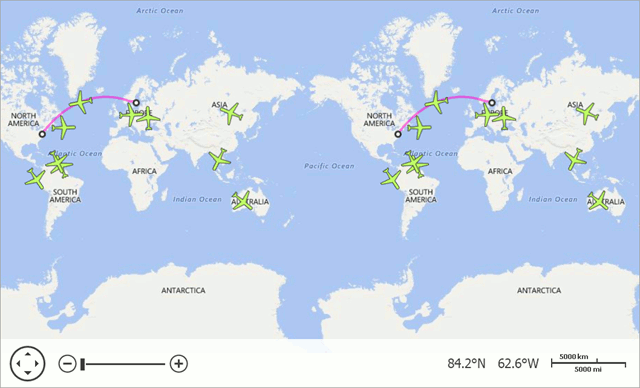
The following code shows how to allow end users to endlessly scroll an image tile and vector items’ layers:
mapControl.CoordinateSystem = new GeoMapCoordinateSystem() {
    CircularScrollingMode = CircularScrollingMode.TilesAndVectorItems
};
The table below lists classes and properties which the code uses:
| Class or Property | Description |
|---|---|
| MapControl.CoordinateSystem | Specifies a map’s coordinate system. |
| GeoMapCoordinateSystem | The geographical coordinate system. |
| CircularScrollingMode | Lists modes that specify the Circular Scrolling behavior. |
Note
Note the following points before using Circular Scrolling:
- The map should have a geographical coordinate system;
- Circular Scrolling does not work with Web Map Service Provider.
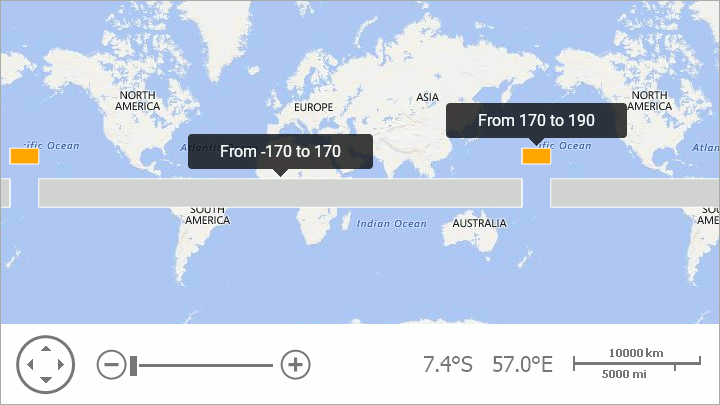
Note that, a map shape should fulfill the following condition to cross the 180th meridian: one or several points’ longitudes should exceed the 180 (-180) limit:
MapPolygon polygon = new MapPolygon();
polygon.Points.Add(new GeoPoint(10, -170));
polygon.Points.Add(new GeoPoint(10, 170));
polygon.Points.Add(new GeoPoint(-10, 170));
polygon.Points.Add(new GeoPoint(-10, -170));
vectorItemStorage.Items.Add(polygon);

// Point longitudes enclose the 180 meridian.
MapPolygon polygonCross180 = New MapPolygon();
polygonCross180.Fill = Color.Orange;
polygonCross180.Points.Add(new GeoPoint(30, 190));
polygonCross180.Points.Add(new GeoPoint(30, 170));
polygonCross180.Points.Add(new GeoPoint(20, 170));
polygonCross180.Points.Add(new GeoPoint(20, 190));
vectorItemStorage.Items.Add(polygon180);
The code above produces the following image:
How End Users Can Scroll a Map
An end user can scroll a map as follows:
Action | Effect |
|---|---|
Hold down the left mouse button and drag it | Move the mouse pointer while holding down the left mouse button. The mouse pointer changes from |
Use the arrows on the map navigation panel. | An end user can scroll a map in four directions by clicking the arrows on the map navigation panel. For example, use the right arrow in the navigation panel to scroll to the east.
Use the NavigationPanelOptions.ShowScrollButtons property to manage scroll buttons’ visibility in the navigation panel. |
Use the “Arrow” keys (Left, Up, Right or Down). | Press the Left arrow key to scroll the map west. Press the Up arrow key to scroll the map north. Press the Right arrow key to scroll the map east. Press the Down arrow key to scroll the map south. |
Use flick gestures on touchscreen devices. | An end user can scroll a map using flick gestures on a touchscreen device.
|
 to
to  when an end user holds down the left mouse button. The map is scrolled in the same direction as the mouse pointer’s movement.