Print Spreadsheet Documents
- 7 minutes to read
The SpreadsheetControl provides two basic approaches to printing: printing from code using the appropriate API methods and properties, or via the spreadsheet Ribbon UI. Refer to the Getting Started topic for details on how to provide a Ribbon UI for the SpreadsheetControl.
Note
The WinForms Spreadsheet uses the XtraPrinting Library to print its contents or save it as a PDF or graphic file. Use the SpreadsheetControl.IsPrintingAvailable property to check whether printing is possible.
Preview a Workbook before Printing
From the Ribbon UI
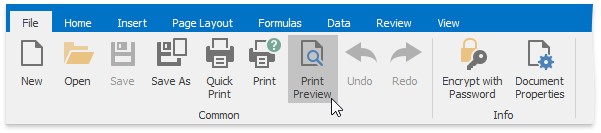
To view your workbook as it will be printed, select the File tab and click the Print Preview button in the Common group.
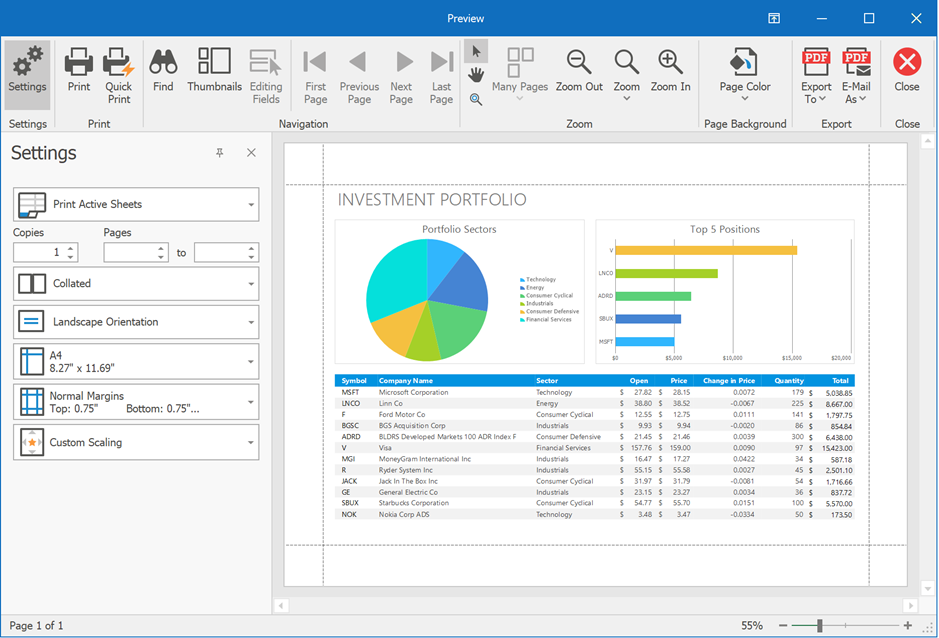
The Print Preview dialog will be invoked. At the bottom of the Preview window, you can see the number of pages and the current page’s number. Note that blank worksheets are not displayed or printed. You can also print the current workbook via the Preview window by clicking the Print button in the Print group.
By default, the SpreadsheetControl uses the Print Preview form with a Ribbon UI to display a printed document. However, you can show the standard Preview window with a Bar UI by setting the SpreadsheetPrintOptions.RibbonPreview property to false.
In code
To invoke the Preview window programmatically, use the SpreadsheetControl.ShowRibbonPrintPreview or SpreadsheetControl.ShowPrintPreview method, depending on the type of Print Preview form you wish to display - with a Ribbon or Bar UI.
Print a Workbook using the Print Dialog
From the Ribbon UI
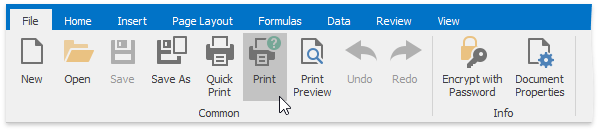
To print a document and set print options, click the Print button in the Common group, or press CTRL+P.
In the invoked Print dialog box, specify the required settings such as printer name, the number of copies, the page range and click Print.

In code
To define printer settings in code, create a PrinterSettings class instance and pass it to the SpreadsheetControl.Print method as a parameter, or call the SpreadsheetControl.ShowPrintDialog method to invoke the Print dialog box.
To print a specific sheet in a workbook, use the Sheet.Print method.
Print a Workbook with Default Settings
From the Ribbon UI
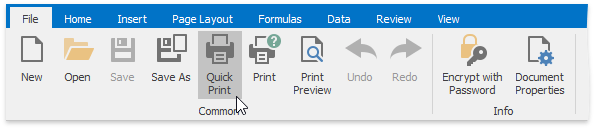
To send a workbook directly to the default printer without setting print options, click the Quick Print button in the Common group.
In code
Use the SpreadsheetControl.Print method to print a workbook programmatically, as shown in the example below.
if (spreadsheetControl.IsPrintingAvailable)
{
    // Print a workbook loaded into the SpreadsheetControl.
    spreadsheetControl.Print();
}
To print a specific sheet in a workbook, use the Sheet.Print method.
Set a Print Area
From the Ribbon UI
You can define a print area to print a specific part of the worksheet. Select the cells you wish to print, and then on the Page Layout tab, in the Page Setup group, click the Print Area button. In the button’s drop-down list, click Set Print Area.
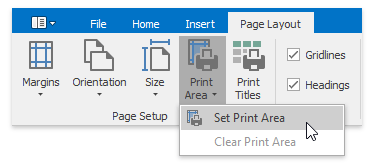
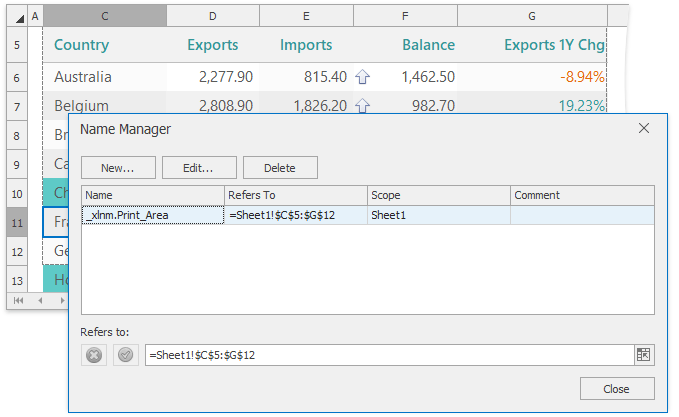
When you specify the print area, the cell range that it comprises gets the thin dashed outline and the _xlnm.Print_Area name is added to the collection of the defined names contained in the workbook.
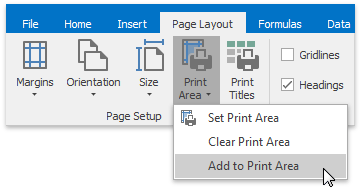
To extend the existing print area, select the cell range you wish to add to the print area, and click Print Area | Add to Print Area in the Page Setup group. Note that if the print area consists of non-adjacent cell ranges, they are each printed on a separate page.
To print the entire worksheet, remove the print area by clicking Print Area | Clear Print Area.
In code
To define a print area programmatically, use the Worksheet.SetPrintRange method. To add cells to the existing print area, utilize the Worksheet.AddPrintRange method. To remove the print area, call the Worksheet.ClearPrintRange method.
You can also display or hide the dashed border around the print area by utilizing the SpreadsheetViewOptions.ShowPrintArea property.
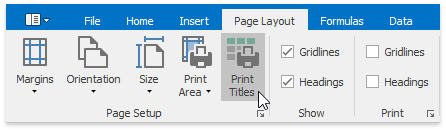
Print Titles
From the Ribbon UI
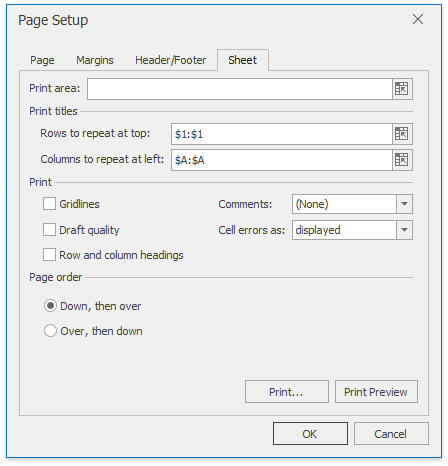
You can print row or column headings on every page to help improve readability. To do this, on the Page Layout tab, in the Page Setup group, click Print Titles to invoke the Page Setup dialog.
In the Rows to repeat at top and Columns to repeat at left boxes, enter references to the title rows and/or columns you wish to repeat or select them directly in the worksheet by clicking the Collapse Dialog button  .
.
In code
Use the corresponding members of the WorksheetPrintTitleOptions object to print titles on every page programmatically. Refer to the How to: Print Titles on a Worksheet example for details.
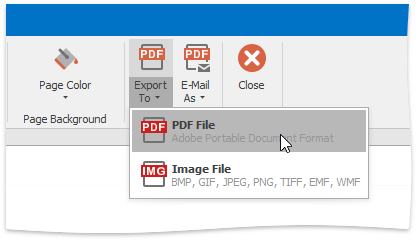
Export to PDF
From the Ribbon UI
End-users have the capability to save a document as a PDF file (or an image) in the Preview window by clicking Export To | PDF File (or Image File) in the Export group.
In code
Use the IWorkbook.ExportToPdf or SpreadsheetControl.ExportToPdf method to export a workbook in PDF format, as shown in the How to: Export a Workbook to PDF example.
Note
The Export to PDF document describes PDF export features and limitations.
Specify Print Options
From the Ribbon UI
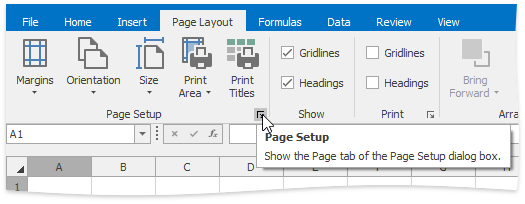
Before printing a workbook, an end-user can specify print settings for individual worksheets using the SpreadsheetControl’s Page Setup ribbon page group. Use this group’s buttons to specify page margins, document orientation, and paper size. To set more specific printout settings (such as print scaling, page order, header and footer options, etc.), click the Page Setup dialog box launcher to invoke the Page Setup dialog.
In code
To specify print options, use properties of the WorksheetView object, accessible via the Worksheet.ActiveView property. WorksheetView enables you to specify general page options such as orientation, margins and paper size settings. More print-specific options can be specified via the properties of the WorksheetPrintOptions object. For examples, refer to the Printing section.
Print Suppression
You can prevent worksheets from printing by handling the SpreadsheetControl.BeforePrintSheet event, which occurs before a workbook is printed. Use the Index or Name properties of the event parameter to get a worksheet to be printed, and set the Cancel property to true to cancel printing.
The example below demonstrates how to print the active worksheet only.
using DevExpress.Spreadsheet;
// ...

bool printActiveSheetOnly = true;
//...

private void spreadsheetControl_BeforePrintSheet(object sender, BeforePrintSheetEventArgs e)
{
  if (printActiveSheetOnly)
      // Cancel printing if the index of the worksheet to be printed is not equal to the active sheet index.
      e.Cancel = spreadsheetControl.ActiveWorksheet.Index != e.Index;
}
Currently, you can explicitly specify which worksheets (visible, hidden or very hidden) you wish to print by utilizing the WorkbookPrintOptions.PrintSheetVisibility property. By default, only visible worksheets are printed.
End-User Restrictions
The SpreadsheetControl allows you to prevent an end-user from printing a workbook. To do this, access the SpreadsheetBehaviorOptions object via the SpreadsheetControlOptions.Behavior property. This object enables you to apply restrictions on different operations in the SpreadsheetControl. To disable printing for an end-user, set the SpreadsheetBehaviorOptions.Print property to DocumentCapability.Disabled or DocumentCapability.Hidden, to disable or hide the printing commands in the Ribbon UI.
The Quick Print, Print and Print Preview commands will be disabled in the Common group as a result of executing this code.