How To: Create Content Containers Hierarchy
- 3 minutes to read
Prerequisites
- Create a Windows Forms Application.
- Windows UI applications are generally designed to run in full-screen mode. Modify the main form to meet these requirements. Set the FormBorderStyle property to None and the WindowState property to Maximized.
- Drop a DocumentManager component on the form.
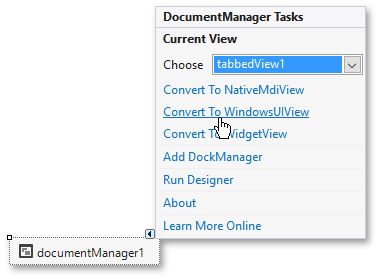
Change the DocumentManager‘s View to WindowsUI View. Click the DocumentManager‘s smart tag and select the Convert To WindowsUIView option.
Creating Application Hierarchy
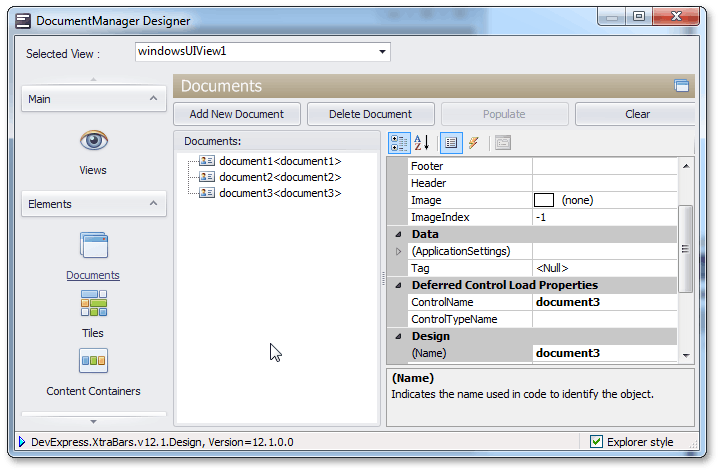
Run the Document Manager Designer.

Switch to the designer’s ‘Documents’ section and add 3 Documents by clicking a corresponding button. This will cause 3 Tiles and a TileContainer to be automatically generated.
- Detach Tiles into 2 separate groups: 2 Tiles in the first group and the last tile in another group. Customize the TileContainer as your needs require. If you are having trouble, please refer to the How To: Create a TileContainer topic.
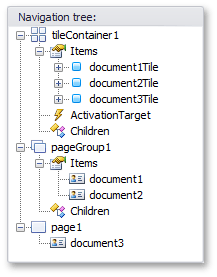
Create a PageGroup container and add first 2 Documents to its DocumentGroup.Items collection. See the How To: Create a PageGroup Container topic to learn more. The application hierarchy must look like the following.
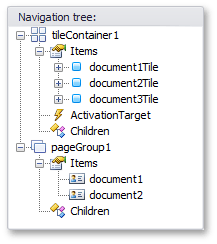
Create a Page container and associate it with the last Document. See the How To: Create a Page Container topic if you are having a hard time. The application tree looks like the image below.
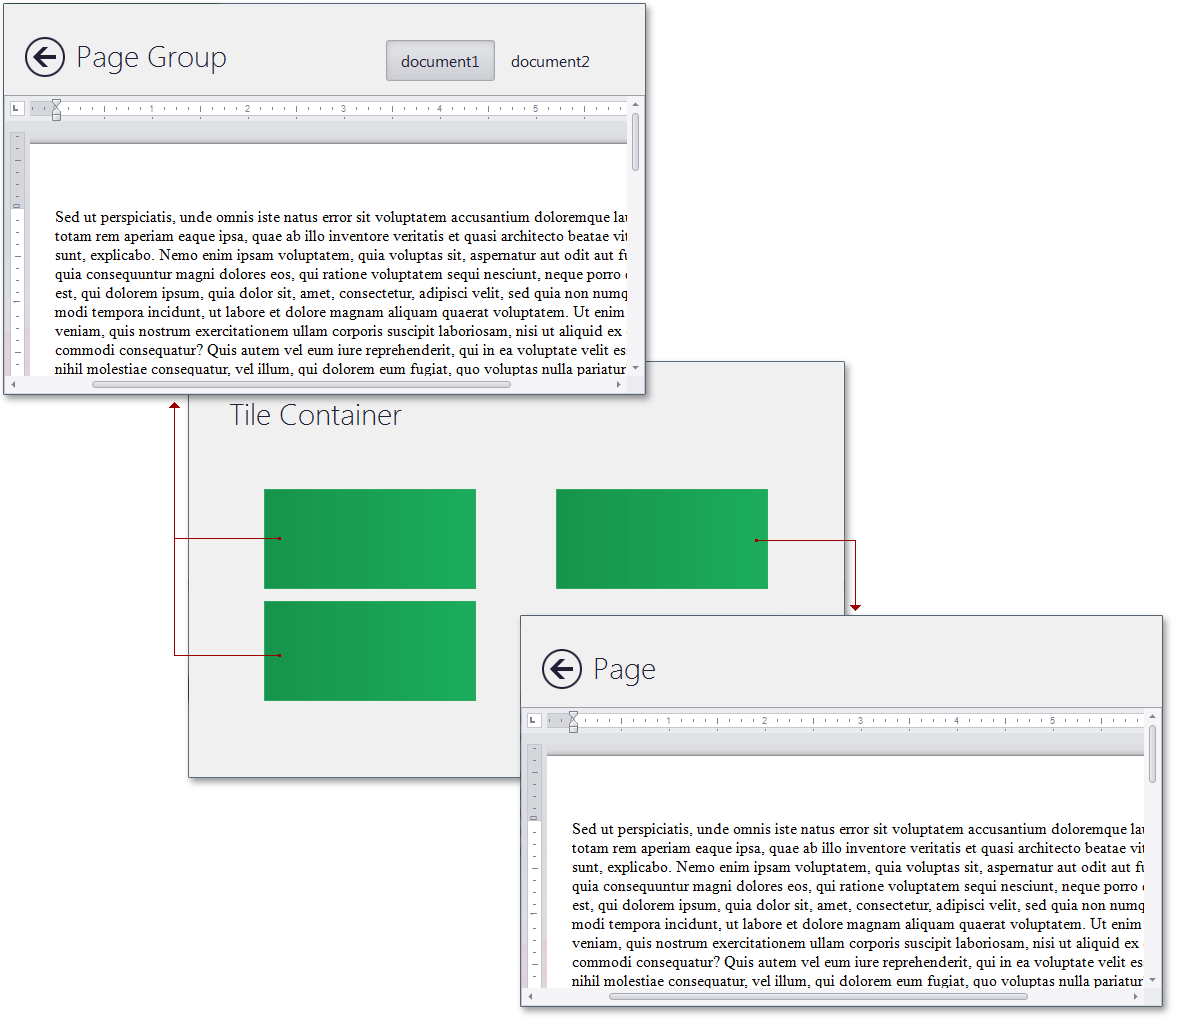
Now, after all 3 containers are added and populated with Documents, build an application hierarchy. In this example, the TileContainer appears on the application start-up. Clicking any tile from the first group will switch us to the PageGroup container and display the related Document. The last tile activates the Page container and displays the 3rd Document.
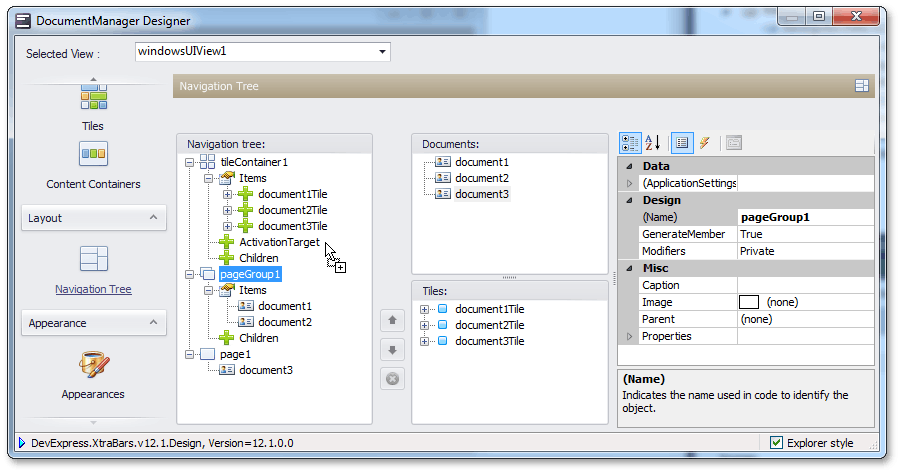
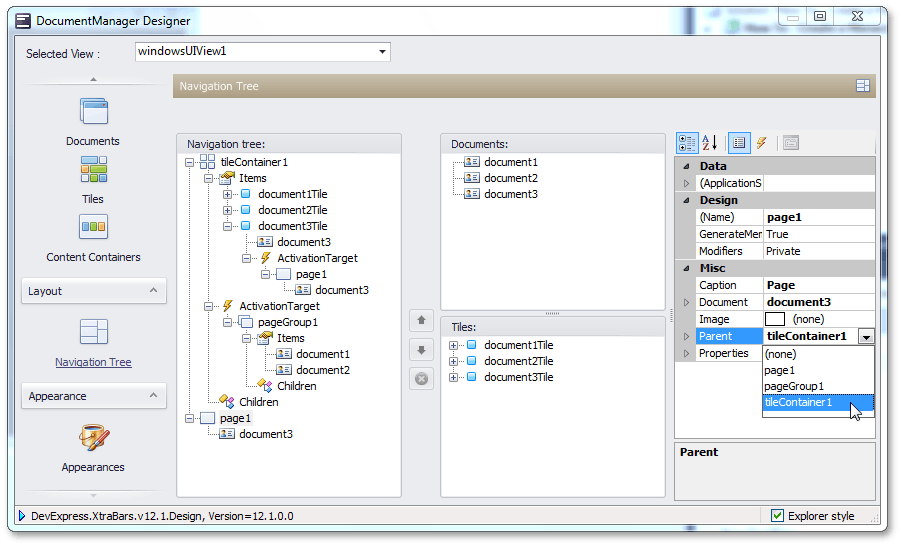
Containers are linked via the ActivationTarget - Parent properties pair (see the Application Hierarchy and Module Navigation topic to learn more). Go to the designer’s ‘Navigation Tree’ section. Select the PageGroup container and drag it to the TileContainer‘s ‘Activation Target’ node.
The PageGroup‘s BaseContentContainer.Parent property was set to tileContainer1 automatically. Now clicking any tile contained within the TileContainer will activate the PageGroup, and navigating back via Navigation Bars will bring us back to the TileContainer again.
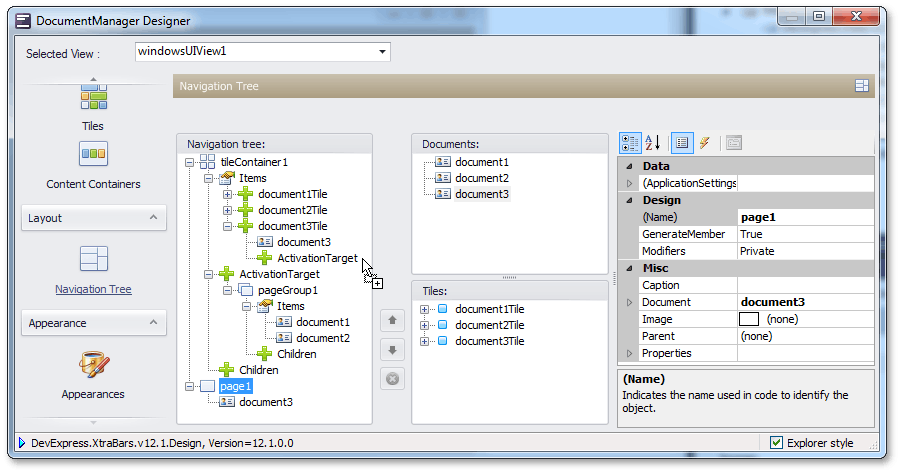
As stated above, clicking the 3rd Tile should activate the Page container. To do so, we have to specify this tile’s Tile.ActivationTarget property, which has a higher priority than a similar container’s property. Expand the ‘Tile3’ node and drag the ‘Page1’ container to the tile’s ‘Activation Target’ node.
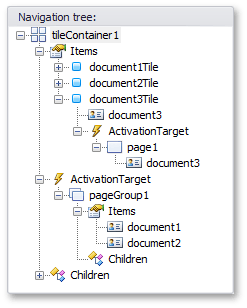
The application hierarchy will now look like the following.
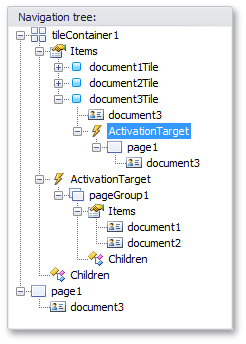
As you can see, the Page container remains on the same level as the TileContainer, and its BaseContentContainer.Parent property equals null. This means our Page container is also the topmost container and we cannot navigate back to the TileContainer from its screen. To change this behavior, manually set the Page‘s BaseContentContainer.Parent property to tileContainer1.
The figure below illustrates the final application hierarchy.
Run the application. The result is demonstrated in the figure below.