How To: Draw and Use SVG Images
- 8 minutes to read
Scalable Vector Graphics (SVG) is an XML-based vector image format. Contrary to raster images that become blurry on high DPI screens, vector images can be resized with no quality loss. This article contains guidelines for creating SVG images and utilizing them within your applications.
Draw SVG Icons
Software
To draw SVG icons, run the SVG Icon Builder tool available from Visual Studio’s “Extensions | DevExpress” menu. You can also use third-party vector graphics editors, such as Adobe Illustrator, Inkscape, Adobe Animate, or CorelDRAW.
Image Size and Grid Settings
When creating SVG icons, you should consider their intended application. For example, if you draw a 32x32 icon and have a 3-pixel wide shape, downscaling it to 16x16 pixels produces a 1.5 pixel line that looks blurry. To avoid this, make sure you use even dimensions. The figure below illustrates an image with 2-pixel grid cells.

DevExpress controls apply different SVG icon colors according to the current application skin and/or SVG skin palette. Below is a button with a vector image as it appears in four different skins.

To support this feature in custom SVG icons, use the colors from the default DevExpress skin palette (see the table below). Your colors should have the same .css style names as default colors:
| Style Name |
|---|
| Red |
| Green |
| Blue |
| Yellow |
| Black |
| White |
The code below extends Bezier skin palettes with two custom colors.
using DevExpress.Skins;
using DevExpress.Utils.Drawing;
using DevExpress.Utils.Svg;
using DevExpress.XtraEditors;

UserLookAndFeel.Default.SetSkinStyle(SkinStyle.Bezier);
Skin commonSkin = CommonSkins.GetSkin(UserLookAndFeel.Default);
commonSkin.SvgPalettes[ObjectState.Normal].Colors.Add(new SvgColor("MyColor", Color.Yellow));
commonSkin.SvgPalettes[ObjectState.Disabled].Colors.Add(new SvgColor("MyDisabledColor", Color.Green));
Below is an XML markup for an SVG image created in Adobe Illustrator. In this markup, shapes are painted with the “White” and “Green” styles. Both names match those in the default DevExpress SVG palette. As a result, such an image can be repainted.
![]()
<?xml version="1.0" encoding="utf-8"?>
<svg version="1.1" id="Layer_1" xmlns="http://www.w3.org/2000/svg" xmlns:xlink="http://www.w3.org/1999/xlink" x="0px" y="0px"
     viewBox="0 0 32 32" style="enable-background:new 0 0 32 32;" xml:space="preserve">
<style type="text/css">
    .White{fill:#FFFFFF;}
    .Green{fill:#039C23;}
</style>
<g id="Add">
    <circle class="Green" cx="16" cy="16" r="14"/>
    <polygon class="White" points="24,14 18,14 18,8 14,8 14,14 8,14 8,18 14,18 14,24 18,24 18,18 24,18"/>
</g>
</svg>
Set the SvgImageColorizationMode property (the ImageOptions property group) to None to draw SVG icons as is and prevent DevExpress controls from adjusting image colors.
Restrictions
DevExpress controls support only base SVG elements and features. The list of unsupported elements includes (but is not limited to) the following items:
- Animations and mouse events
- External .CSS styles
- Elements with multiple styles
- Styles with CDATA sections
- Masks
- Relative values (percents) in all elements except for brushes
- Custom fonts
- Text paths
- Complex opacity settings with the enable-background parameter
- The “pattern” element
- Raster images embedded differently than Base64-encoded data
SVG Icon Builder
You can use the SVG Icon Builder to create vector icons. This tool also includes DevExpress template icons you can edit and combine with imported third party icons to create unique SVG images.
To launch the SVG Icon Builder:
- Run Visual Studio.
- Select DevExpress | All Platforms | Run SVG Icon Builder…

Alternatively, you can download the Icon Builder from the Microsoft Store as a stand-alone application.
To create icons in the SVG Icon Builder, drag images from the list onto the main area. In the figure below, “Document” and “Pencil” images are combined to create a custom “Edit Document” vector icon.
![]()
Toolbox buttons allow you to move, rotate, and flip images. You can also select and repaint each image element individually:
![]()
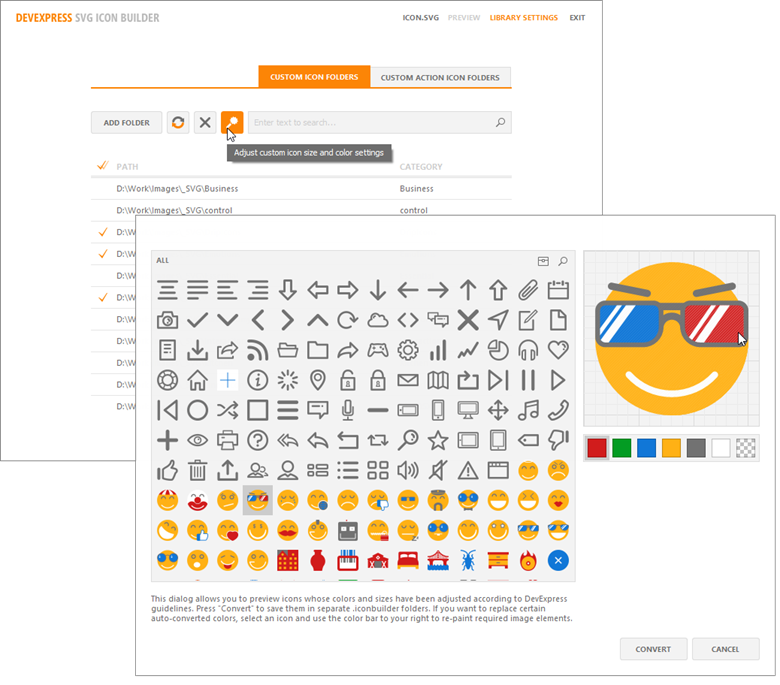
To import third-party images, go to the “Library Settings” and add a folder that contains icons.

Click the “Adjust” button to scan the third-party icons you added, and adjust their size and color settings to match DevExpress guidelines (refer to the first section). You can preview all the changes and correct the colors that were converted incorrectly. To save your changes in “.iconbuilder” folders in the source image directory, click “Convert”.
Assign SVG Icons to DevExpress Controls
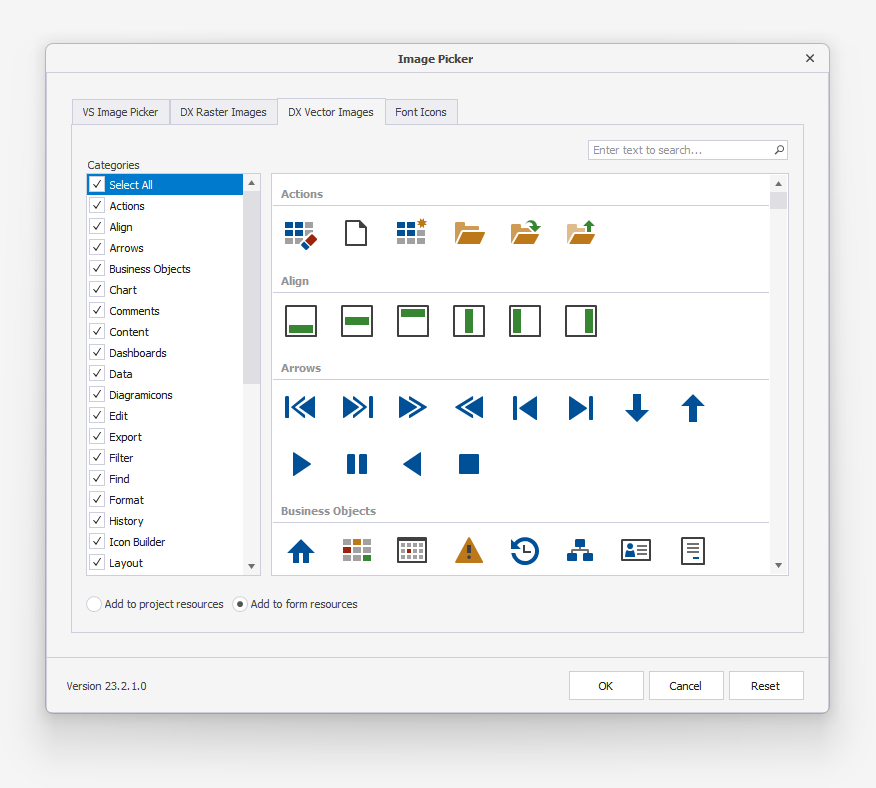
To assign a vector image to an item, expand the ImageOptions properties section and utilize the required …SvgImage properties. For example, BarItems have the SvgImage and DisabledSvgImage properties for assigning vector icons for normal and disabled item states. Click the ellipsis button to invoke the DevExpress Image Selector dialog and choose a vector image from local storage or form/project resources.

You can also switch to the “DX Image Gallery” tab to choose vector icons from the DevExpress Image Gallery.
Every …SvgImage property has a related …SvgImageSize property. The figure below illustrates the BarItem class’s size properties.

Size properties behave in the following manner:
- If items expose properties that manage icon sizes, the …SvgImageSize settings are ignored. For example, the BarItem.RibbonStyle property specifies that a button icon is either 16x16 or 32x32 when this button is in a Ribbon.
If items use no specific logic to set their icon sizes, the …SvgImageSize properties are in effect. Set the icon size manually or leave it as 0x0 to draw the icon as is. For example, the Bar Manager does not limit icon sizes, so you can have 64x64 icons as shown below.

Assign SVG Icons Manually
If a control supports SVG Icons and has a related SvgImage property, create a new DevExpress.Utils.Svg.SvgImage class instance and assign it to that property. The SvgImage class exposes the FromFile, FromResources, and FromStream methods to load vector icons from different sources.
// Load from file
SvgImage image = SvgImage.FromFile(@"D:\Work\Images\_SVG\Driving.svg");
// Load from Resources
// Image file's "Build Action" must be set to "Embedded Resource"
SvgImage image = SvgImage.FromResources("DXApplication1.Resources.Driving.svg", typeof(Form2).Assembly);
simpleButton1.ImageOptions.SvgImage = image;
The DevExpress.Utils.Svg namespace exposes an API that allows you to manually assign SVG icons to third-party controls or DevExpress controls that do not support vector icons yet.
- Call the
SvgBitmap.FromFileorSvgBitmap.FromStreammethod to initialize an SVG bitmap from a file or stream. - Call the static
SvgPaletteHelper.GetSvgPalettemethod to retrieve the color palette of the current application skin and visual element state. Skip this step when assigning SVG icons to third-party controls that do not support DevExpress skins. - Call the
SvgBitmap.Rendermethod to produce a raster image based on your SVG bitmap. This method takes two parameters: a palette (see the previous step) and a scale factor (set to 1 to draw an image as is). If you do not specify the scale factor manually, the icon is rendered according to the current system DPI setting.
The code below assigns the same vector icon to a Data Grid column and a standard WinForms button. The button receives a permanent icon that is never redrawn. The grid column, in turn, supports Glyph Skinning and you should render its icon according to current Look And Feel and Skinning settings.

using DevExpress.Utils.Drawing;
using DevExpress.Utils.Svg;

namespace MyApp {
    public partial class Form1 : DevExpress.XtraEditors.XtraForm {
        // An SVG bitmap
        SvgBitmap btm;

        public Form1() {
            InitializeComponent();
            // Load a vector icon from a file
            btm = SvgBitmap.FromFile(@"D:\Work\Images\_SVG\Driving.svg");
            // Create and assign a raster image
            // This image is 1.3 times larger than the original vector icon
            button1.Image = btm.Render(null, 1.3);
            // Assign a grid column image dynamically
            gridView1.CustomDrawCell += GridView1_CustomDrawCell;
        }

        private void GridView1_CustomDrawCell(object sender, DevExpress.XtraGrid.Views.Base.RowCellCustomDrawEventArgs e) {
            // Retrieve a color palette
            var palette = SvgPaletteHelper.GetSvgPalette(this.LookAndFeel, ObjectState.Normal);
            // Create and draw a raster image
            // The image size matches the current system DPI value
            e.Cache.DrawImage(btm.Render(palette), Point.Empty);
        }
    }
}
Note that the Render method uses a fixed size buffer and is not suitable for images wider or higher than 1536 pixels.
If you need to draw a bigger image, create a new Bitmap object with correct sizes, and use the SvgBitmap.RenderToGraphics method to convert a vector image to this Bitmap.
SvgBitmap source = SvgBitmap.FromFile("sourceImage.svg");
Bitmap target = new Bitmap(
    (int)source.SvgImage.Width,
    (int)source.SvgImage.Height);
using (Graphics g = Graphics.FromImage(target))
{
    source.RenderToGraphics(g,
        SvgPaletteHelper.GetSvgPalette(LookAndFeel, ObjectState.Normal));
}
target.Save("targetImage.png", System.Drawing.Imaging.ImageFormat.Png);