Create Popup Menus
- 2 minutes to read
Below is a brief tutorial about creating popup menus. Refer to this article for detailed information.
- Locate the PopupMenu in VS Toolbox and drop in onto the form (user control).
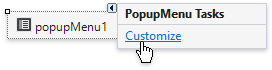
Invoke the menu smart tag and click the “Customize” link. This will invoke the Customization Window dialog and the popup menu preview.
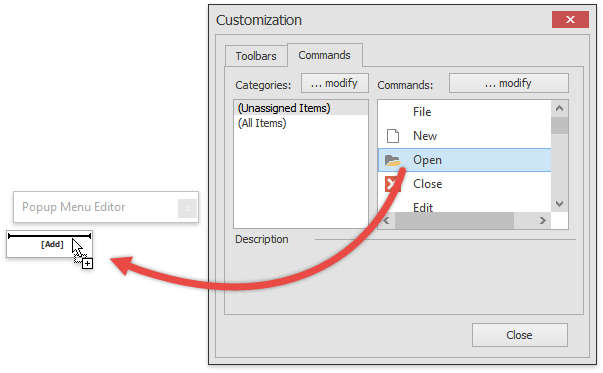
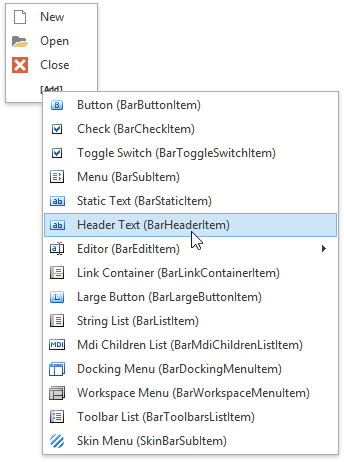
Drag the menu preview away so it does not overlap the Customization Window and start adding item links to this menu. To add a new bar item, click the [Add] button and select an item type. To add a link to an existing bar item, drag the required item from the Customization Window’s “Commands” tab and drop it onto the menu (see the figure below).
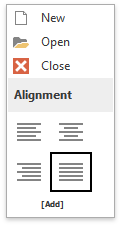
You can categorize item links into groups by adding BarHeaderItem items.
A Bar Header Item provides means of customizing all item links that follow this header. For example, at the figure below the “Alignment” Header Item utilizes the BarHeaderItem.MultiColumn and BarHeaderItem.OptionsMultiColumn properties to arrange links into two columns and enable large glyphs.
Assign your menu to the required control. There are multiple ways of doing this.
- To associate a menu with a drop-down button, utilize the BarButtonItem.DropDownControl property.
- When a Bar Manager is present on a form, all controls expose the PopupContextMenu property (in the VS Properties window, this property has a name similar to “PopupContextMenu on barManager1”). Assign your menu to this property and this menu will automatically pop up when end-users right-click the target control.
- To display a menu manually, call the required PopupMenu.ShowPopup method overload from code.