How To: Generate Data Access Layer with Entity Framework Database First
- 2 minutes to read
This tutorial will guide you through the process of creating a database-first Data Access Layer. This layer will later be used by the Scaffolding Wizard to generate an application.
- In Visual Studio, go to “File | New | Project” or press CTRL+SHIFT+N to create a new project. Select the DevExpress Template Gallery option and choose the “Blank Application” template.
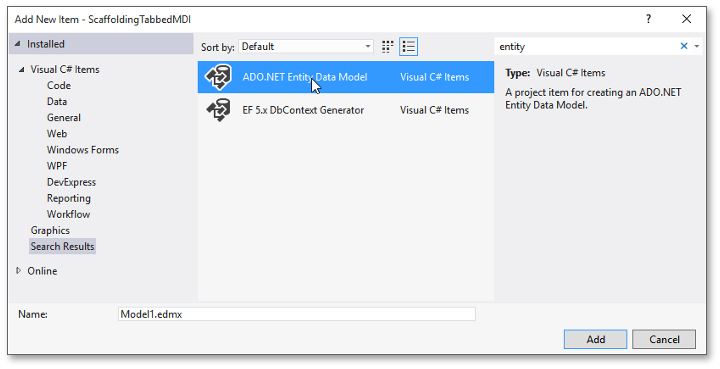
Select your project in the VS Solution Explorer window and press CTRL+SHIFT+A to add a new item. Search for the ADO.NET Entity Data Model item, then click “Add” to proceed.
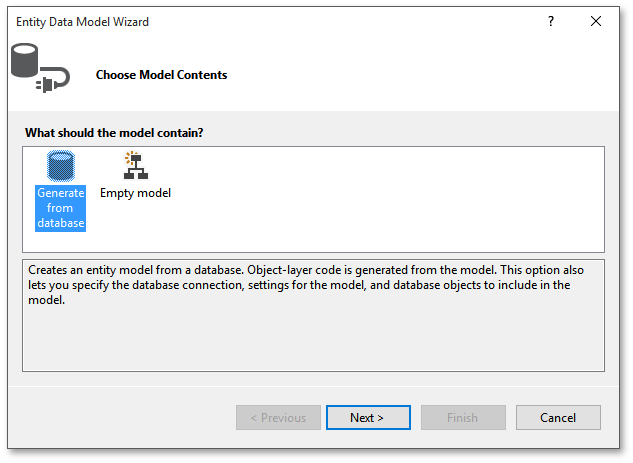
After the ADO.NET Entity Data Model component is added, it will automatically pop up its Data Model Wizard. On the first Wizard page, select the “Generate from Database” option and click next.
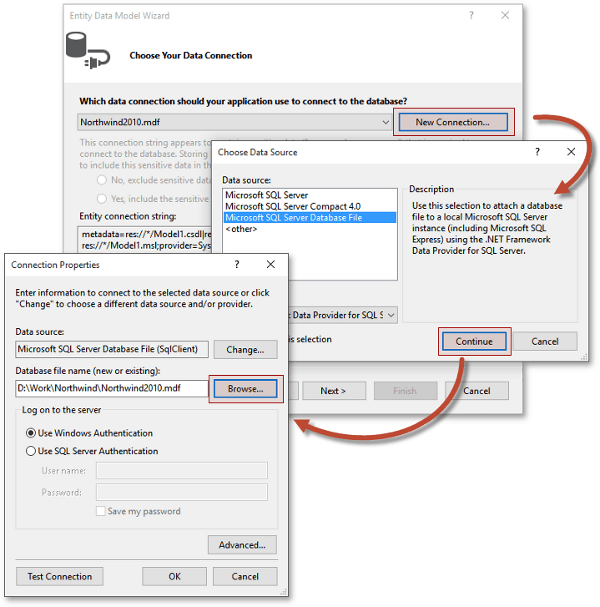
Click the “New Connection…” button to add a new data connection. Next, select a database file from a local storage. Sample “Northwind” SQL Server database files for this tutorial can be found here.
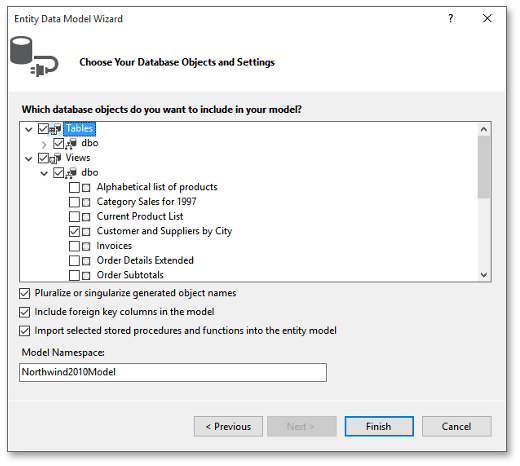
The final wizard page shows all tables and views found in the selected database. Tick those of them that should be added to the EF model and click “Finish”.
At this step, your Visual Studio may throw warnings, telling you that selected data base views contain multiple primary keys and thus are added to the EF model as read-only views. The Scaffolding Wizard treats database views as read-only data sets in any case, so simply ignore these warnings. Optionally, re-start Visual Studio: all warnings will be gone.
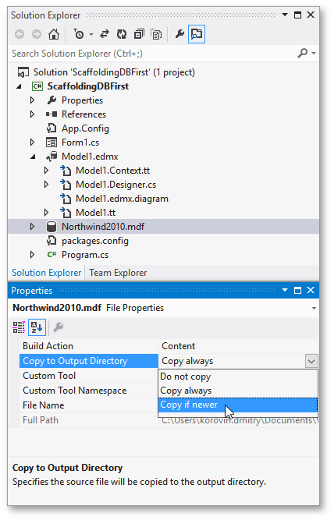
If you chose to add a database file to a project, the database is copied to the output directory each time the project is rebuilt. That is, changes made to data are discarded after each rebuilding. If you wish to keep these changes, select the database in the Solution Explorer window and set its Copy to Output Directory property to Copy if newer. This way, the database is only replaced when scheme conflicts are detected.
What’s Next?
Congratulations, you have created a sample Data Access Layer with a code-first Entity Framework! Check out other Data Access Layer tutorials or proceed to generating an application based on this layer.