How To: Generate Data Access Layer with Entity Framework Code First
- 6 minutes to read
This tutorial will guide you through the process of creating a code-first Data Access Layer. This layer will later be used by the Scaffolding Wizard to generate an application.
- In Visual Studio, go to “File | New | Project” or press CTRL+SHIFT+N to create a new project. Select the DevExpress Template Gallery option and choose the “Blank Application” template.
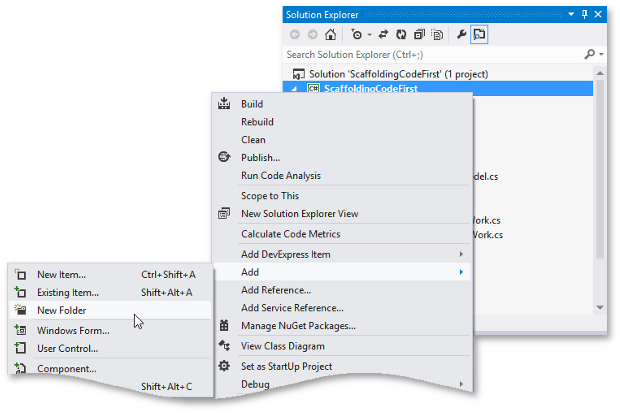
Right-click your solution in the VS Solution Explorer window and click “Add | New Folder”. Rename this new folder “Model”.
Select the newly created folder, then press “SHIFT+ALT+C” to add a new class named “Department”. Repeat the process four times more to add the “Course”, “Employee”, “DepartmentContext” and “DepartmentContextInitializer” classes. The figure below illustrates the result in the VS Solution Explorer window.
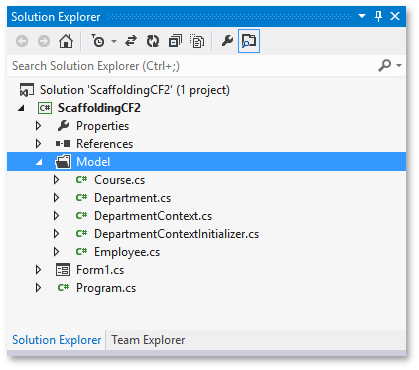
This data set will store entities of the “Department”, “Course” and “Employee” classes in related data tables. Thus, populate each of these classes with the desired properties (data fields).
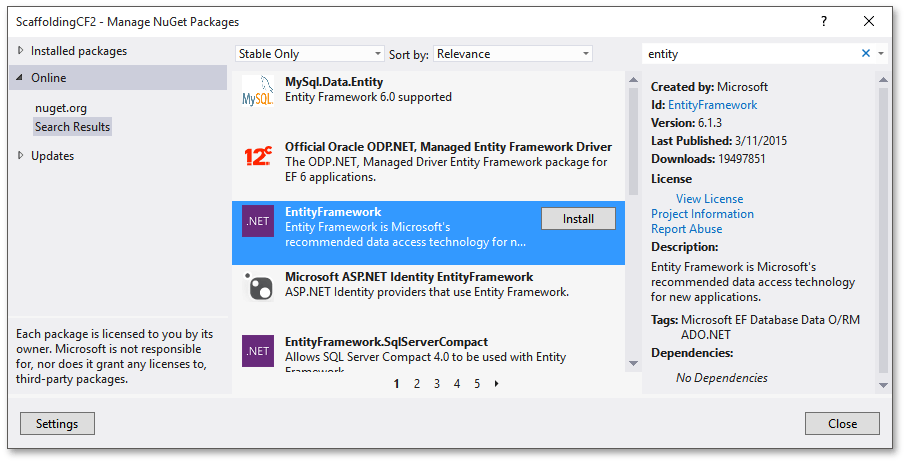
public class Department { public Department() { Courses = new HashSet<Course>(); } public int DepartmentID { get; set; } public string Name { get; set; } public virtual ICollection<Course> Courses { get; set; } } public class Course { public int CourseID { get; set; } public string Title { get; set; } public int DepartmentID { get; set; } public virtual Department Department { get; set; } } public class Employee { public int EmployeeID { get; set; } public string Name { get; set; } public int DepartmentID { get; set; } public virtual Department Department { get; set; } }The following steps involve using the Entity Framework DbContext, so add the related NuGet package to your project. To do this, go to “Project | Manage NuGet Packages…” in Visual Studio, then search for the “EntityFramework” package and install it.
Derive your “DepartmentContext” class from DbContext and declare three properties of the System.Data.Entity.DbSet type. This class will represent a Data Access Layer and allow you to query and save data. DbSet properties, in turn, will represent tables that store records of related types.
Declare a database initializer. This object will populate your database with sample data as the application starts for the first time.
public class DepartmentContextInitializer : DropCreateDatabaseIfModelChanges<DepartmentContext> { protected override void Seed(DepartmentContext context) { base.Seed(context); Department department1 = new Department { Name = "Music" }; Department department2 = new Department { Name = "Journalism" }; Department department3 = new Department { Name = "Management" }; context.Departments.Add(department1); context.Departments.Add(department2); context.Departments.Add(department3); context.Courses.AddRange(new[] { new Course { Title = "First", Department = department1 }, new Course { Title = "Second", Department = department1 }, new Course { Title = "Third", Department = department1 }, new Course { Title = "First", Department = department2 }, new Course { Title = "Second", Department = department2 }, new Course { Title = "Third", Department = department2 }, new Course { Title = "First", Department = department3 }, new Course { Title = "Second", Department = department3 }, new Course { Title = "Third", Department = department3 }, }); context.Employees.AddRange(new[] { new Employee { Name = "Frankie West PhD", Department = department1 }, new Employee { Name = "Jett Mitchell", Department = department1 }, new Employee { Name = "Garrick Stiedemann DVM", Department = department1 }, new Employee { Name = "Hettie Runte", Department = department1 }, new Employee { Name = "Gabe Flatley", Department = department2 }, new Employee { Name = "Zetta Beatty", Department = department2 }, new Employee { Name = "Ms. Luis Jewess", Department = department2 }, new Employee { Name = "Jefferey Legros III", Department = department3 }, new Employee { Name = "Margaretta Roberts", Department = department3 }, }); context.SaveChanges(); } }Note that in this code sample, your initializer is derived from the System.Data.Entity.DropCreateDatabaseIfModelChanges class. This initializer removes, re-creates and re-populates the database only if the model was changed since the last time the database was created. For this reason, your final application will not reflect any changes made to sample data in code after the first run. Moreover, any modifications made to your database at runtime will persist through subsequent application runs. If you want your application to start with clean sample data each time, derive the initializer from the DropCreateDatabaseAlways class instead.
Finally, register your initializer on application start-up.
What’s Next?
Congratulations, you have created a sample Data Access Layer with code-first Entity Framework! Check out other Data Access Layer tutorials or proceed to generating an application based on this layer.