Lesson 2 - Create a TreeMap Bound to Flat Data
- 7 minutes to read
This lesson goes over the steps required for building a simple unbound TreeMap diagram.
To create a simple unbound chart, do the following.
- Step 1.Add a TreeMap Control
- Step 2. Bind the TreeMap to a Data Source
- Step 3. Customize the Appearance of the TreeMap
- Result
Step 1. Add a TreeMap Control
- Run Microsoft Visual Studio 2012, 2013, 2015, 2017 or 2019.
- Create a new WinForms project and add the TreeMapControl component to it. (See the first step in Lesson 1 to learn how to do this).
Step 2. Bind the TreeMap to a Data Source
In this lesson, the TreeMap control will be bound to a list of objects. To provide data to the TreeMap control, do the following.
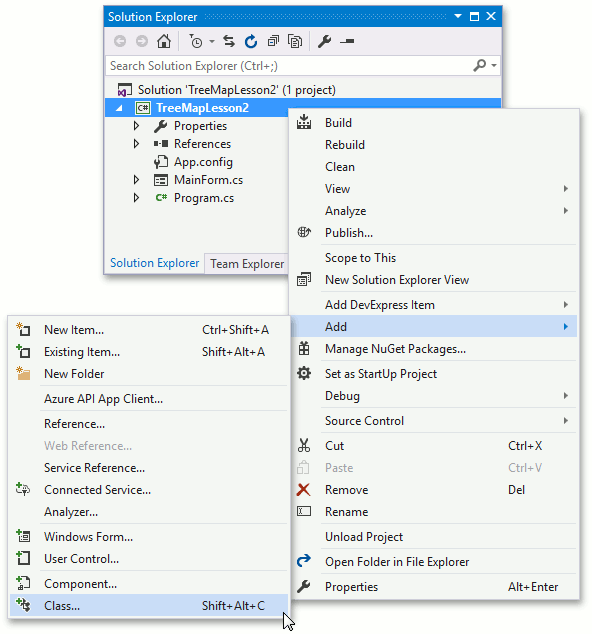
First, create a class representing data object. Create a new source code file by sampling a data file. To do this, right-click the project in the Solution Explorer. In the invoked menu, select the Add | Class… element.
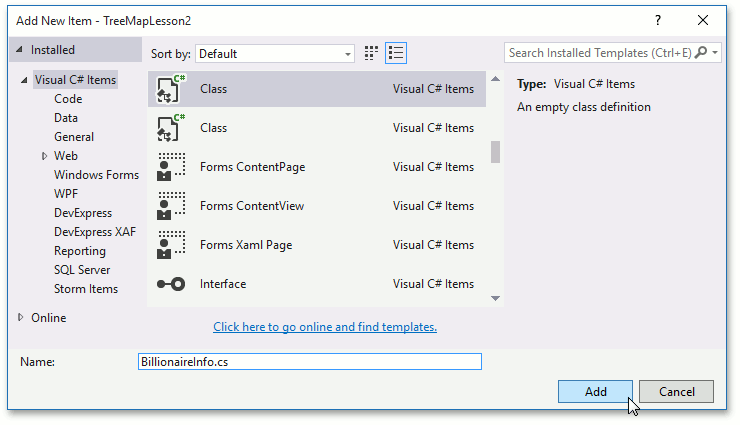
In the invoked Add New Item dialog, set the name to BillionaireInfo, then click Add to add the source code file to the project.
Insert the following class to the file.
Add the following method to the Form class. This method will be used to populate data to the TreeMap.
List<BillionaireInfo> CreateBillionaireInfos() { return new List<BillionaireInfo> { new BillionaireInfo {Name = "Bill Gates", NetWorth = 79.2, Age = 60, Residence = "United States", Source = "Microsoft"}, new BillionaireInfo {Name = "Carlos Slim Helu", NetWorth = 77.1, Age = 75, Residence = "Mexico", Source = "telecom"}, new BillionaireInfo {Name = "Warren Buffett", NetWorth = 72.7, Age = 85, Residence = "United States", Source = "Berkshire Hathaway"}, new BillionaireInfo {Name = "Amancio Ortega", NetWorth = 64.5, Age = 79, Residence = "Spain", Source = "Zara"}, new BillionaireInfo {Name = "Larry Ellison", NetWorth = 54.3, Age = 71, Residence = "United States", Source = "Oracle"}, new BillionaireInfo {Name = "Charles Koch", NetWorth = 42.9, Age = 79, Residence = "United States", Source = "diversified"}, new BillionaireInfo {Name = "David Koch", NetWorth = 42.9, Age = 75, Residence = "United States", Source = "diversified"}, new BillionaireInfo {Name = "Christy Walton", NetWorth = 41.7, Age = 60, Residence = "United States", Source = "Wal-Mart"}, new BillionaireInfo {Name = "Jim Walton", NetWorth = 40.6, Age = 67, Residence = "United States", Source = "Wal-Mart"}, new BillionaireInfo {Name = "Liliane Bettencourt", NetWorth = 40.1, Age = 93, Residence = "France", Source = "L'Oreal"} }; }Now, all the preparatory work is done. The next step is to provide data to the Tree Map.
Assign the TreeMapFlatDataAdapter to the TreeMapControl.DataAdapter property.

Specify the data source of the data adapter. To do this, handle the Form’s Load event and add the following code to the handler.
private void MainForm_Load(object sender, EventArgs e) { TreeMapFlatDataAdapter dataAdapter = treeMap.DataAdapter as TreeMapFlatDataAdapter; if(dataAdapter != null) dataAdapter.DataSource = CreateBillionaireInfos(); }The code above dynamically casts the TreeMapControl.DataAdapter property to the TreeMapFlatDataAdapter type. If the adapter can be converted to this type, then the adapter’s TreeMapFlatDataAdapter.DataSource property is populated with data.
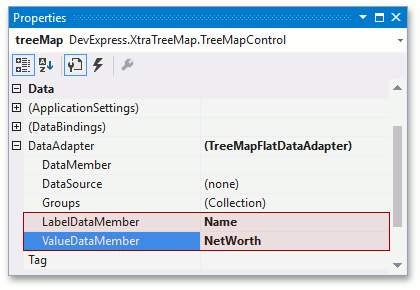
Specify which members of the data source objects will be provided as labels and values to tree map items. Set the TreeMapFlatDataAdapter.LabelDataMember to Name and TreeMapFlatDataAdapter.ValueDataMember to NetWorth.
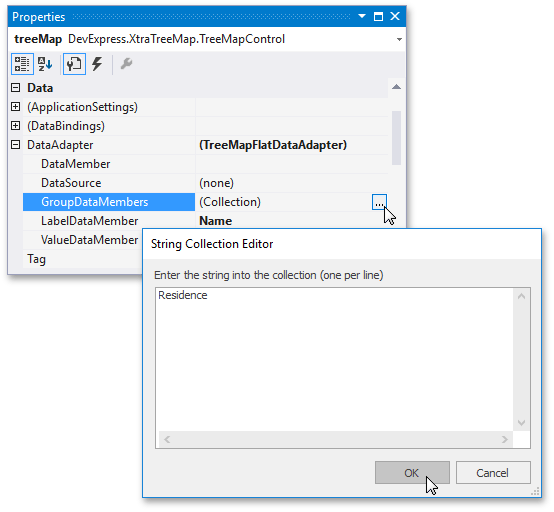
Using the Tree Map control, it is possible to group automatically generated items and specify how the group header will look for each generated group. To group generated tree map items by data members, add a new string representing the data member’s name to the TreeMapFlatDataAdapter.GroupDataMembers collection. To do this, locate the collection and click the ellipsis button. In the invoked window, type the name.
Step 3. Customize the Appearance of the TreeMap
In this step, the appearance of the TreeMap’s tooltip will be configured, as will the Colorizer used to provide colors to tree map items.
Add the ToolTipController to the Form, assign it to the TreeMapControl.ToolTipController property and handle its ToolTipController.BeforeShow event.
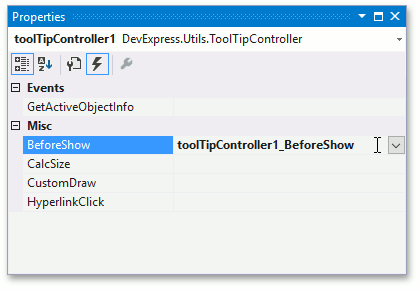
Insert the following code to the handler.
private void toolTipController1_BeforeShow(object sender, ToolTipControllerShowEventArgs e) { TreeMapItem item = e.SelectedObject as TreeMapItem; if(item == null) return; BillionaireInfo info = item.Tag as BillionaireInfo; if(info == null) return; SuperToolTip superTip = new SuperToolTip { AllowHtmlText = DefaultBoolean.True }; superTip.Items.Add(new ToolTipTitleItem { Text = String.Format("{0} information", info.Name) }); superTip.Items.Add(new ToolTipSeparatorItem()); superTip.Items.Add(new ToolTipItem { Text = String.Format("<b>Age:</b> {0}", info.Age) }); superTip.Items.Add(new ToolTipItem { Text = String.Format("<b>Residence:</b> {0}", info.Residence) }); superTip.Items.Add(new ToolTipItem { Text = String.Format("<b>Net Worth:</b> {0}", info.NetWorth) }); superTip.Items.Add(new ToolTipItem { Text = String.Format("<b>Source:</b> {0}", info.Source) }); e.SuperTip = superTip; }In the code above, the source data object of the selected tree map item is obtained using the TreeMapItem.Tag property and object properties are displayed in a tooltip.
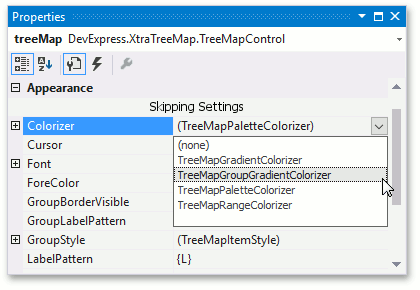
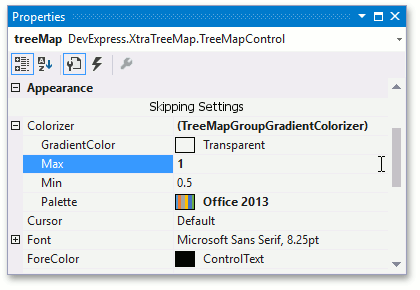
Assign a TreeMapGroupGradientColorizer to the TreeMapControl.Colorizer property.
Set the TreeMapPaletteColorizerBase.Palette property to Palette.Office2013Palette.
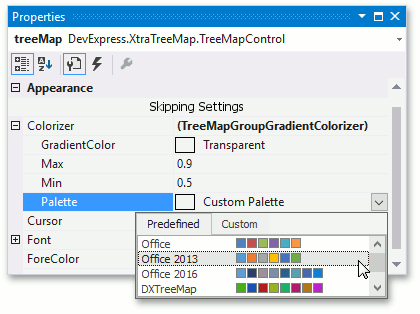
Finally, set the TreeMapGroupGradientColorizer.Max to 1.
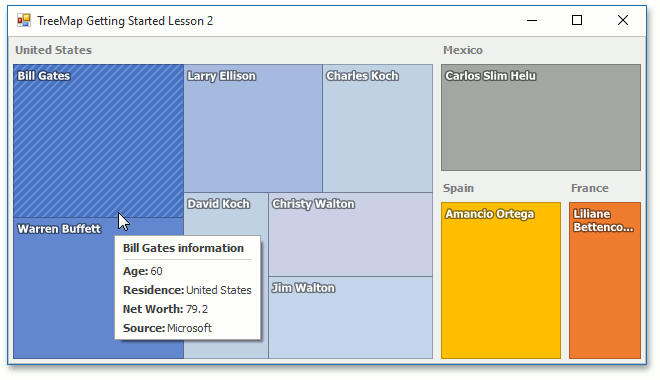
Result
The application is complete. Run it and locate tree map items. The application should look like this.