Lesson 1 - Create a Simple Unbound TreeMap
- 3 minutes to read
This lesson details the steps required to build a simple unbound TreeMap diagram.
To create a simple unbound chart, do the following.
- Step 1. Create a New Project
- Step 2. Populate a TreeMap with Data
- Step 3. Customize an Appearance of the TreeMap
- Result
Step 1. Create a New Project
In this step, a new WinForms application will be created and a TreeMap Control will be added to the application’s Form.
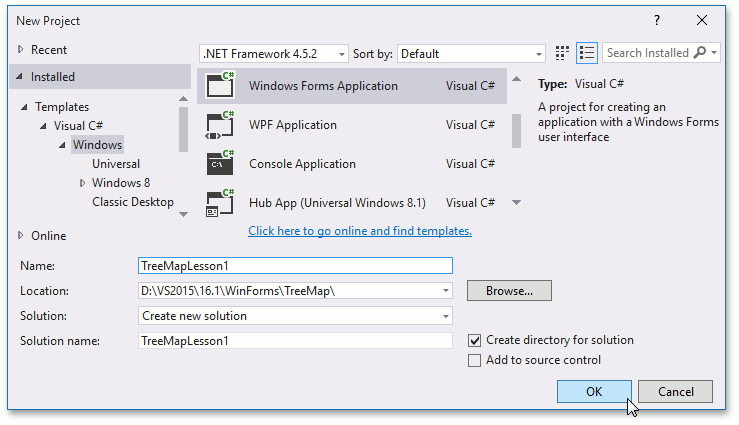
- Run MS Visual Studio 2012, 2013, 2015, 2017 or 2019.
Create a new Windows Forms Application project.
To do this, select the File | New | Project… menu item. In the invoked dialog, select the Windows | Classic Desktop template group, then select the Win Forms Application item. Specify the name of the project as TreeMapLesson1 and click OK.
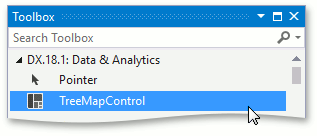
Add the TreeMapControl to the application’s Form.
To do this, open the Form designer. Then, drag the TreeMapControl item from the Toolbox’s DX.20.2: Data & Analytics tab to the form.
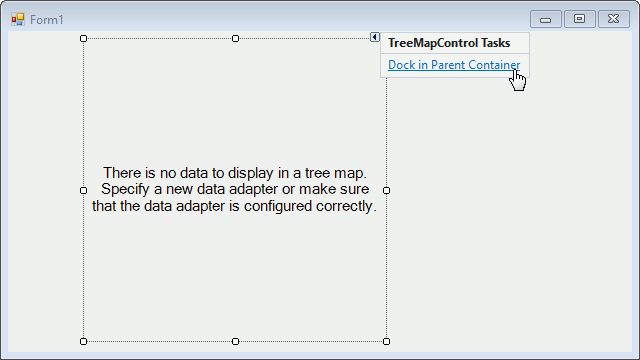
Dock the TreeMap in the form.
To do this, click the TreeMap control to select it. Then, click its smart tag and in the invoked window, select the Dock in Parent Container item.
All the preparatory work is complete. In the next step, the TreeMap will be populated with data.
Step 2. Populate a TreeMap with Data
In this step, the following data table will be visualized using the TreeMap Control.
| Region | Country | GDP (million of USD) |
|---|---|---|
| Americas | United States | 17.418 |
| Americas | Brazil | 2.353 |
| Asia | China | 10.380 |
| Asia | Japan | 4.616 |
| Asia | India | 2.049 |
| Europe | Germany | 3.859 |
| Europe | United Kingdom | 2.945 |
| Europe | France | 2.846 |
| Europe | Italy | 2.147 |
| Europe | Russia | 1.857 |
To do this, follow the steps below.
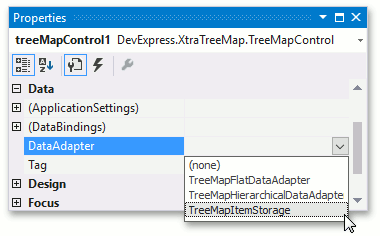
Assign the TreeMapItemStorage object to the TreeMapControl.DataAdapter property.
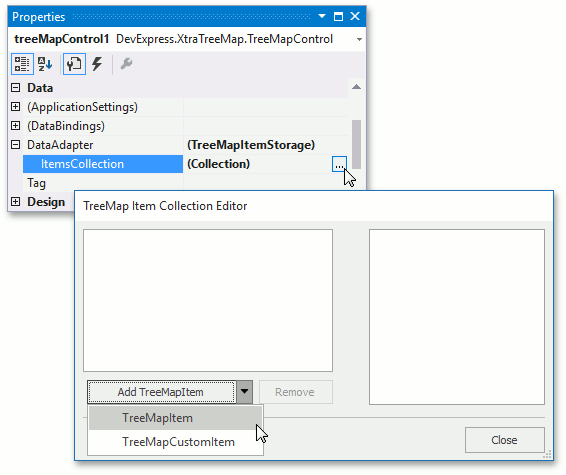
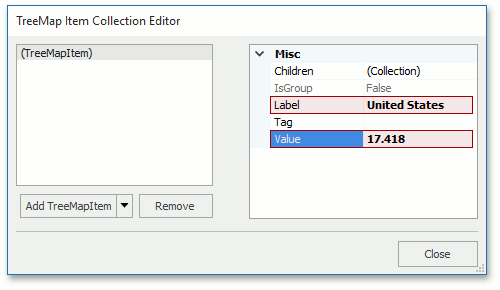
Then, expand the adapter’s properties and click the ellipsis button opposite the TreeMapItemStorage.Items property. In the invoked TreeMapItem Collection Editor, expand the list of available items clicking the Expand button. After that, select TreeMapItem to add the first group item.
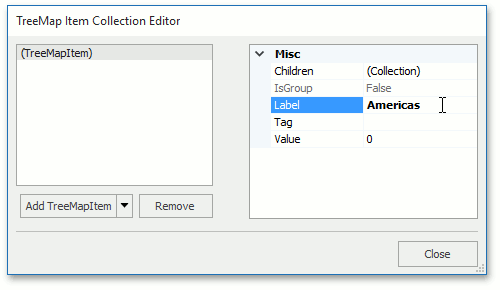
For the newly created item, set the TreeMapItem.Label to Americas. This value will be used as the group label.
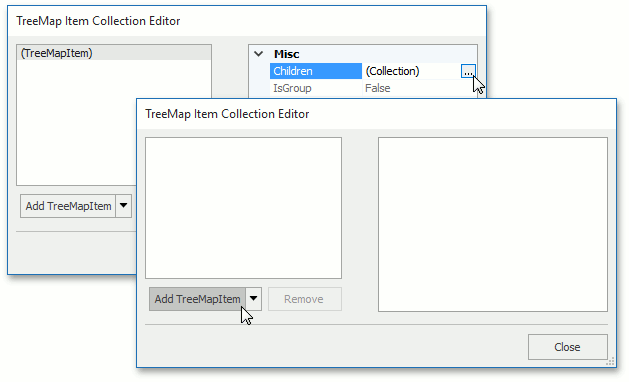
Add children elements. To do this, click the ellipsis button opposite the TreeMapItem.Children property. In the invoked TreeMapItem Collection Editor dialog, click Add to add a leaf item.
For the added leaf item, set the TreeMapItem.Label to United States and the TreeMapItem.Value to 17.418.
- Repeat previous steps to add table rows to the TreeMap.
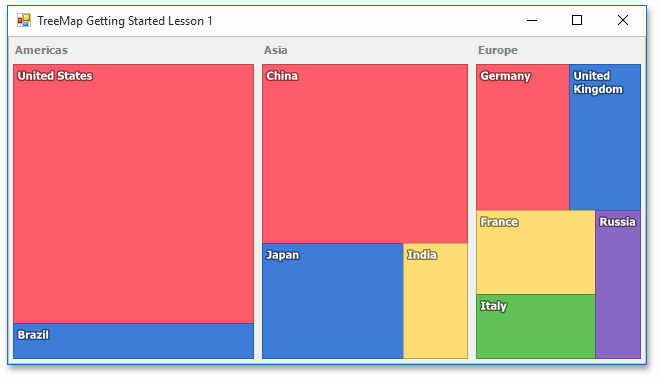
The image below represents the launched application with a TreeMap control populated with data.
Proceed to the next step to learn how to customize the appearance of the TreeMap control.
Step 3. Customize the Appearance of the TreeMap
In this step, the style of the group header, text patterns of group headers and leafs will be configured. Also, the colorizer that provides colors to tree map items will be customized.
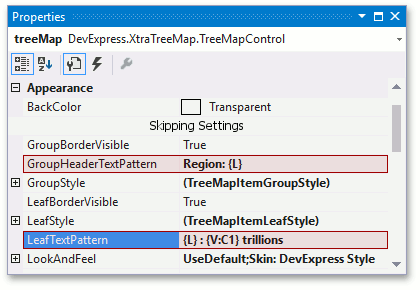
Specify the Region: {L} string to the TreeMapControl.GroupHeaderTextPattern property and specify the {L}: {V:C1} trillions to the TreeMapControl.LeafTextPattern property.
Then, expand the TreeMapControl.GroupStyle property and set its HierarchicalItemStyle.Fill to White and HierarchicalItemStyle.TextColor to Black.
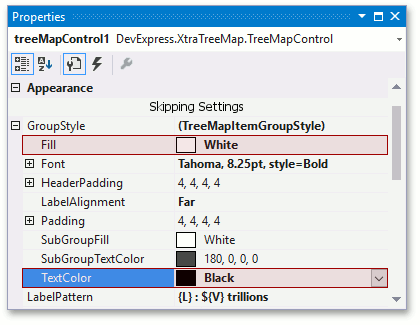
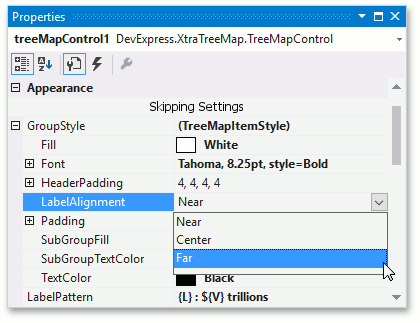
Set the TreeMapItemLeafStyle.LabelAlignment to Far to flush labels right.
Now, expand the TreeMapControl.Colorizer property, set the TreeMapPaletteColorizer.ColorizeGroups property to True. Then, select the TreeMapPaletteColorizerBase.Palette property and click the Expand button. In the invoked editor, select the Palette.Office2016Palette palette.

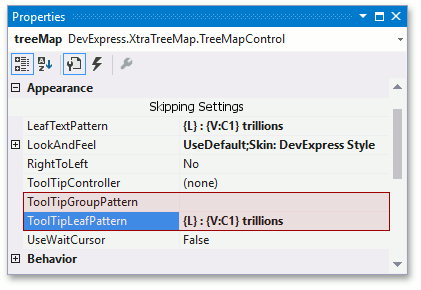
Finally, set TreeMapControl.ToolTipLeafPattern to {L} : {V:C1} trillions to show leaf content in a tooltip and set the empty string to TreeMapControl.ToolTipGroupPattern to not display tooltips for groups.
Now, the application is finished.
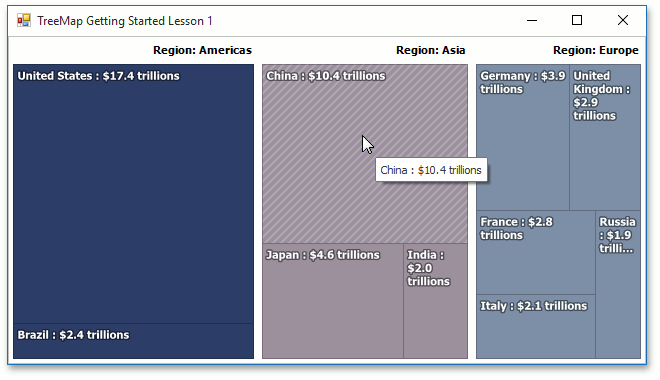
Result
Run the application. The following image represents the launched application.