Tutorial: ADO.NET Data
- 5 minutes to read
This walkthrough is a transcript of the ADO.NET Data video available on the DevExpress YouTube Channel.
In this tutorial, you will learn how to create a new ADO.NET data source in your WinForms project and how to bind the grid control to it with a BindingSource component. You will see how to sort or filter your data source at the BindingSource level and how to save the changes back to the database.
Creating a New ADO.NET Data Source
To bind the DevExpress WinForms Data Grid control to data using ADO.NET, use the GridControl.DataSource property in the Properties grid window, or invoke the control’s smart tag and open the drop-down list next to the Choose Data Source label.
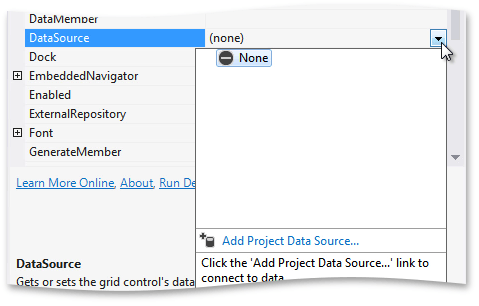

In the drop-down menu, you can select any existing data source or click the Add Project Data Source… link to create a new one. Clicking this link will invoke the standard dialog that will guide you through a few simple steps.
Yet another way to create a data source is by using the Data Source Wizard, that can be invoked by clicking an icon  in the control’s bottom-right corner.
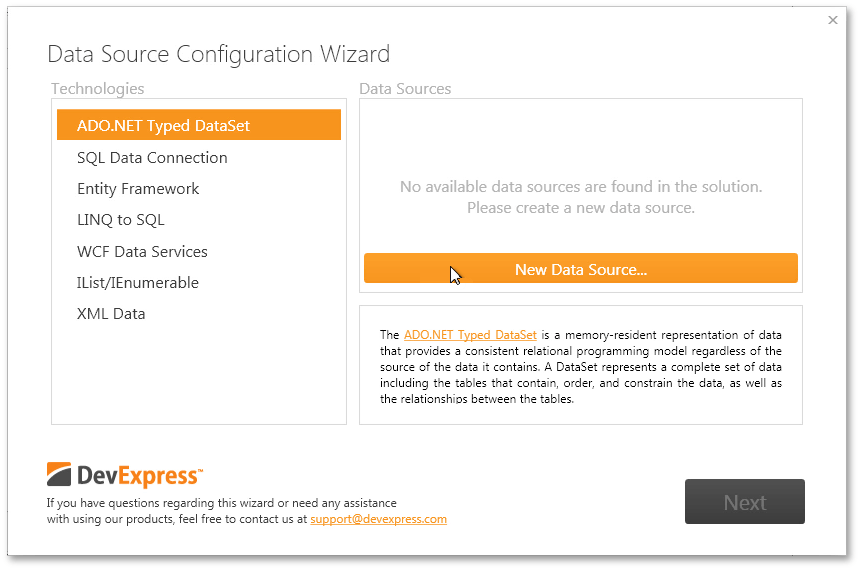
Open the wizard and select the very first option – binding to ADO.NET Typed Dataset. Any existing datasets will be displayed on the page’s right side. As you currently have no existing datasets, click the New Data Source… button to create a new one.
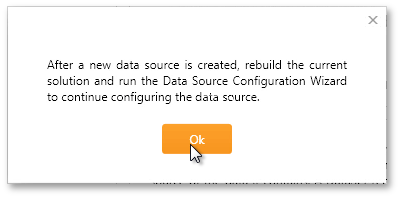
The wizard will pop-up a message box that tells you to re-build your solution after the data source is created and use the Wizard again to bind the control to this dataset.
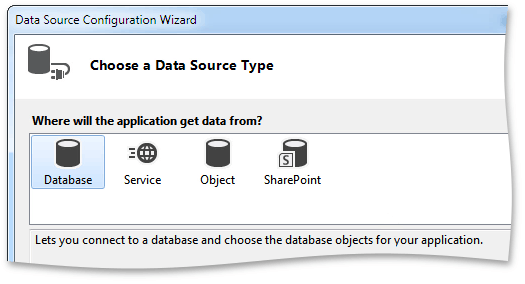
Proceed and the same new data source dialog as you saw before appears. On the first page, select the Database source type.
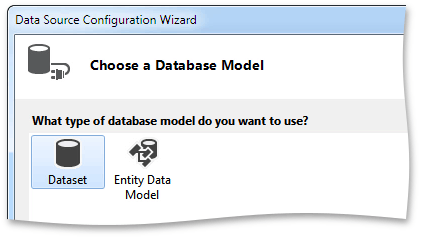
On the second page, you can select the required database model – Dataset or Entity Data Model. The process of binding to Entity Framework models is described in a separate tutorial (Tutorial: Entity Framework Data). In this walkthrough, choose Dataset.
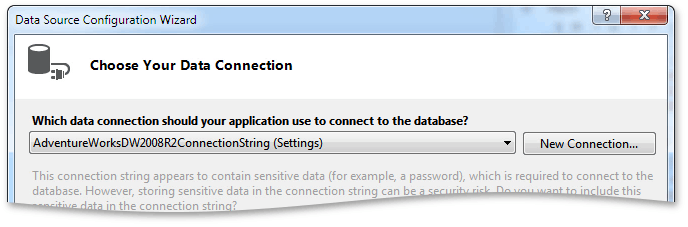
The third page asks you to choose the existing data connection or to create a new one. Click the New Connection… button and choose the sample AdventureWorks database provided by Microsoft. Clicking Yes in the displayed message box adds this database to your solution making it easier to modify your data, if needed.
Next, select data tables you will need in your application. Choose 3– customers, employees and products.
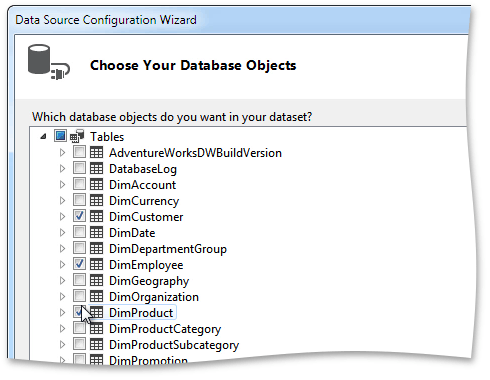
For each table, you can uncheck data fields that you do not need. Click Finish and rebuild your application.
Binding to the ADO.NET Data Source
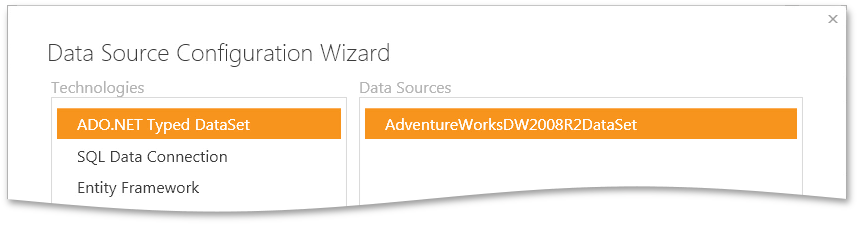
If you invoke the Data Source Configuration Wizard again, you can see that your dataset is now available as an existing data source. Select this dataset and click Next.
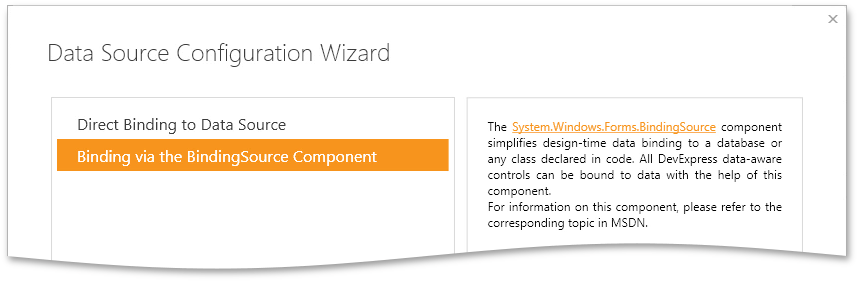
The next page offers you two options: binding with and without the BindingSource component. This component simplifies design-time binding and allows you to sort and filter your data before it is displayed by bound UI Controls. So select the second option and click Next.
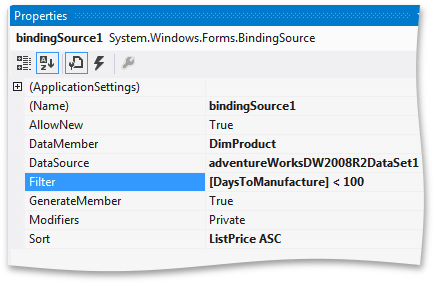
The final page contains multiple options. The topmost drop-down list allows you to select the required data table. The Sorting drop-down list enumerates all data fields in the selected data table. Select the required field, click up or down arrow to indicate ascending or descending sorting mode and click Add. Sort the data against the ListPrice column. The sorting rule is now displayed in the area below. You can select the desired rule and click Invert to reverse the sorting order, or Delete to remove sorting by this column. Finally, the Filter text box allows you to enter a text string that is the filtering condition for your data. Create a filter that selects products with values that are less than 100 in the Days To Manufacture column and their descriptions don’t begin with the word Alluminum.

Click Finish to complete the setup. As you left the Show generated code-behind checkbox checked, the wizard will now show the C# file where you can see the auto-generated code.
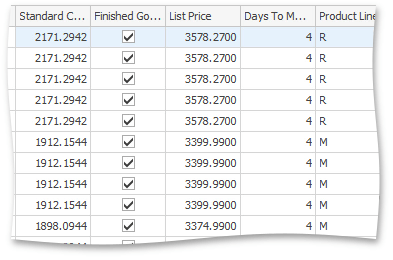
Launch the app to see the result. You can see the required data displayed from your dataset. Note that data is sorted by the List Price column and filtering has been applied too.
If you ever decide to remove or change the sorting and filtering applied in the Wizard, select the BindingComponent at design time and look through its properties. For instance, you can change the sort order and the filter string applied previously.
Posting Data Back to the Datasource
To post changes back to the datasouce, handle the ColumnView.FocusedRowChanged event and call the adapter’s Update method. This method has 4 overloads, use the one that takes the dataset as a parameter.
private void gridView_FocusedRowChanged(object sender, DevExpress.XtraGrid.Views.Base.FocusedRowChangedEventArgs e) {
    dimProductTableAdapter1.Adapter.Update(adventureWorksDW2008R2DataSet1);
}
If now you launch the app and try to modify the DaysToManufacture column cell, you will get an exception. This one is raised because after you have excluded key columns from the query, only the SELECT command was generated. In order to push changes, you need to create an UPDATE command as well. To do so, you can open the .XSD diagram, select the required data table, right-click it and select Configure….
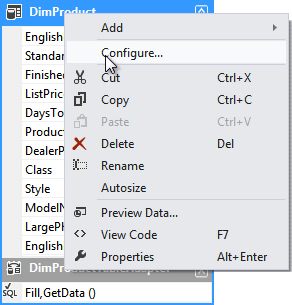
In the dialog, click the Advanced Options… button and check the Generate Insert, Update and Delete statements.
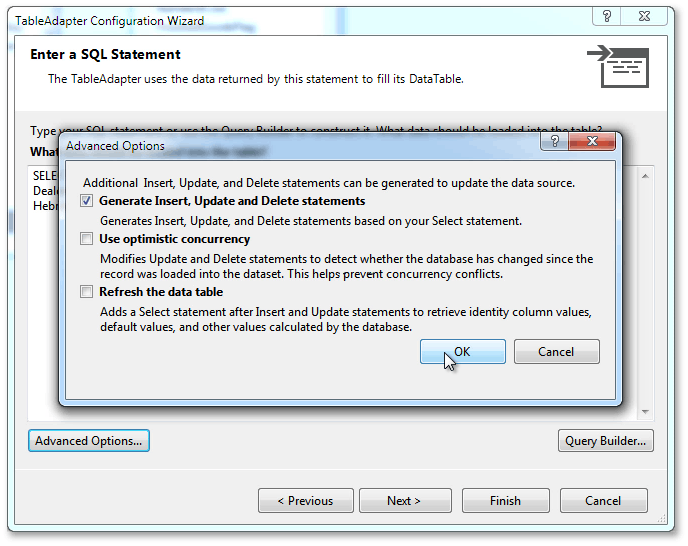
Click Yes to add required key columns to the query and click Finish. Now, if you launch the app, modifying row cells does not raise the exception. If you re-start the app, you can see that all your changes persist.