Tutorial: Filter Row
- 4 minutes to read
This walkthrough is a transcript of the Filter Row video available on the DevExpress YouTube Channel.
In this tutorial, you will learn how to activate the auto-filter row and use it to filter data against columns that use different in-place editors.
Activating the Filter Row by End-Users
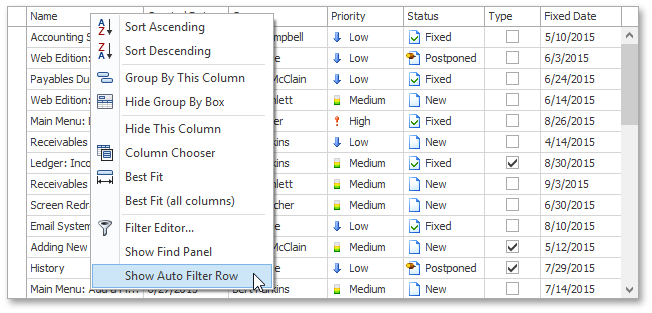
To activate the auto-filter row, right-click any column header and select the Show Auto Filter Row item in the context menu.
Filtering Data by Typing Text within the Filter Row
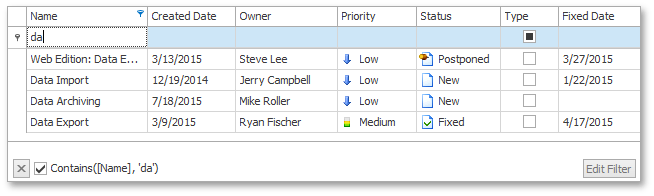
When an end-user starts typing within a row, a filter condition is automatically created using the LIKE comparison operator. After typing ‘d’ in the Name cell, the grid displays records of names that begin with ‘d’.
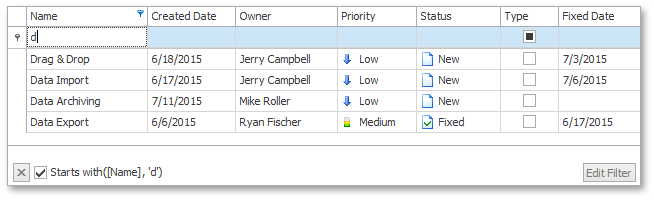
You can then enter additional characters to continue filtering the view. To clear the currently applied filter condition, remove the text from the filter row’s cell.
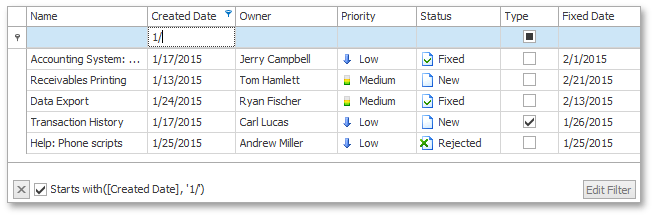
In a similar manner, you can filer data against date-time columns. For instance, type 1 and a forward slash to filter records that have been created in January.
You can also use the auto-filter row to filter data against multiple columns. Enter the ‘help’ string within the Name column without clearing the previous filter to try it in action.
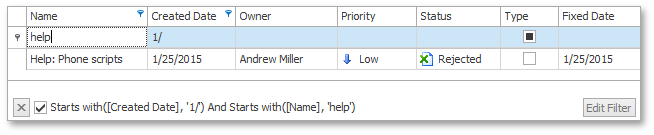
Then, clear the filter to see all data again.
Using the Filter Row for Columns that Use LookUp, ImageComboBox and CheckEdit Editors
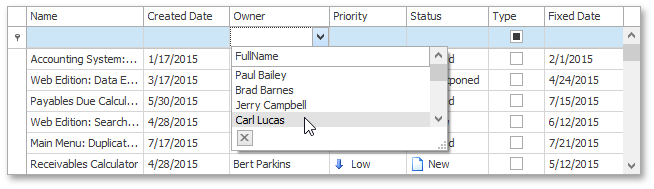
In columns with LookUpEdit, ImageComboBoxEdit or CheckEdit in-place editors, the auto-filter row doesn’t allow custom text entry. Auto-filter row cells use the same editors, and allow users to create filter conditions only with Equals and Does not Equal operators.
Tip
If you want to use other operators (such as Contains or Less than), set the FilterMode property to DisplayText. In this case the AutoFilterRow cell displays a TextEdit instead of a lookup editor, and allows users to enter any custom values.
Select the Carl Lucas item in the dropdown list to create and apply an appropriate filter.
To clear filtering against the Owner column, you can press the CTRL+DELETE key combination or select (All) in the column header dropdown.
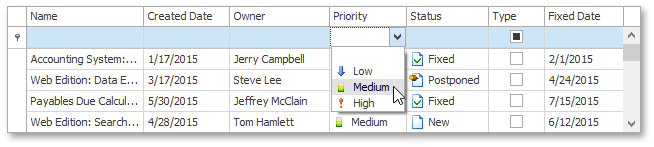
To filter data against the Priority column with an ImageComboBoxEdit editor assigned, select the desired item in the corresponding dropdown list.
To clear the current filter, select the empty item in the dropdown.
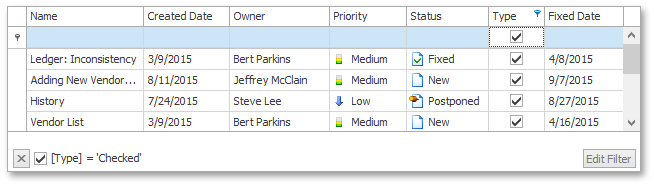
Check boxes in the auto-filter row can be in three states. If you switch the editor’s check state to the Checked or Unchecked, the corresponding filter is applied.
To remove the current filter, switch the check box to the Indeterminate state.
Preventing End-Users from Activating the Filter Row
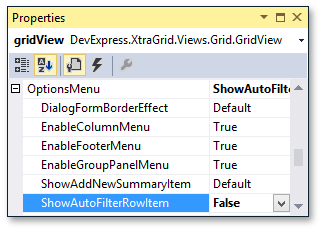
To prevent the auto-filter row from being invoked using the column header context menu, expand the View’s GridView.OptionsMenu property and disable the GridOptionsMenu.ShowAutoFilterRowItem option.
Run the application and click any column header to see that the context menu doesn’t contain the Show Auto Filter Row item anymore.
Activating the Filter Row at Design Time
Expand the View’s GridView.OptionsView property and enable the GridOptionsView.ShowAutoFilterRow option.
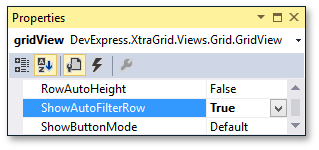
Run the application again to see the auto-filter displayed at the top of the View. It is enabled at application startup now and cannot be hidden by end-users using the context menu.
Changing the Comparison Operator for Filter Conditions
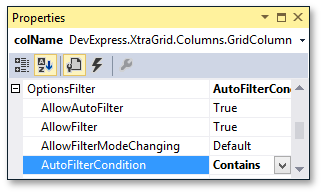
The grid also allows you to manually specify the comparison operator for filter conditions. Close the application and change the comparison operator for the Name column. Expand the column’s GridColumn.OptionsFilter property and set the OptionsColumnFilter.AutoFilterCondition setting to AutoFilterCondition.Contains.
If you filter the grid now, it will display records whose values contain the entered string at any position.
Note that for columns that use a LookUpEdit, ImageComboBoxEdit or CheckEdit editor, the comparison operator cannot be changed.
Disabling Automatic Updates for Filter Row Conditions
As you’ve noticed, by default the filter is updated immediately you type in every individual character. With large datasets you may want to enable delayed filtering so that the condition is applied only once after you enter the entire filter string. To do this, open the Property grid displaying the Name column properties and disable the OptionsColumnFilter.ImmediateUpdateAutoFilter option.
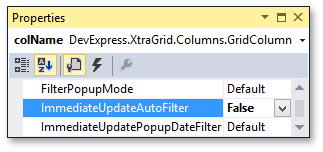
Now when you enter text in the auto-filter row within the Name column, the filter is not automatically applied. You need to press the ENTER key or move focus to another cell to force the update.

Disabling the Filter Row for Individual Columns
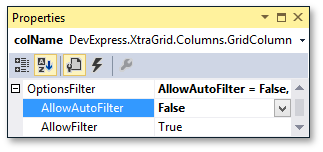
Now disable the filter row’s functionality for the Name column by setting the OptionsColumnFilter.AllowAutoFilter property to false.
As a result, the auto filter row’s cell for the Name column is now disabled, but you can still use this row to filter data against other columns.