Tutorial: Filter Editor
- 5 minutes to read
This walkthrough is a transcript of the Filter Editor video available on the DevExpress YouTube Channel.
The grid control ships with a built-in Filter Editor dialog that allows end-users to build filter criteria of any complexity using either the tree-like filter builder interface or a text editor with hints much like Visual Studio IntelliSense. In this tutorial, you will learn how end-users can invoke this dialog, what options affect its availability and how you can invoke it from code and customize it before it’s displayed.
Invoking the Filter Editor and Creating Simple Filter Criteria
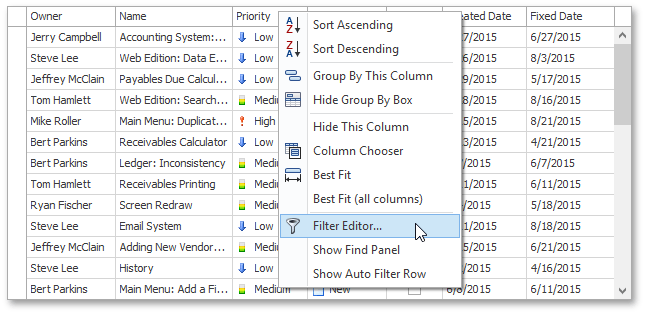
To invoke the Filter Editor, right-click any column header and select Filter Editor… in the context menu.
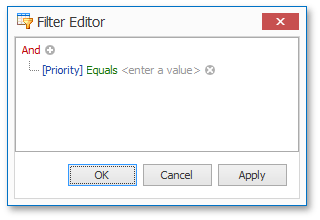
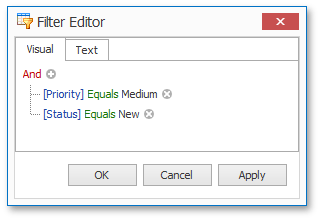
By default, the Filter Editor displays filter criteria as a tree where individual nodes represent simple filter conditions. The root node is the logical operator combining all conditions. Any filter condition consists of three parts: a column name, criteria operator and operand value. If the grid’s data is not filtered, the editor contains one incomplete filter condition for the clicked column.
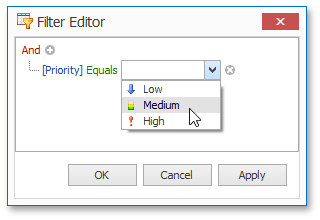
Click the value box and select Medium in the dropdown list.
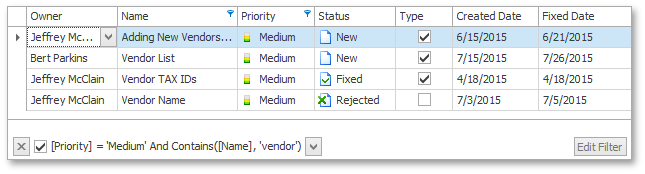
Click OK to close the editor and apply changes. As a result, the grid displays only records with a priority set to Medium. Now you can invoke the Filter Editor using the Edit Filter button within the Filter Panel.

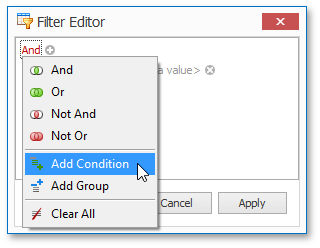
To add a new filter condition, click the plus button ( ) next to the root node. This can also be done by clicking the logical operator and selecting Add Condition.
Select Name in the list of available columns. Then, use the Contains comparison operator and enter the ‘vendor’ string in the value box. Click Apply to filter data without closing the editor.
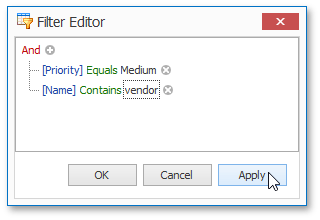
The grid now displays records with medium priority and names containing ‘vendor’ in them.
Deleting Filter Conditions
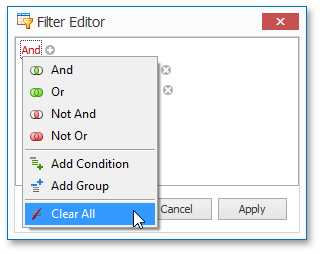
Now delete all filter conditions by clicking their  buttons or by selecting Clear All in the logical operator’s menu.
Remove Items from Multi-Item Filter Conditions
Users can select specific items from multi-item filter conditions (for example, “Is Any Of”, “Is One Of”) and remove them. Use the keyboard or Ctrl+Click to select an item. Press Delete to remove the item.
Constructing Complex Filter Criteria
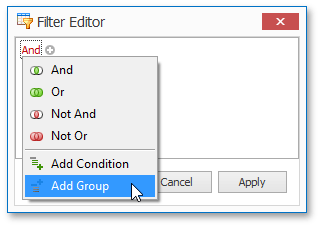
You can now create a more complex filter criteria. To create a new condition group, click the root logical operator and select Add Group.
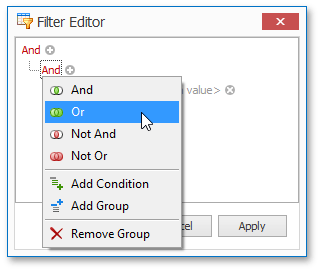
Change the created logical operator to OR.
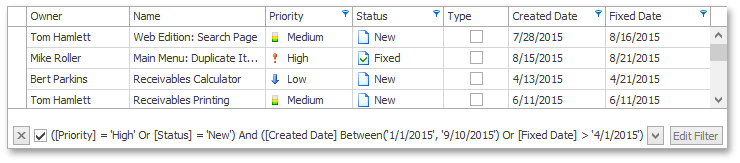
Create two new conditions within this group. These conditions will select records that have a High priority or a status set to New. In the same manner, create one more OR condition group with two conditions. These conditions will select records with Created Date between January 1 and today or those where Fixed Date Is greater than April 1.
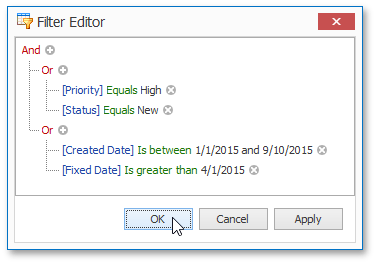
Click OK to filter data using the created criterion. You’ll see the entire filter condition displayed in the filter panel.
Changing the Filter Editor Style
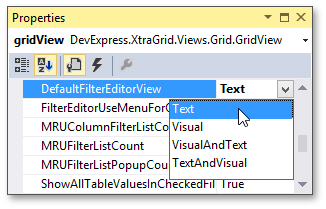
Now try a different filter condition editor UI. At design time, access the View’s settings, expand ColumnView.OptionsFilter and set the ColumnViewOptionsFilter.DefaultFilterEditorView property to FilterEditorViewMode.Text.
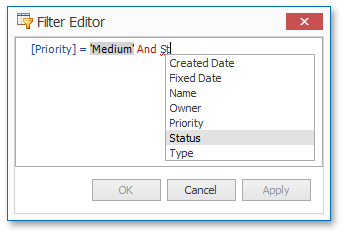
Run the application and invoke the Filter Editor. Now you can type a filter string directly into the embedded Rich Text Editor. Dropdown lists of operators and field names are automatically invoked when typing a filter, much like the Visual Studio IntelliSense feature.
Locate the same property and set the editing mode to FilterEditorViewMode.VisualAndText. The Filter Editor will display both the Visual and Text editors in their own tabs.
Preventing End-Users from Invoking the Filter Editor
If you don’t want end-users to invoke the dialog from the column header menu, set the ColumnViewOptionsFilter.AllowFilterEditor property to false.

Note that the filter panel’s Edit Filter button has also become invisible.
Invoking and Customizing the Filter Editor in Code
Return to design-time and see how the Filter Editor can be invoked and customized in code.
In the Click event handler for the Show Filter Editor button, call the View’s ColumnView.ShowFilterEditor method to invoke the Filter Editor in visual style.
private void btn_ShowFilterEditor_ItemClick(object sender, ItemClickEventArgs e) {
    gridView.OptionsFilter.DefaultFilterEditorView = DevExpress.XtraEditors.FilterEditorViewMode.Visual;
    gridView.ShowFilterEditor(null);
}
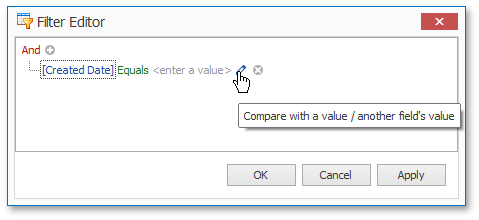
Additionally, handle the View’s ColumnView.FilterEditorCreated event, which is raised when the Filter Editor is about to be displayed. In the event handler, customize the value color using the FilterControl.AppearanceValueColor property of the event’s FilterControlEventArgs.FilterControl parameter. Enable the FilterControl.ShowOperandTypeIcon option to allow values of one column to be compared to values in other columns or to predefined constants.
private void gridView_FilterEditorCreated(object sender, DevExpress.XtraGrid.Views.Base.FilterControlEventArgs e) {
    e.FilterControl.AppearanceValueColor = Color.Red;
    e.FilterControl.ShowOperandTypeIcon = true;
}
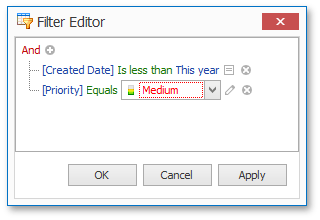
Run the application and click the Show Filter Editor button. In the invoked editor, add a new condition and then click the operand type icon that’s now displayed on the left of the remove button.
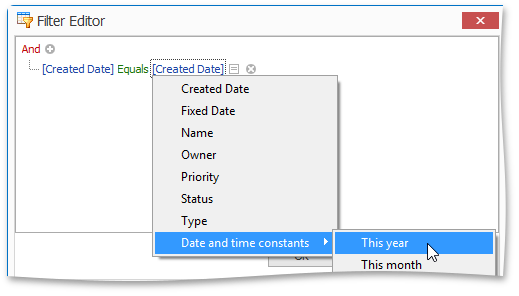
Click the value box, select Date and time constants and choose This year.
Change the comparison operator to Is less than. Add another condition that selects records where Priority is Medium. Note that the value is painted using the red color as specified in the event handler.